Creating and Using SSH Keys in Windows
There are several ways to create SSH keys in Windows. Follow the instructions below for the SSH client you use.
Generating SSH keys with OpenSSH (Windows 10 and newer)
For Windows 10 only
-
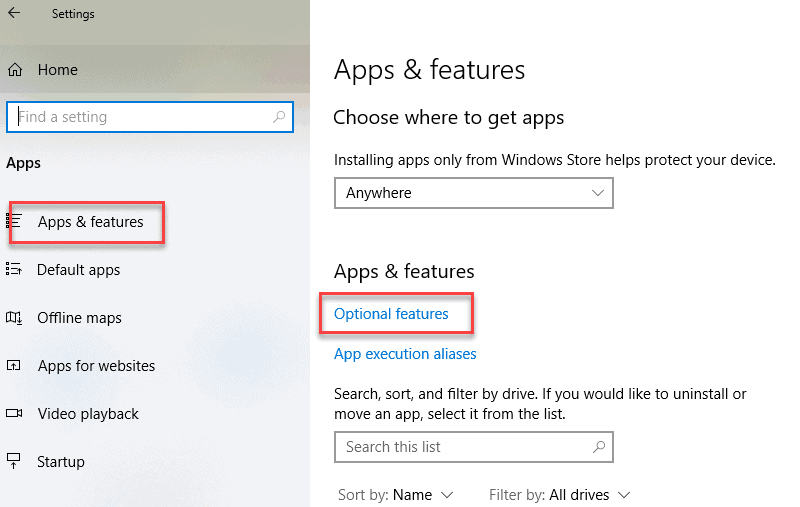
Open the Windows 10 Start menu and search for “Apps & Features”. In the “Apps & Features” heading, click “Optional Features”.
-
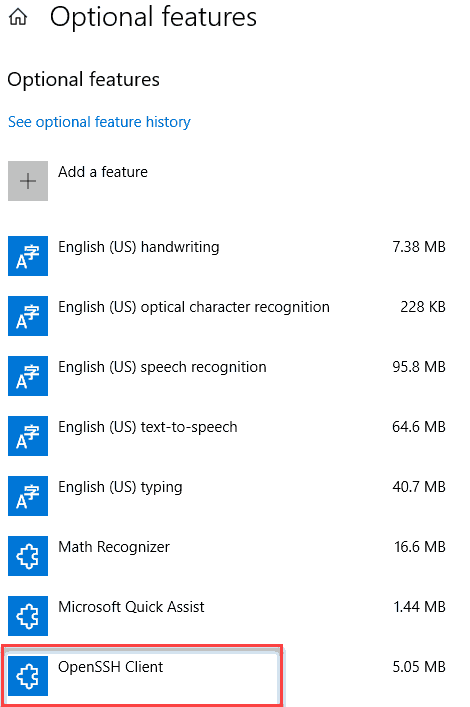
Scroll down the list to see if “OpenSSH Client” is listed. If not, click the plus sign next to “Add a feature”, select OpenSSH Client, and click “Install”.
For Windows 10 & 11
-
Press the Windows key or open up the Start Menu. Type “cmd”.
-
Under “Best Match”, click “Command Prompt”.
-
In the command prompt, use the ssh-keygen command:

By default, the system will save the keys to [your home directory]/.ssh/id_rsa. Unless you are an expert you should use the default option and press Enter.
-
The system will now generate the key pair and display the key fingerprint and a randomart image. These fingerprints are not needed in day-to-day use of your keys but can be saved to your notes to identify your keys later if needed.
-
Open your file explorer. You can now navigate to the hidden “.ssh” directory in your home folder. You should see two new files. The identification is saved in the id_rsa file and the public key is labeled id_rsa.pub. This is your SSH key pair. They are both saved in plain text.

For usage of your new keys with a remote host, see “Copying your public key to a host” below.
Generating SSH keys with SecureCRT
-
SecureCRT can be downloaded free of charge by Purdue students, faculty, and staff from the Purdue Community Hub.
-
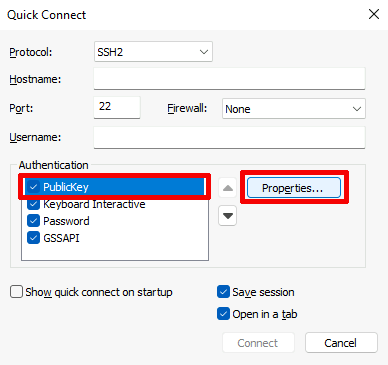
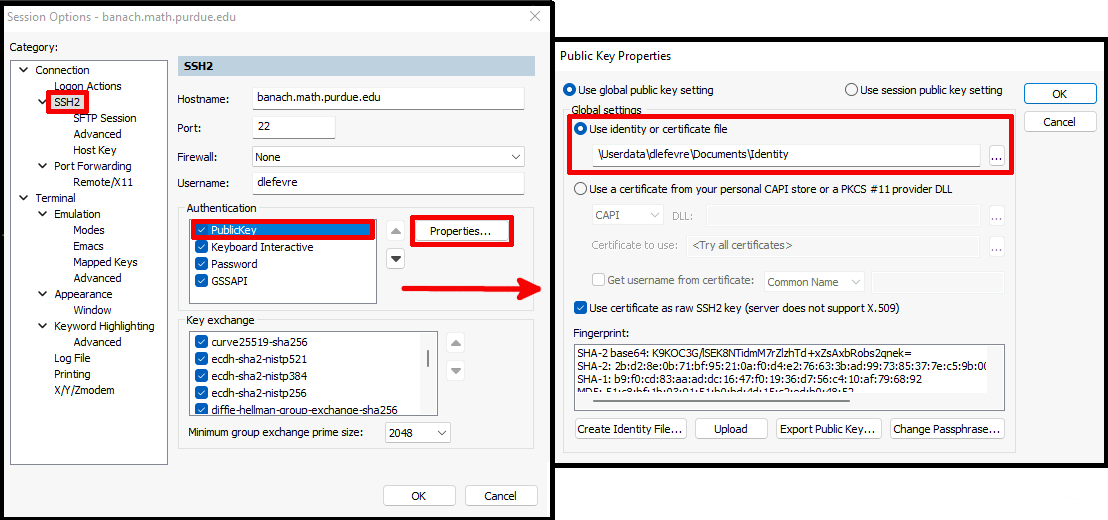
Open a quick connect window (Under “File” or Alt-Q). Under Authentication highlight PublicKey, then click the Properties button.
-
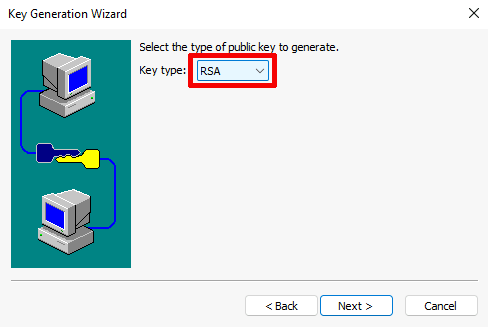
In the Public Key Properties window, click Create Identify File in the lower left. This will open the Key Generation Wizard. Click next and then select key type of RSA and click Next.
-
Generally you do not want to add a passphrase. Click next with empty boxes.
-
The default key length is adequate. Click next.
-
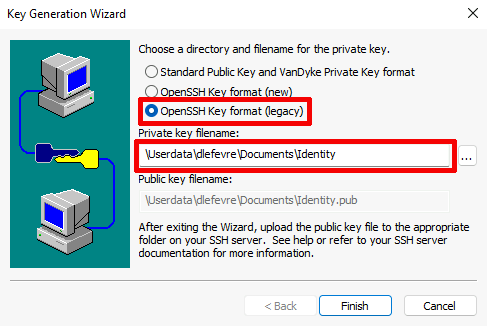
Save your new key using “OpenSSH Key format (legacy)”. Take note of the filename of your new key as well as its paired public key (the same name with a “.pub” extension) and where they are saved.
-
The wizard will ask you if you want to add keys to a host. Select no. For adding keys, see “Copying your public key to a host” below.
-
SecureCRT will try to use this key filename by default in future sessions. You can change keys used in the “session properties”.
For usage of your new keys with a remote host, see “Copying your public key to a host” below.
Generating SSH keys with PuTTY
-
PuTTY is Free and Open Source software. It can be obtained from the PuTTY latest release page.
-
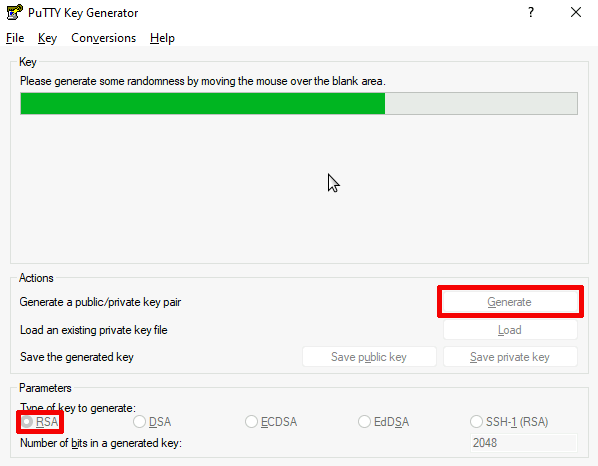
Once PuTTY is installed, press the Windows key or open the Windows and type “puttygen” and open the “PuTTYgen” app.
-
In the PuTTY Generator window, make sure that “RSA” is selected at the bottom of the window and click “Generate”. Move your mouse cursor over the gray area to fill the green bar.
-
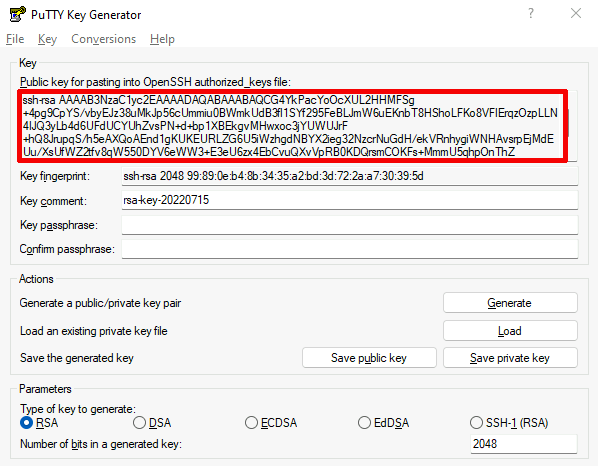
You need the public key written at the top of the window for your authorized_keys file (see “Copying your public key to a host” below). PuTTY does not save the public key for you. You can copy and paste it directly to your authorized_keys file or copy and paste this key into a notepad document for safe keeping to copy later.
-
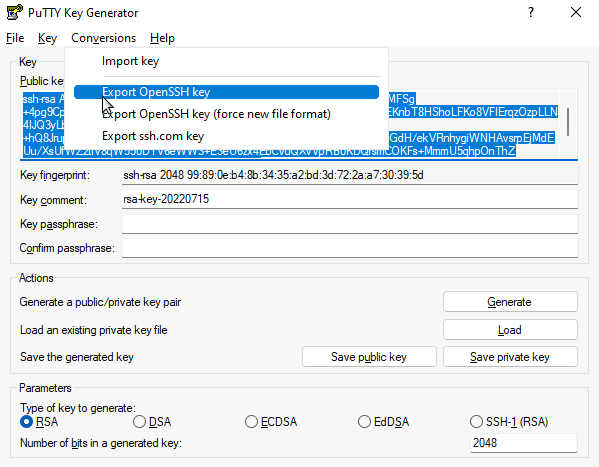
Now the private key needs to be saved. Click the “conversions” menu at the top and select “Export OpenSSH Key”. Generally you want to save this without a passphrase, so click “Yes” in the next dialog box. Choose a location to save the key and give your key a name (e.g. putty_key).
-
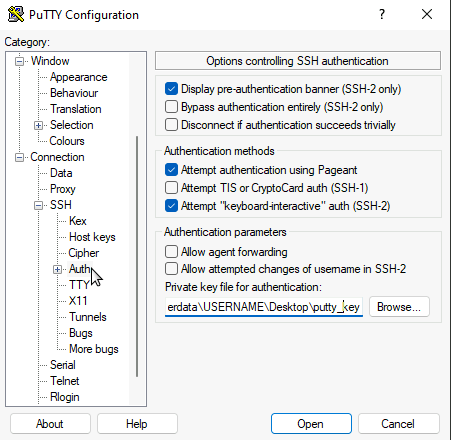
Your keys are generated and you can close the PuTTY key generator. To use your new key with PuTTY, you need open “Connection” and “Auth” in the PuTTY configuration. Under “Private Key file for authentication” choose the private key you just saved.
You will need to copy your public key from Step 4 above to the host you wish to use your keys with. See “Copying your public key to a host” below.
Copying your public key to a host
Public keys are in text format and copying them to a remote host can be done with cut and paste commands. The public key file you created can be opened with a text editor and it will look something like this *:

The key can contain numbers, letters, or symbols like the one above. On remote Unix, Linux, or MacOS machines the public key needs to be placed into a file called ~/.ssh/authorized_keys file using your favorite text editor. There can be multiple public keys in the authorized_keys file. If the file does not exist it needs to be created. Your authorized_keys file needs to be set to owner read/write only (mode 600). When using your key file with a Windows 10 or 11 host you similarly put your key into a text file called authorized_keys in a hidden .ssh folder in your user folder.
For more security your authorized_keys file can also be set up to only accept connections from certain IP addresses or hostnames. Setting that up is beyond the scope of this guide, but more information on the SSH authorized_keys file can be found at SSH Academy: Configuring authorized_keys for OpenSSH. Many other how to files are available through Google Search.
Other remote computer systems might require you to add your public key in a different way. Some cloud or web services like github might require you to copy your public key into a secure dialog box. Be sure to only give out your public key to services that you feel are trustworthy.
Footnotes
* If using PuTTY the public key is shown in the window and not in a separate file. See step 4 of "Generating SSH keys with PuTTY" above. That will be the key needed for your cut and paste. ↩ Back
Reference
The information on this page originates from PhoenixNAP: How to Generate SSH Key in Windows 10.