STEM and Leaves
The fall is a beautiful time of year here in the Midwestern U.S. That beauty provides a lot of opportunities to integrate STEM instruction in students' learning. Here are a few that we tried and enjoyed.
Where does the fall color come from?
We can model the changing of colors in leaves by using chromatography. Chromatography is the separation of a mixture. The process of extracting color from leaves is a bit more complicated for younger scientists. So, we model the process.
When you eat breakfast in the morning, you get the energy you need for a fun day at school. Plants get energy in a different way. Have you ever noticed green leaves on a tree? Leaves are green because of a special green material (chlorophyll) that plants make. This green material is important because it helps plants collect the energy they need from sunlight. Plants use this energy to make sugar and oxygen. We can live on the Earth because of the green material (chlorophyll) in leaves.
At the end of the day, you might take a bath and put on pajamas as you get ready to go to sleep and rest. Plants rest in a different way. In the fall, there is less daylight and the temperature starts turning colder. This means the green leaves know it is time to “go to bed.” The green material (chlorophyll) that plants have in their leaves starts to go away and the yellow, orange, brown, and red colors in the leaves are revealed.
Supplies:
- Coffee filter
- Crayola or other water-based markers: green, red, orange
- Plastic cup
- Water
- Pencil
- Tape
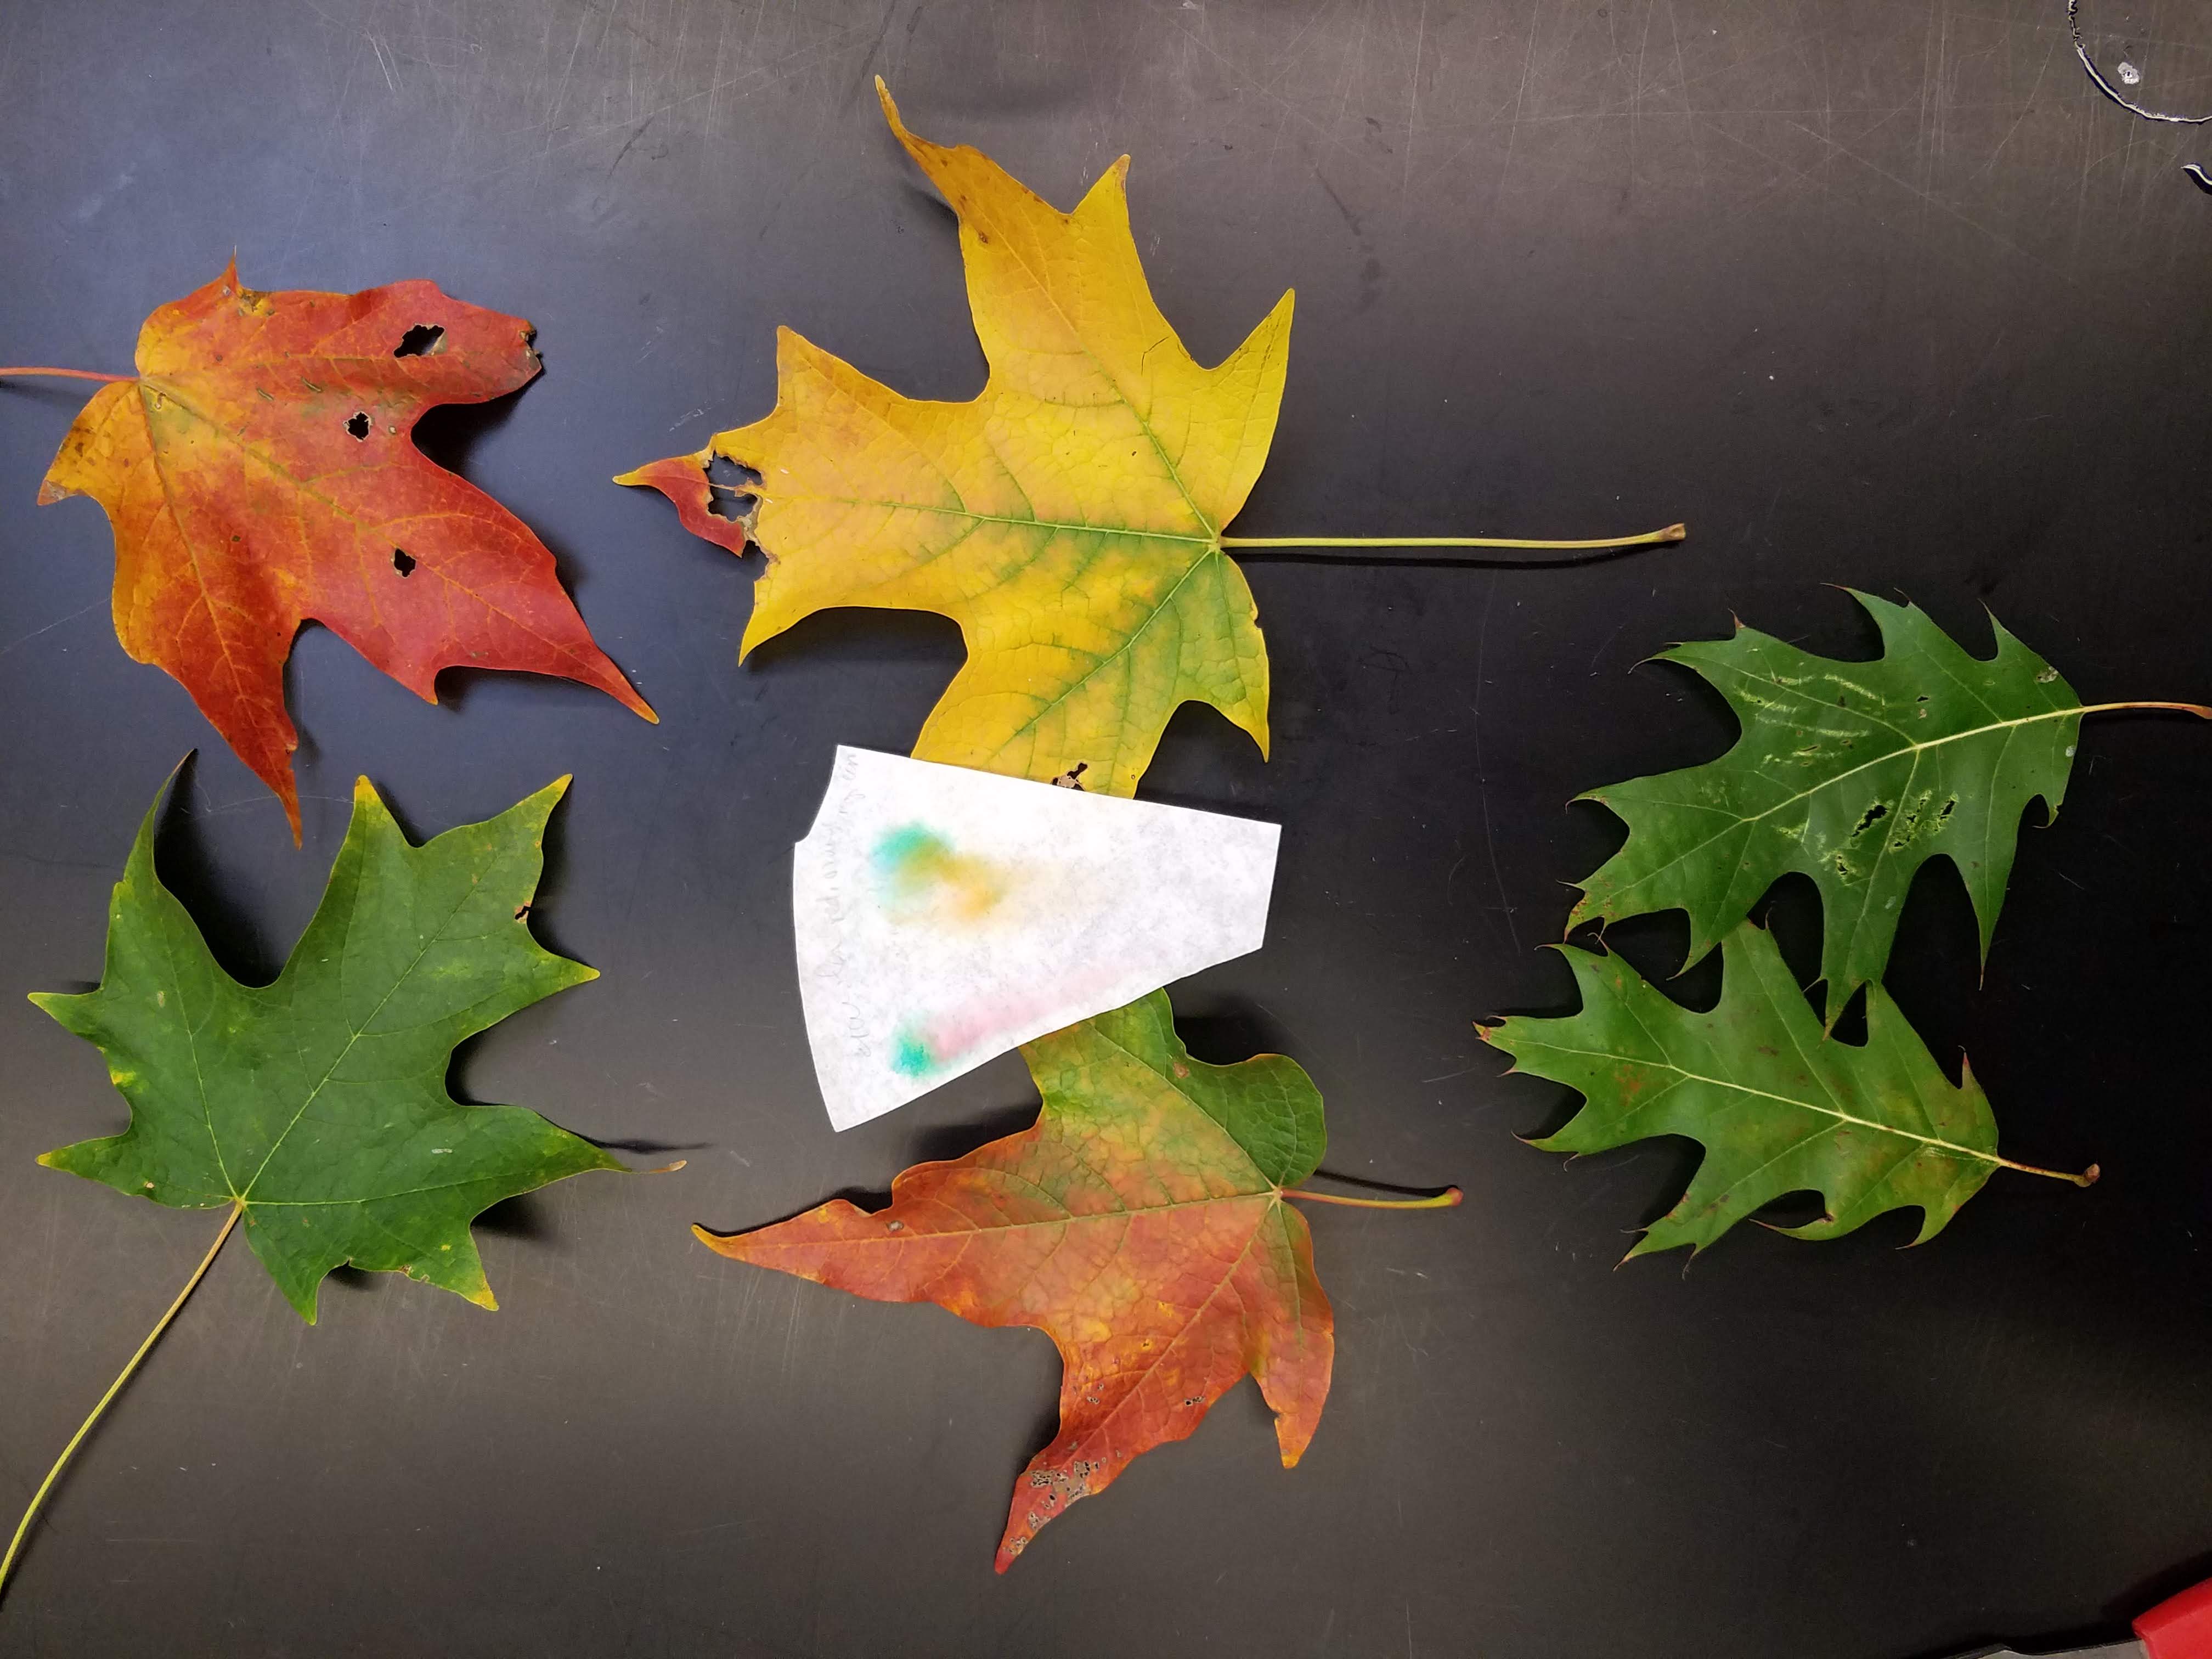
- Various leaves - try to collect a few leaves that show both green and other colors like yellow, orange, or red.
Procedure:
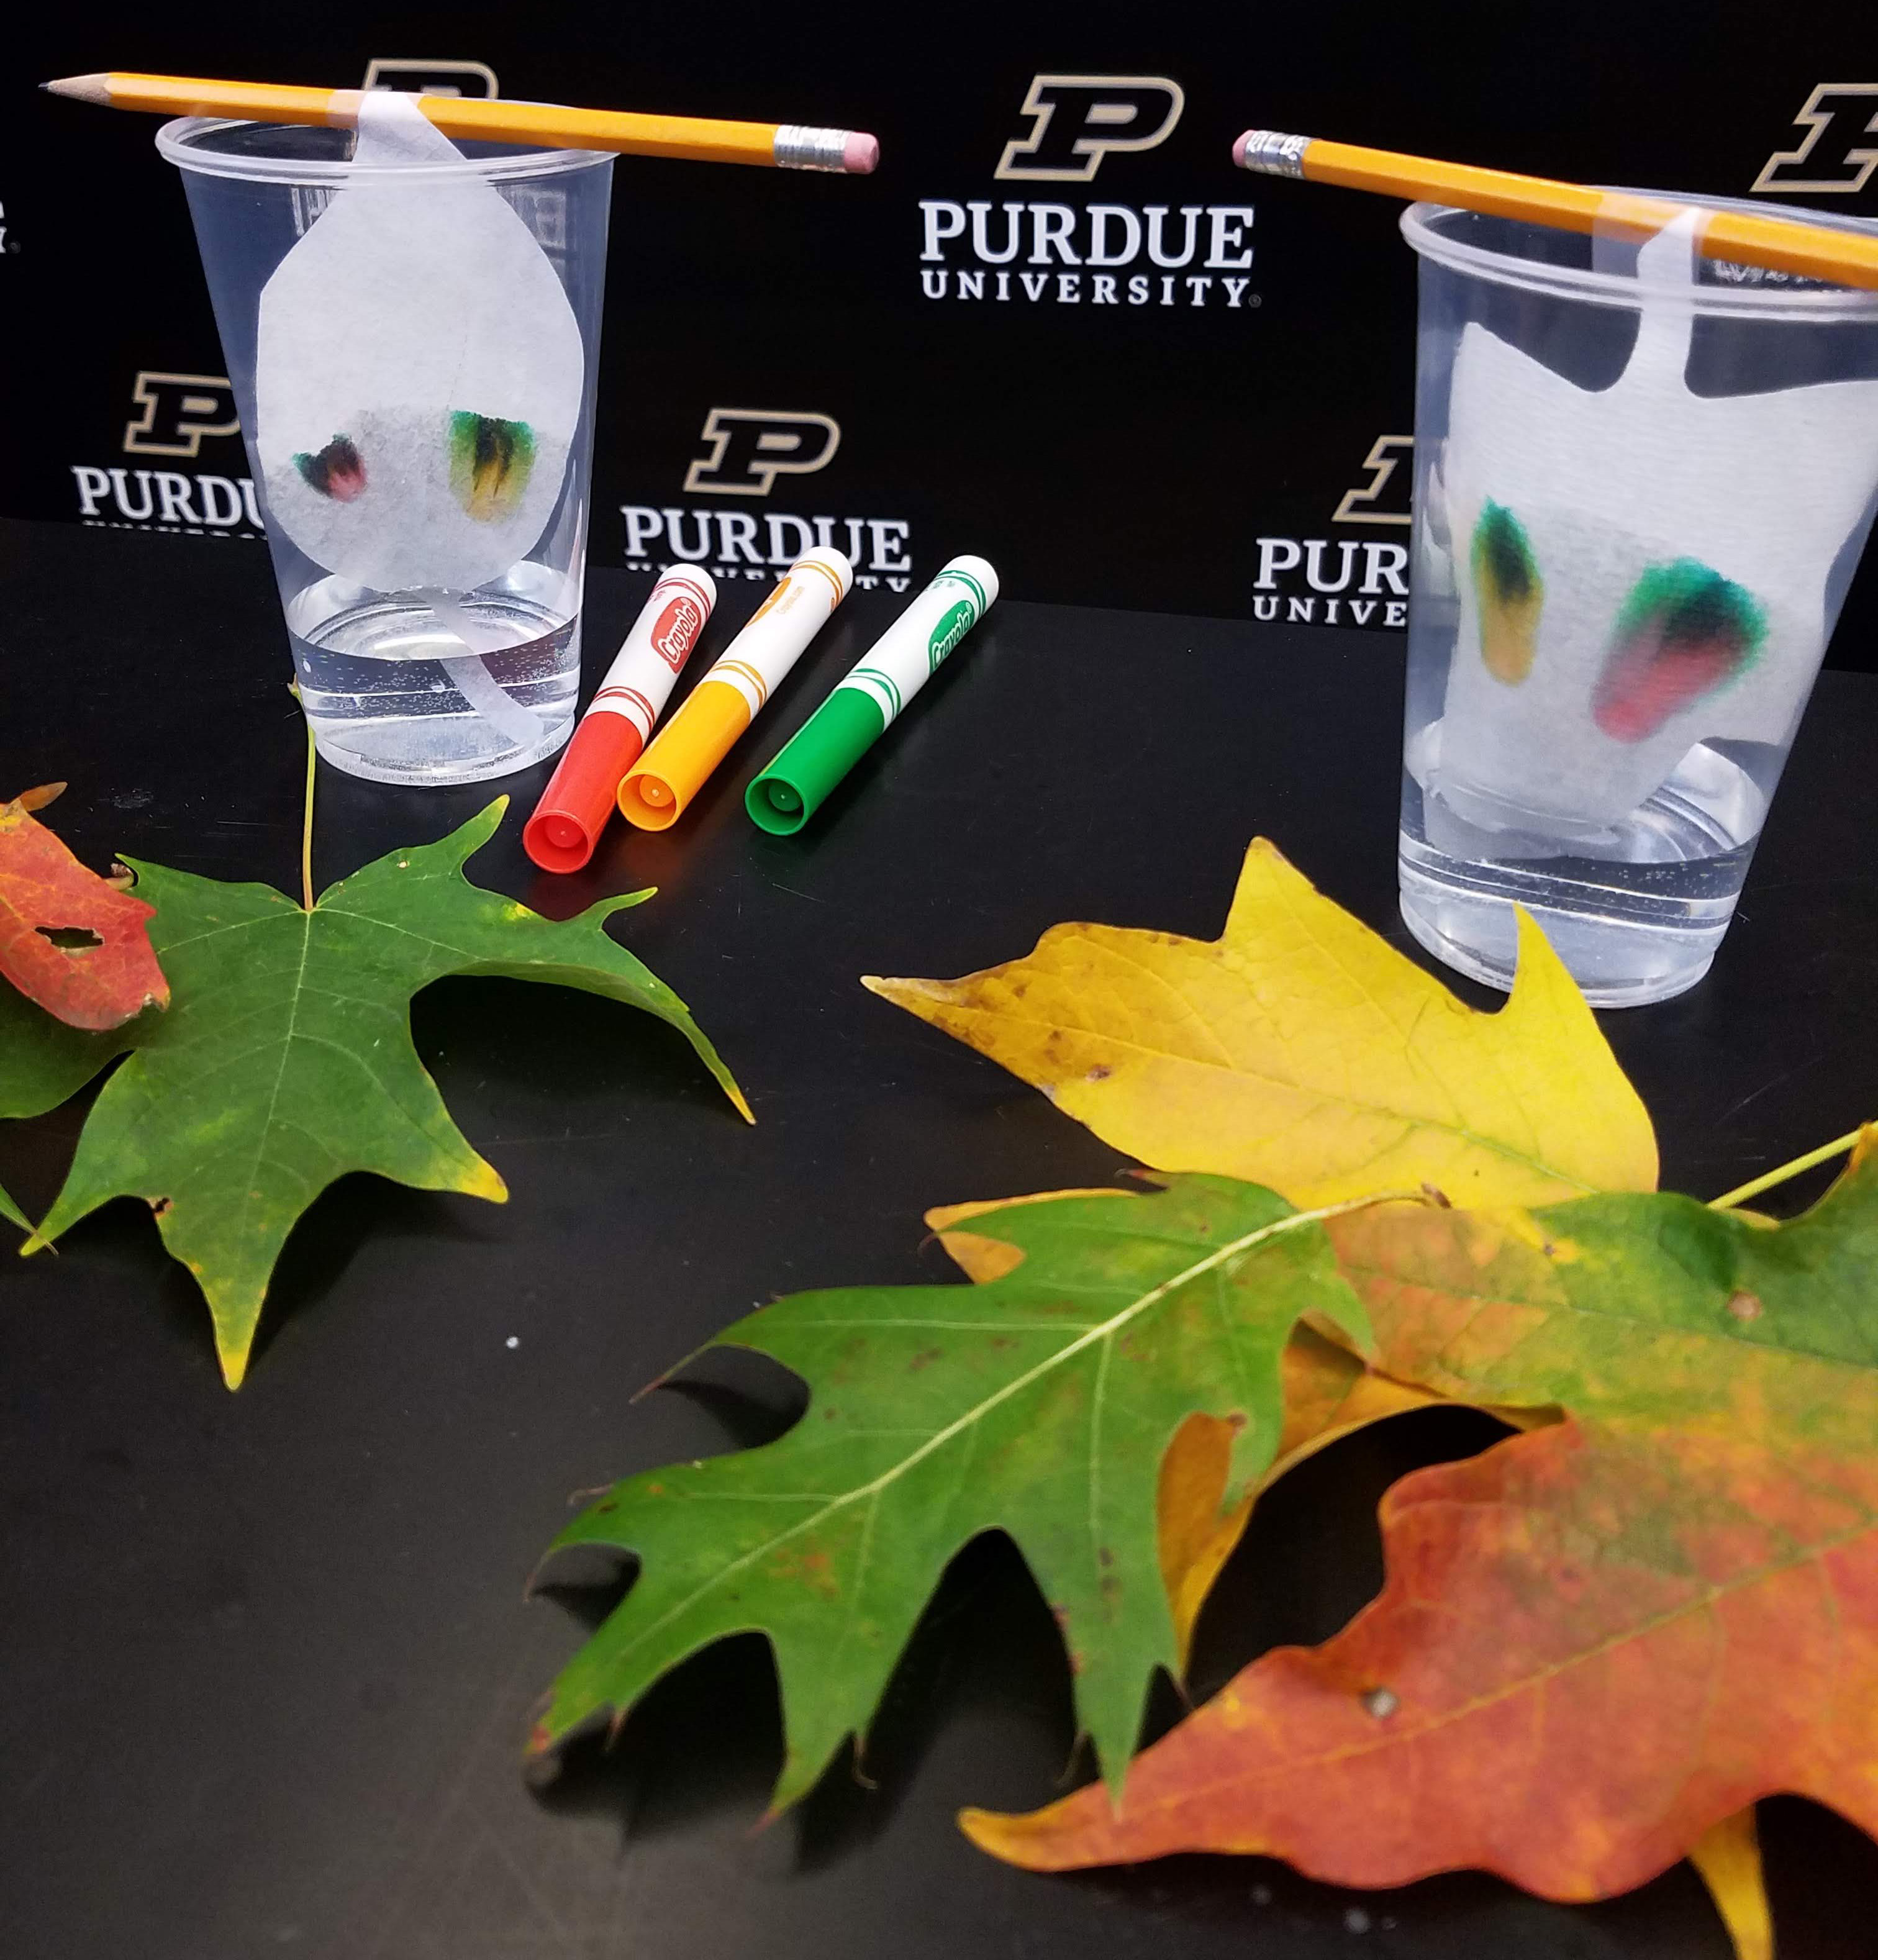
- Cut a coffee filter into a strip that can be suspended from a pencil sitting on top of a plastic cup. (We chose to cut coffee filters into leaf shapes.)
- Add enough water to the plastic cup so that the bottom of the filter paper will be suspended in the water when it is hanging from a pencil.
- Find a spot toward the bottom of the filter paper where you will place your marker dots. The marker dots should not be touching the water at first. The goal is to allow the water to “wick up” the filter paper and travel to the marker dots.
- Place your marker dots on the filter paper. Begin with a color like red or orange. Make one or two marker dots in the same spot. Allow these marker dots to dry. Then, cover the first marker dots with one or two green marker dots.
- Tape the opposite end of the filter paper to the middle of the pencil.
- Sit the pencil on top of the plastic cup and allow the bottom of the filter paper to sit in the water in the plastic cup. (Be sure the marker dots are not in the water at first.)
- Observe what happens as the water travels up the filter paper.
- Remove the filter paper when the water level on the filter paper is about one-half inch from the top of the paper. Allow the filter paper to dry.
- Compare the separated marker dots on the dry filter paper to any leaves that you have available.
Conclusions and suggestions
- Students should understand that the fall colors like yellow, orange, red, and brown are always present in the leaves. They are just hidden by the green material (chlorophyll) within each leaf.
- Have students think about and brainstorm ways they are similar to and different from plants.
Literacy Connections:
I am a Leaf (Level 1) By Jean Marzollo
Fall Leaves: Colorful and Crunchy; By: Martha E. H. Rustad
Goodbye Summer, Hello Autumn; By: Kenard Pak
Arthur Jumps into Fall; By: Marc Brown
There was an old lady who swallowed some leaves; By: Lucille Colandro
Leaves; by David Ezra Stein
We’re going on a leaf hunt; By: Steve Metzger
YouTube Channel
Purdue University Superheroes of Science
Like us on Facebook! ![]()