This is the workflow to use the waterjet at the Bechtel Center, use this as a guide to help your project go more smoothly. See Project Workflow for the specific steps to get started.
1. Idea Generation and Design
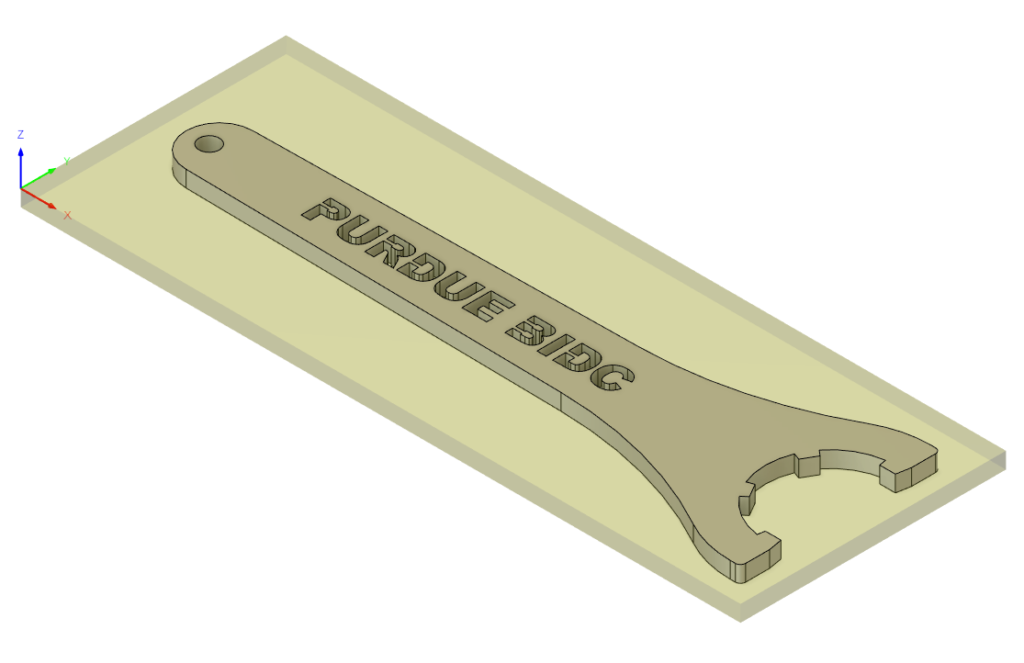
Create a sketch or part in Fusion 360 with the outline you want waterjet cut on a single surface or plane.
- You can import .dxf files from other software into Fusion 360 which is what is used to program the waterjet tool paths.
- Units can either be mm or in. The post processor will convert the movement position to inches for the waterjet.
Visit the Waiting Room channel on Discord to get added to the Fusion Team and access to tool libraries.

2. CAM Setup
- In Fusion 360, enter the [MANUFACTURE] environment and go to the [FABRICATION] tab along the top bar.
- Create a new setup. Change the operation type to cutting.
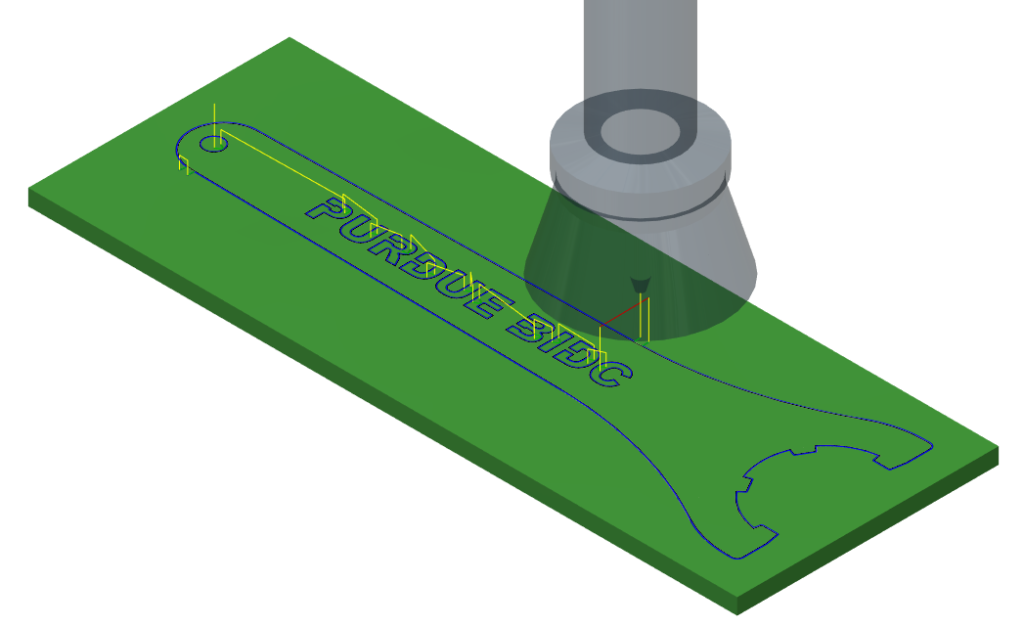
- Define the origin where you want the model to be cut in reference to the user-defined origin on the water jet.
- Recommended location is the bottom left corner of your part. Make sure you select the TOP SURFACE of the stock. The model has to be aligned in the X-Y plane with Z pointing upward.
- Switch to the [Stock] tab and define the stock size. Use this feature to offset the origin from the edge of the stock if needed.
- THERE MUST BE AROUND 1/2″ (12mm) MARGIN AROUND THE PART FOR CLAMPING YOUR STOCK TO THE MACHINE.
- (Modeling the stock is recommended, change the stock to [From Bodies] if using modeled stock)
3. Creating Toolpaths
Waterjet tolerance is ~±0.020″. If you have high precision parts, consider finishing your parts manually. Precise holes should be drilled, especially small ones. Minimum hole size is 0.15″.
- Select the 2D profile operation under [Cutting]
- Under the [Tool] tab, select the [Flow PASER 4 Cutting Head]
- Select “Through-auto” as the cutting mode. This sets the quality to 40% cut speed.
- Auto = 40%
- High = 20%
- Medium = 60%
- Low = 100%
- Etch = 60% without lead-in or lead-out lines.
- Under the [Geometry] tab, select the contours you wish to cut. Under “loops,” select inner loops and under “Side” chose outside or inside, which ever starts the lead-ins/outs on the correct side.
- Under the [Passes] tab, Set either left, right or center offset depending on which side of the line the jet needs to cut.
- Under the [Heights] tab, use the default retract and clearance heights.
- The retract height must be a positive number. If it is set to zero the post processor will not recognize transverse lines.
- Under the [Linking] tab, select an appropriate lead-in/out radius, sweep angle, and distance.
- Recommended radius is 0.05 to 0.1in. Sweep angle recommended to be 45 to 60 degrees. Distance 0.05 or 0.1 in unless shorter is needed for clearance.
- If the path fails to generate inside small pockets, try smaller lead-in/out settings.
- Hit OK then right-click on the operation and select [Duplicate]
- Under the [Geometry] tab, select [Outer loops] to select the outside profile of your part.
- Add tabs if needed. Recommended size is at least 0.1 inches.
- Hit OK, then right-click on the setup and select [Simulate]. Watch the program and make sure it cuts as desired without crashing
4. Peer Mentor Review & Reserve time at the Bechtel Center on the machine to be used
- See Project Workflow for project review, modification, and approval
- Reserve at least an hour more than your program’s run time
- Arrive on time, reservations are canceled after 15 minutes of no-show
- Teams can only reserve one machine at a time. Anyone operating a machine is required to be familiar with what operations are taking place, (no handing off for others to babysit your program)
5. Post Process the Program
- In Fusion, hit the [Post Process] button. Press [Setup] at the top then select [My Cloud Posts]. Under the [Post Configuration], select [Flow Waterjet ORD]
- Save the file to your computer, location is the [Output Folder].
- Upload your program to the Bechtel Center File Share: