YuJa Panorama Instructor Guide: Remediating Content Within Brightspace
Updated 8/5/26
YuJa Panorama is a digital accessibility tool available to all faculty, staff, and students that is integrated directly within Brightspace. It is designed to help instructors identify and address accessibility issues in course content more efficiently, supporting the creation of accessible learning experiences for all students. Panorama tests content based on WCAG 2.1 AA standards.
This guide will cover:
- How Panorama scans content in Brightspace
- How accessibility scores for content are generated
- How to remediate content directly within Brightspace
How Panorama scans content in Brightspace
Panorama will automatically scan all Microsoft Word, Microsoft PowerPoint, Microsoft Excel, PDF files uploaded to your Brightspace course upon upload, as well as all content pages (HTML) within your course. This includes content that is both published and unpublished. When navigating through modules and content within your course, you will see Panorama-specific indicator icons to the right of each page title, as well as to the right of each file that you have uploaded.
How accessibility scores for content are generated
Panorama identifies how accessible a document is based on pre-set thresholds. The thresholds are denoted by the following indicator icons, which you will see to the right of files that have been uploaded to your Brightspace course:

Low Accessibility Score

Medium Accessibility Score

High Accessibility Score
How to remediate content directly within Brightspace
There are two methods to access Panorama remediation within your course:
Method 1: Remediate all Files and Pages from the Course Home Page
- After logging into Brightspace, you will see a YuJa Panorama banner at the top of the Course Home page. To begin remediating content, click “Launch Remediation”.
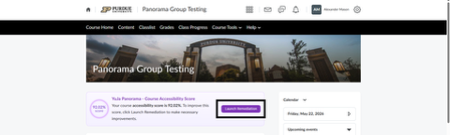
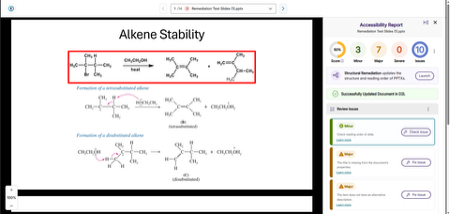
- This will bring up the Accessibility Report window. At the top of this window, there is a drop-down menu that allows you to navigate through all files and pages within your course. The files and pages are listed alphabetically.
Method 2: Remediate an Individual File or Page from the Course Content Page
- After logging into Brightspace, click “Content” at the top of the page.
- Click the indicator icon to the right of any content file or page.

This will bring up the Accessibility Report window for the individual file or page.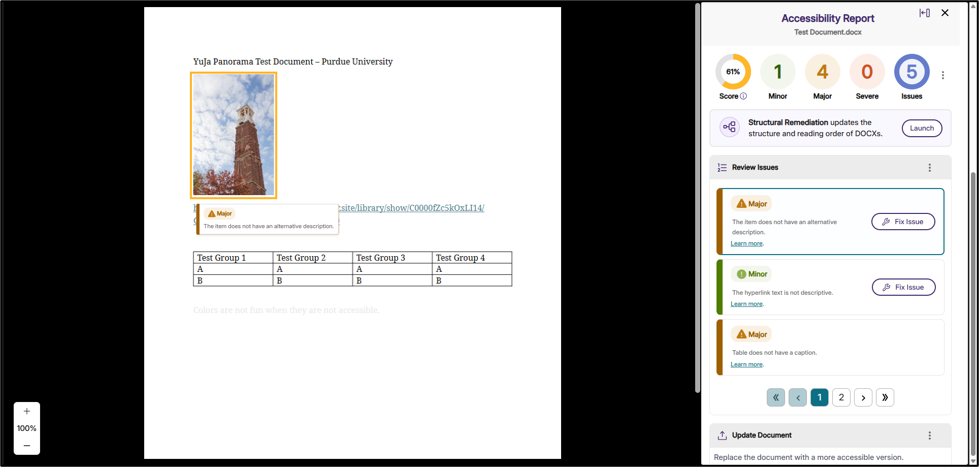
Panorama will display a preview of the document on the left side of the screen, and details of the Accessibility Report on the right side of the screen. The Accessibility Report will display the overall Accessibility Score, the number of minor, major, and severe issues, as well as a listing of the issues
From here, remediating a file or page is the same process, no matter which method you used to get to the Accessibility Report window.
Remediating a File or Page
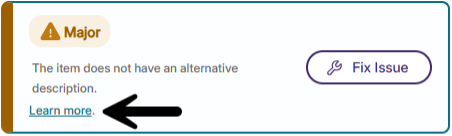
- When you click on one of the issues displayed, Panorama will highlight where the issue is in the document preview on the left side of the screen. If you are unsure of why a particular item is an issue, you can click “Learn more”, which will provide a “How to Fix” guide with additional information on that issue.
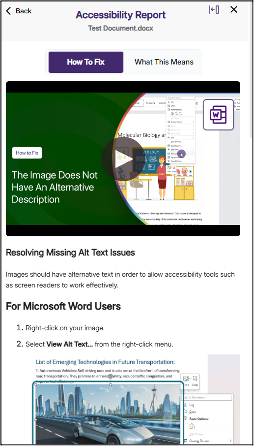
- Panorama supports around 30 issue types that can be fixed within Brightspace. For any additional issues highlighted that cannot be fixed within Brightspace, you will need to remediate your document outside of Brightspace and re-upload.
- To fix an issue, click the “Fix Issue” button
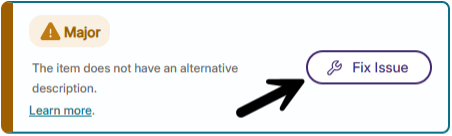
- The next window will display what the issue is and the recommended action to fix it.
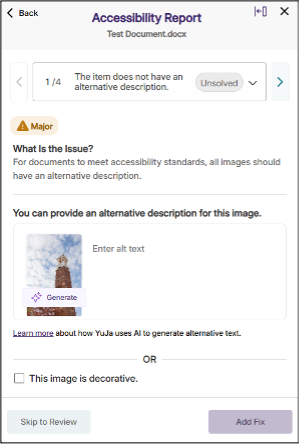
For the issue highlighted above, Panorama has flagged that the image of the Purdue Bell Tower does not have any sort of alternative description. You have the option of adding your own alternative text or using Panorama’s built-in AI-assisted alternative text generator. If the image is purely decorative, you have the option to choose this as well.
For each issue, follow the prompts within Panorama to correct each issue that is identified. - Once you have fixed the issue, click “Add Fix”
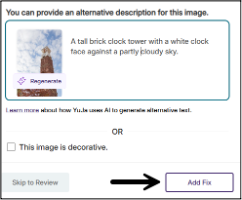
- Once you click “Add Fix”, the window will automatically move on to the next issue. You can also navigate between issues by clicking the left and right arrows at the top of the Accessibility Report window, or by selecting a specific issue from the drop-down menu at the top of the screen.

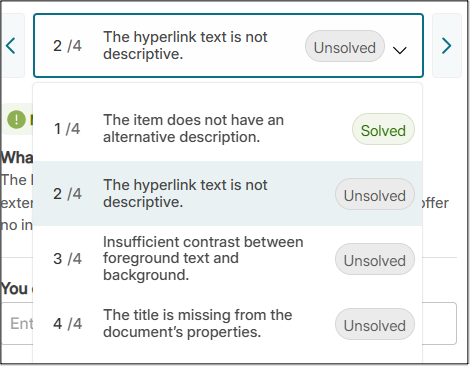
- If you decide to do all your fixes at once, the “Add Fix and Proceed to Review” button will appear at the bottom of the Accessibility Report window. Panorama will save whatever progress you have made, no matter how many issues you fix in one document. You can always come back later to continue working.

After clicking this button, you will see all the fixes you just made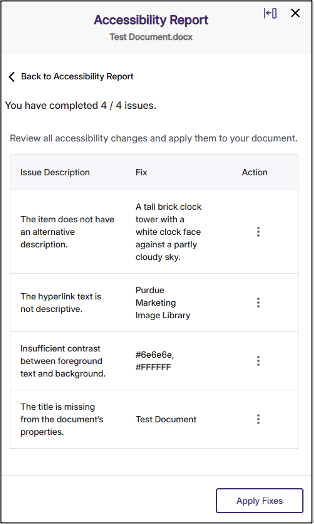
If you would like to edit or remove any of the fixes you just made, click on the three dots to the right of the issue and select “Edit” or “Remove”.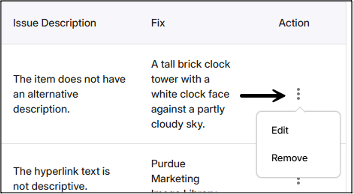
- Once you are satisfied with the fixes you made, click “Apply Fixes”.
After clicking “Apply Fixes”, Panorama will:
- Update the document and apply the fixes
- Replace the original file you uploaded with the updated file
- Update the alternative formats of the file that can be downloaded
- Rescan the document to double-check that there are no additional issues