
BEP Developer Resources
How to Create a New BEP in WordPress
Please use the steps listed on this page to create your new BEP.

Step 1.
Access and Login
- Go to the BEP site login URL:
https://www.purdue.edu/operations/emergency-preparedness/wp-admin/ - Sign in with your Purdue Career Account credentials.
- If shown “Pending Approval,” please keep an eye on your inbox for an approval email.
- Logins are approved manually Monday-Friday 8 a.m. to 5 p.m.
- After approval, return to the same login URL above and sign in again.
- If you can’t sign in or do not see “Posts,” (as described in Step 2) please email Brylie or Jacinda.
Step 2.
Navigate to Posts
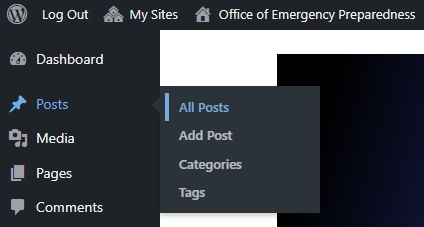
In the left sidebar, click Posts → All Posts.

Step 3.
Start From the Correct Template
- Locate the BEP Template for your campus (e.g., Indianapolis BEP Template or West Lafayette BEP Template).
- You may need to type “template” into the search bar in the upper right corner to find your template among all the other BEP posts.
- Hover the template title and click Duplicate This.
- You’ll be taken to your new draft. Do not edit the original template or it will affect everyone using it.

Step 4.
Edit Your Template
- Change the page title to your building’s abbreviation.
- Click Save draft in the upper right corner. This will rename your template and prevent other BEP developers from accidentally copying yours.
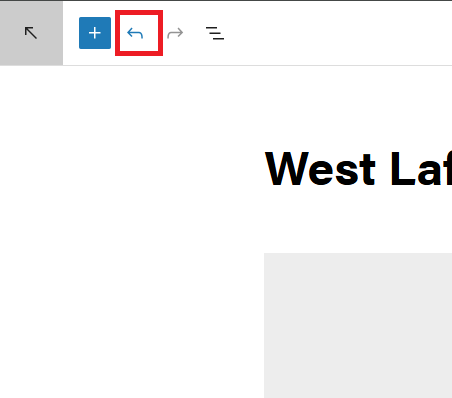
If you make a mistake at any point, click the blue undo arrow in the top left corner of the page.

Title Section
Fill in the following BEP information. You can click into the placeholder text and type your information directly.
- Building Name (and Building Abbreviation in parenthesis)
- Building Address
- BEP Revision Date

Please add a Google Earth hyperlink to you Building Address. Here are the steps:
- Visit the Google Earth website.
- Type or paste your Building Address into the search bar at the top of the Google Earth page.
- Google Earth will fly to the location and populate a new website URL in the website address bar.
- Copy that URL.
- Navigate back to your WordPress BEP window.
- Highlight the Building Address and click the link button. Paste the Google Earth URL here and hit enter.

Building Emergency Contacts
Add the following contact information where applicable:
- Building Deputy or Manager
- Safety Manager
- Facility Manager
- List any other contacts
When you enter an email address, make sure to hyperlink it. You can do this by highlighting the email address and clicking the link icon in the pop-up menu. This will auto-populate the hyperlink.

Life Safety Equipment
- Add the Location Description of your building’s Automated External Defibrillator (AED).
- Add a Photo of your building’s AED or floorplan showing where it is located. You can do this by clicking the grey placeholder box and clicking upload.
- Add Alternative Text (ALT) to your image in the toolbar to the right. You’ll need to do this for any image you add.
If you do not have an image to upload, click the grey placeholder and hit delete on your keyboard.

Emergency Evacuation
- Add maps, exit routes, other steps, actions or precautions specific to your building or work area.
- Remember to add ALT Text when you upload photos or delete the grey placeholder boxes where they aren’t needed.
- Add the information for your Emergency Assembly Areas (EAA).

Shelter in Place
- List or describe your shelter in place locations or procedures for weather-related, HAZMAT or civil disturbance incidents. You can enter as much information as needed.
- Remember to add ALT Text when you upload photos or delete the grey placeholder boxes where they aren’t needed.

Building Description
- Enter Building Information for First Responders.
- You can also add a Photo of your building.
- Remember to add ALT Text when you upload photos or delete the grey placeholder boxes where they aren’t needed.
- Add contact information to the Building Departments and Building Critical Operations tables.
- Add a description of the alarm(s) in your building.
- Add contact information to the Building Safety Committee table.

If you need to add or delete rows to your tables, follow these steps.
- Click anywhere inside the table.
- A small toolbar will appear.
- Click the table icon (the small grid square).
- Here you can click to Insert row before, Insert row after or Delete row.

Step 5.
Submit for Review
- Click the blue Submit for Review button in the top right corner.
- Send one email to brylie@purdue.edu, jshirle@purdue.edu and jfhowells@purdue.edu with the following information:
- Building Name + Abbreviation
- Campus
After Submission
- Reviewers will check formatting, completeness and compliance.
- You’ll receive edit requests via email if changes are needed.
- Once approved, the BEP will be published by the admin team.
How to Edit an Existing BEP in WordPress
Please use the steps listed on this page to edit/update your existing BEP.
Step 1.
Request Update Access
Email Brylie Gineris (brylie@purdue.edu) requesting access to edit your BEP.
You must clarify the specific building BEP you need access to update.
Step 2.
Access and Login
- Go to the BEP site login URL:
https://www.purdue.edu/operations/emergency-preparedness/wp-admin/ - Sign in with your Purdue Career Account credentials.
- If shown “Pending Approval,” please keep an eye on your inbox for an approval email.
- Logins are approved manually Monday-Friday 8 a.m. to 5 p.m.
- After approval, return to the same login URL above and sign in again.
- If you can’t sign in or do not see “Posts,” (as described in Step 2) please email Brylie.
Step 3.
Navigate to Posts
In the left sidebar, click Posts → All Posts.

Step 4.
Find Your BEP
- Locate the BEP you need to update.
- You may need to type your building name or abbreviation into the search bar in the upper right corner to find your BEP among all the other BEP posts.
- Hover the template title and click Edit.
Step 5.
Edit Your BEP
- Change text and images as needed.
- Click Save draft as needed to save your work.
If you make a mistake at any point, click the blue undo arrow in the top left corner of the page.
Step 6.
Submit for Review
- Click the blue Submit for Review button in the top right corner.
- Send one email to brylie@purdue.edu, with the following information:
- Building Name + Abbreviation
- Campus
After Submission
- Reviewers will check formatting, completeness and compliance.
- You’ll receive edit requests via email if changes are needed.
- Once approved, the BEP will be published by the admin team.
Troubleshooting and FAQs
- WordPress says I don’t have access to the site.
Please keep an eye on your inbox for an approval email. Logins are approved manually Monday-Friday 8 a.m. to 5 p.m. - Is Alt Text required?
Yes. WordPress will prevent submission if Alt Text is missing on new uploads. Please see the Life Safety Equipment section for information on how to add Alt Text. - I don’t see “Duplicate This.”
Make sure you’re hovering the correct campus template. Please see the Start From the Correct Template section for more information. If still missing, contact Brylie/Jacinda. - I can’t upload images / I only see my own media.
That’s expected—developers only see media they upload. - I’m blocked from “Submitting for Review.”
Make sure all images contain alt text. Make sure any image placeholders that you don’t need have been deleted.
Contact Us
Any questions about filling out your BEP on WordPress can be directed to: Brylie Gineris (brylie@purdue.edu) and Jacinda Shirley (jshirle@purdue.edu).