
EvoNotify Navigation Guide
Step 1.
Login
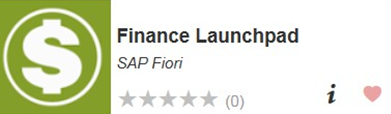
Log in to the OneCampus Portal and click the Finance Launchpad button.
Step 2.
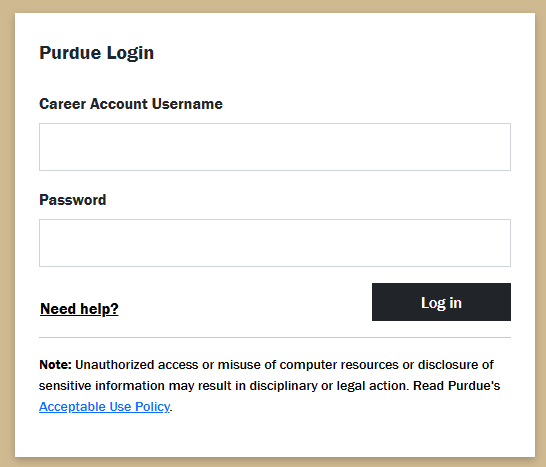
Log in to SAP with your Boiler Key password.
Step 3.
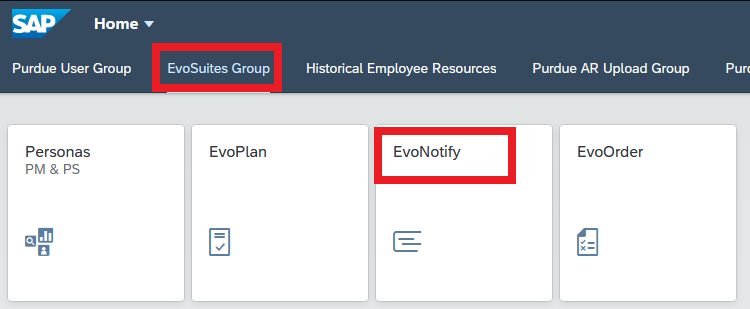
Select the EvoSuites Group tab and click EvoNotify.
Step 4.
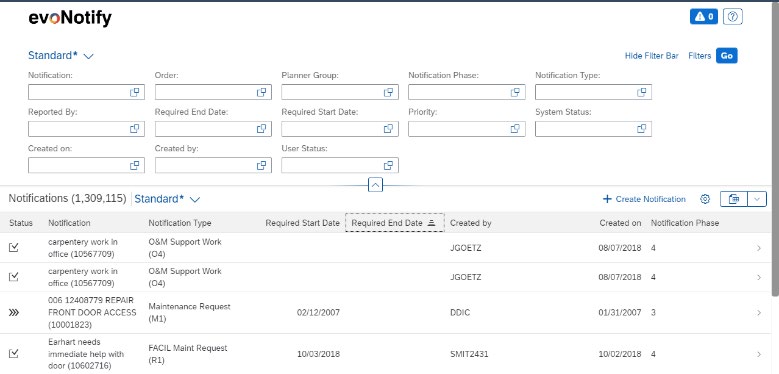
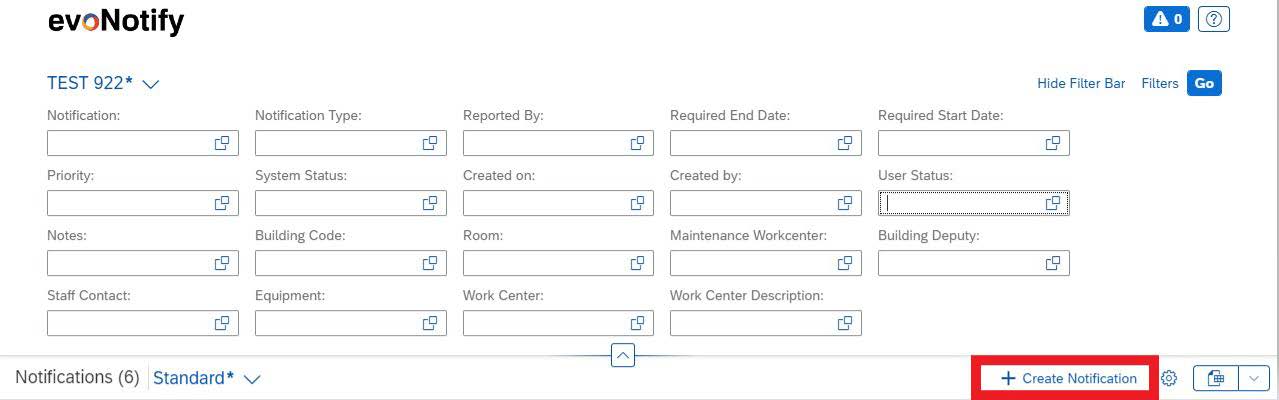
The Evo Notify home screen is divided into two sections:
- Top: Search and Filter Bar
- Use this section to filter the information you want to see
- Bottom: Notification list
- This section populates the information you’ve filtered for and the order you want it in
Both sections are customizable to your specific area/needs. Once the view is saved, you will have access to it in the future.
Step 1.
Creating a Notification
Click Create Notification.

Step 2.
Type a Notification Description.
Step 3.
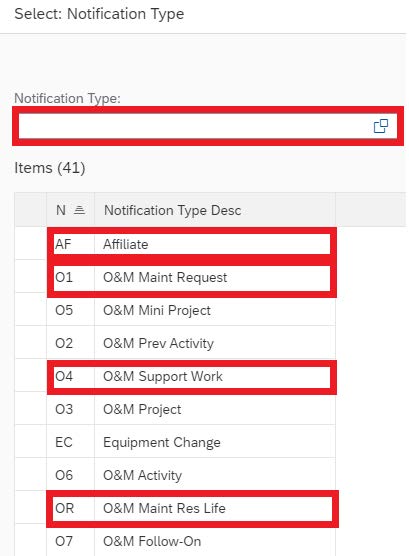
Type a Notification Type or select one using the pop-out search box. This information will populate the ‘Reported By’ field.
Please only use these notification types:
- AF – Affiliate funded
- O1 – O&M funded
- O4 – Dept. Funded
- OR – Student Life funded
Step 4.
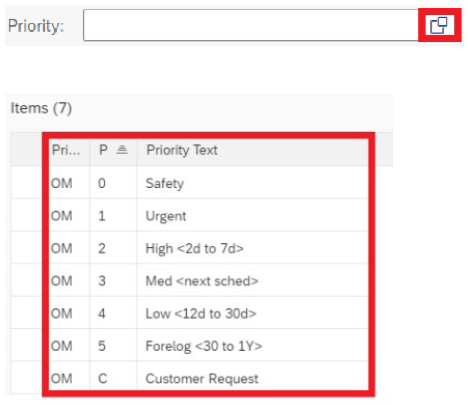
Type the priority or select one using the pop-out search box. Double click the priority needed.
Step 5.
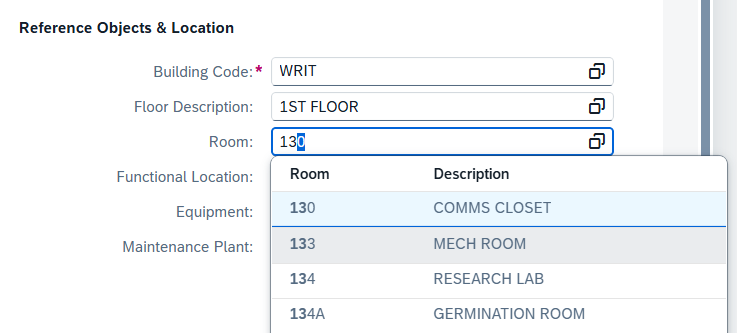
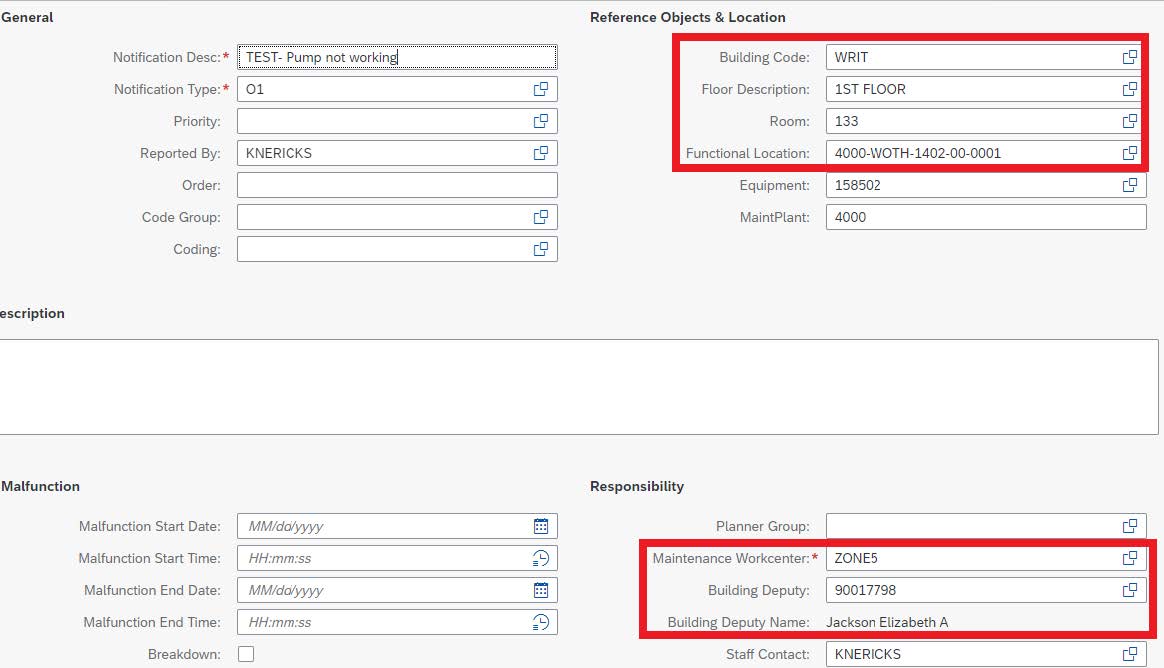
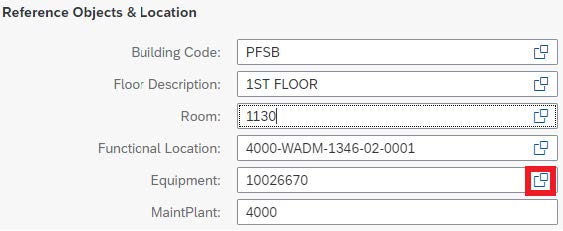
Under the Reference Objects & Location section, starting with the Building Code, Floor Description, and then Room will help to filter down to specific equipment.
Step 6.
If you know the Equipment Number or Room Equipment Number, you may enter that first.
The other fields (Building Code, Floor Desc., Room, FLOC, Maintenance Workcenter, & Building Deputy info) should autofill.
This information is being pulled from the master data record in SAP; therefore, an Equipment Number or Room Equipment Number must be selected.
Step 7.
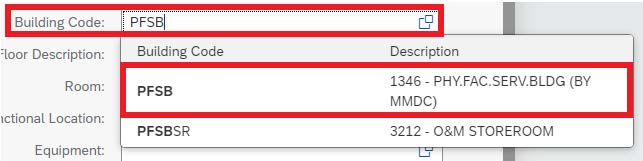
If the Building Code did not auto populate, type the building abbreviation into the box to select it from the list. You can also use the pop-out search box.
Step 8.
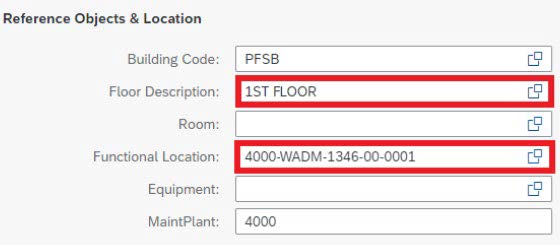
If the Floor Description did not auto populate, type the floor description (ex. 1st floor) into the box to select it from the list. You can also use the pop-out search box.
A selection here will automatically populate the Functional Location.
Step 9.
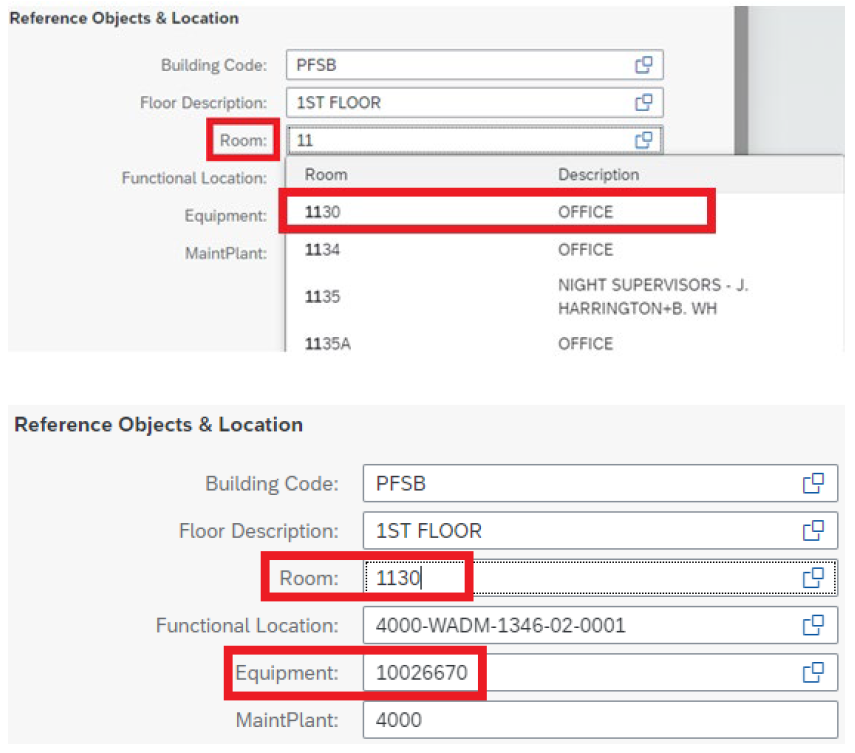
Type the Room Number or select one using the pop-out search box.
The Room Equipment Number will populate in the equipment field.
Step 10.
Make sure the correct equipment is selected for your request. Click to search for equipment within the Room selected, or click the Room itself.
Equipment Category References:
- F – Facilities Equipment
- R – Room
- U – Utility Equipment
Step 11.
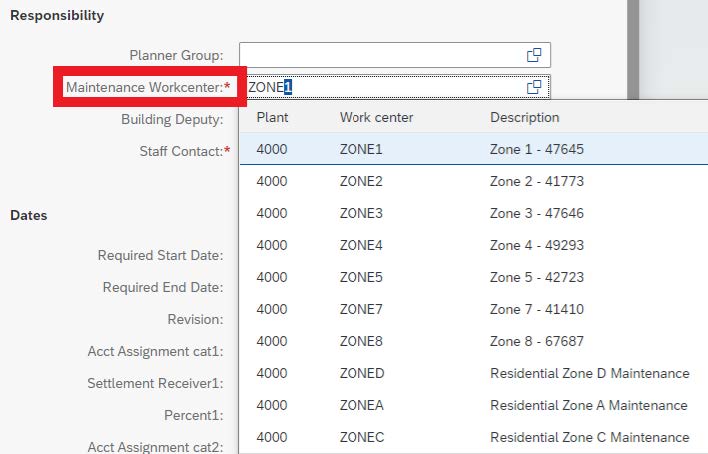
Under the Responsibility section, selection of Equipment above should populate the Maintenance Work Center.
Building Deputy info will autofill. You do not need to add anything.
Step 12.
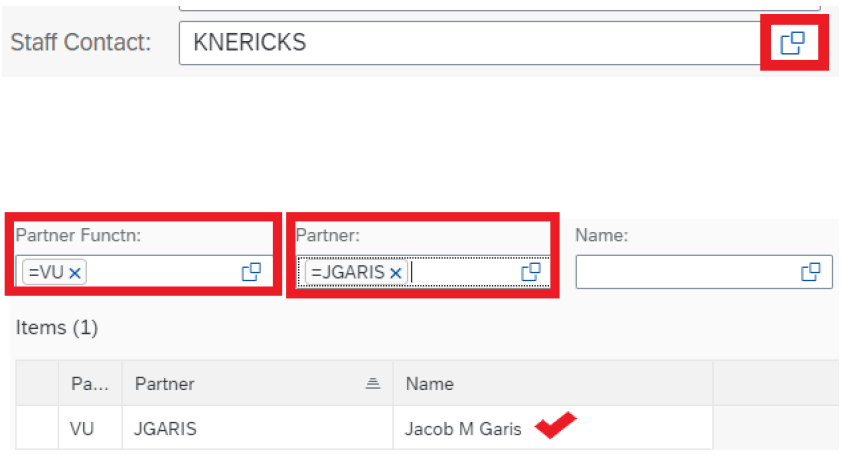
Staff Contact defaults to the person creating the notification. You can change staff contact by clicking the pop-out button.
Search by username:
- The Partner Function box auto populates “=VU”.
- Type a username in the Partner box and hit enter.
- Click to select the contact.
Search by last name:
- The Partner Function box auto populates “=VU”.
- Type a last name in the Name box and hit enter.
- Click to select the contact.
Step 13.
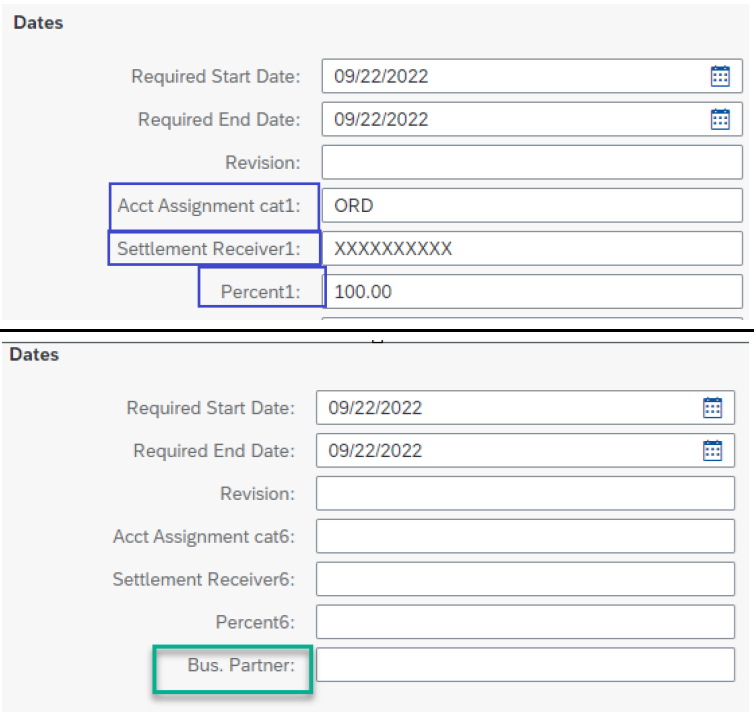
Under the Dates section:
If Notification Type is O4 (Departmental Costs):
- Enter the IO or Grant (F).
- Enter the Percent being paid.
If Notification Type is AF/AFF (Affiliate Work Orders):
- Enter Business Partner number.
Step 14.
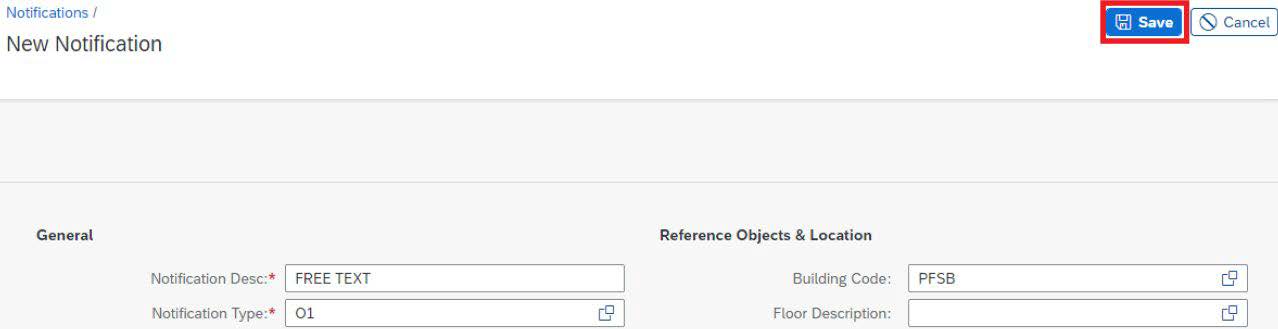
Click Save to Create Notification.
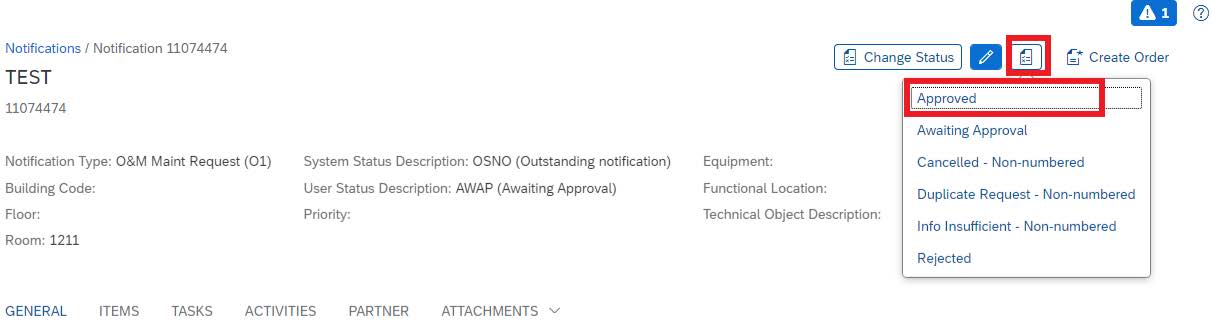
Approving a Notification
Once the notification has been saved, you will be able to approve it at the top of the screen, if you have the role.
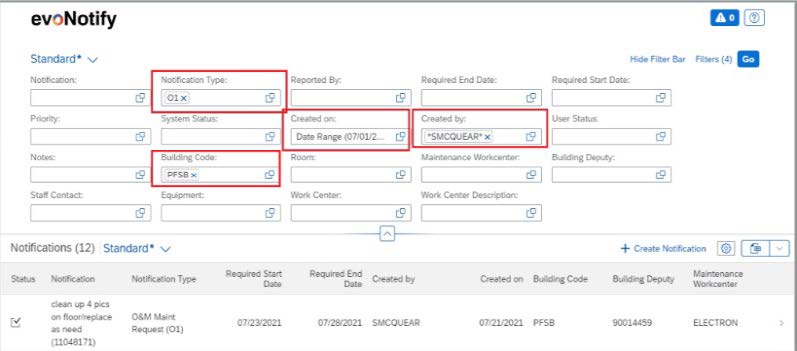
You may also use the fields to conduct a quick search.

Setting Your Search and Filter View
We recommend creating a filter for an area(s) you are responsible for. This will require bringing in filters that are important to you.
Step 1.
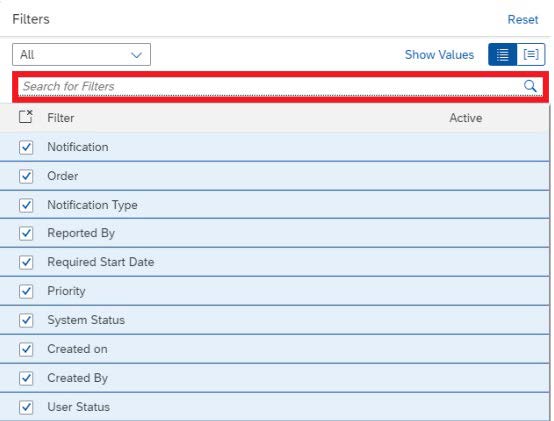
Add Filters you want to see in your View.
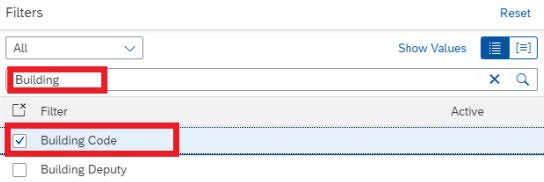
- Type your search into the “Search for Filters” bar and select drilldown box.
Recommended Filters:
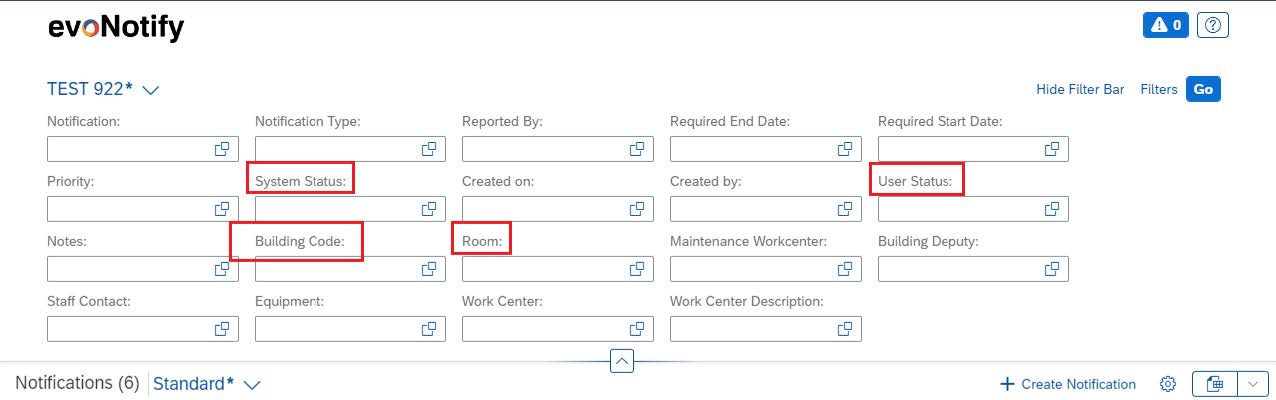
- Building Code, Room, System Status and User Status
Step 2.
Once you start typing in the search, a list will populate below. Check the box next to the wanted field to add to the view.
Step 3.
Once filter fields are selected, click Go, then proceed to fill them in with the information you are looking for.
Helpful Tips:
- When searching, “=ALLCAPS” may be necessary.
- Some fields may require use of the search pop-out .
Step 4.
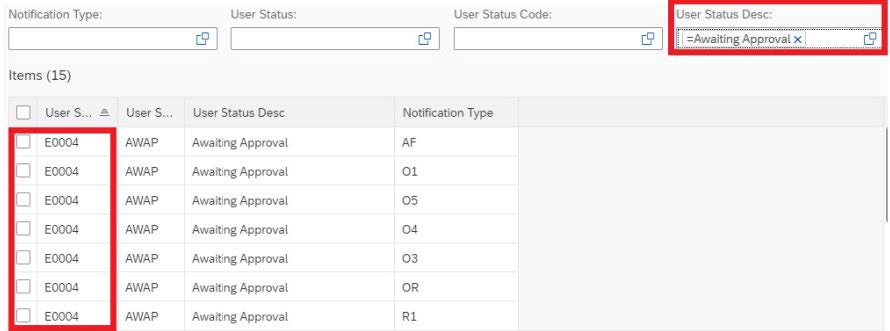
Example: User Status
- Type the status you need into the field starting with “=”.
- OR, select search pop-out.
- Type search into User Status Description.
- Example: “=Awaiting Approval”
- Hit enter to get the list.
- Select any of the E0004 options.
- Select OK.
Step 5.
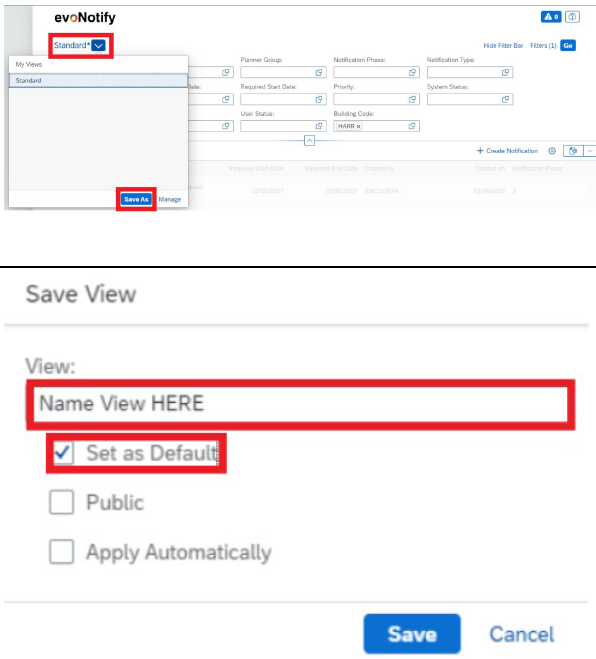
Once you have filled in the fields you need:
- Select Standard (top left corner).
- Click Save As.
- Name the View you created.
- Set as Default if you wish.
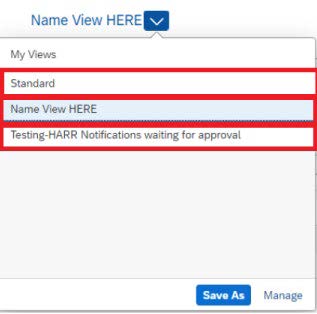
Calling or Switching Views
Click the down arrow to the right of the current View name to select from a list of saved Views.
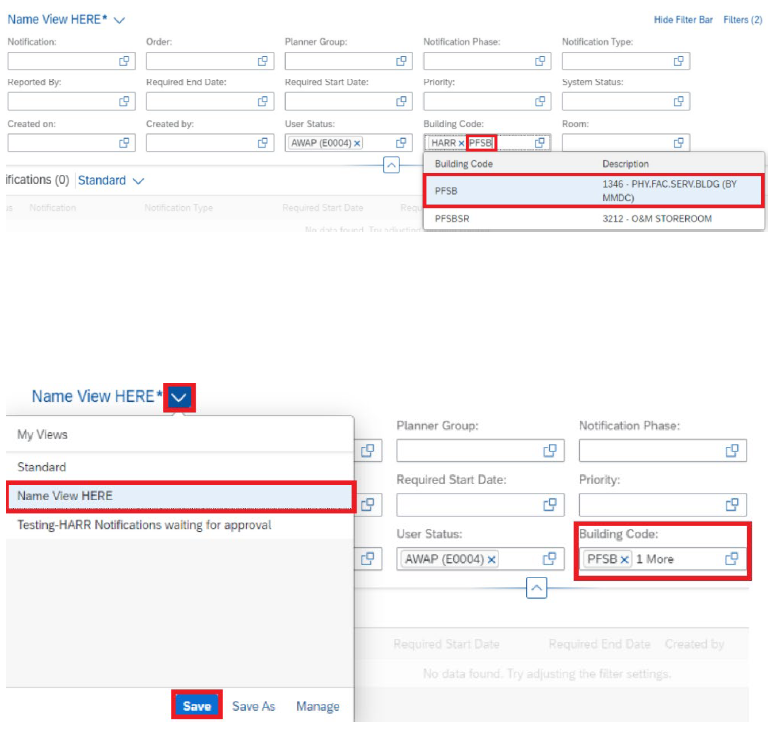
Updating a View
Note: When you see the (*) by the View name, this means filter changes have been made, but have not been saved. These changes can be saved via the “Save” button. The view will be overwritten accordingly.
Here’s what adding a second building to the saved View would look like:
- Add Building Code.
- Select Drop-down.
- Click Save.
Save As will save a NEW View with the added information. It will prompt you to name the view after selecting Save As.
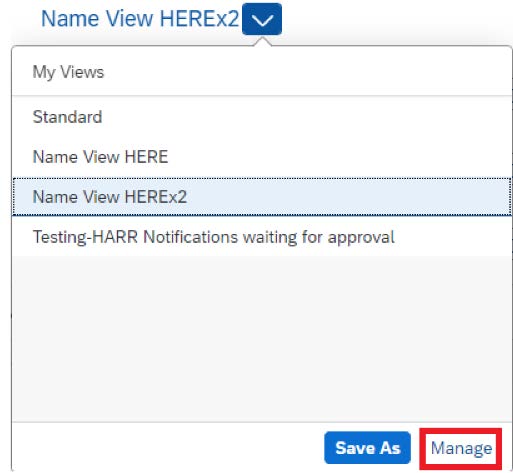
Managing Views
Click the down arrow to the right of the current View and select the Manage button.

Manage opens the list of filter variants. The following is visible and changeable.
- Search bar – This allows you to search for the name of a variant.
- Default – Allows you to select which View you’d like to see when you log in.
- You may also Delete a view by clicking the X on the right side.
- Click OK to save changes.
- Clicking Cancel will take you out of the screen without saving changes.
Note: A blue star means that the user has marked the variant as a favorite.