FM:S User Guide
A printable PDF version of the FM:S User Guide is available upon request by emailing OccupancyPlanning@purdue.edu.
What is FM:S?
Facility Management: System
- Users can view space, update occupancy, run reports and enter space requests.
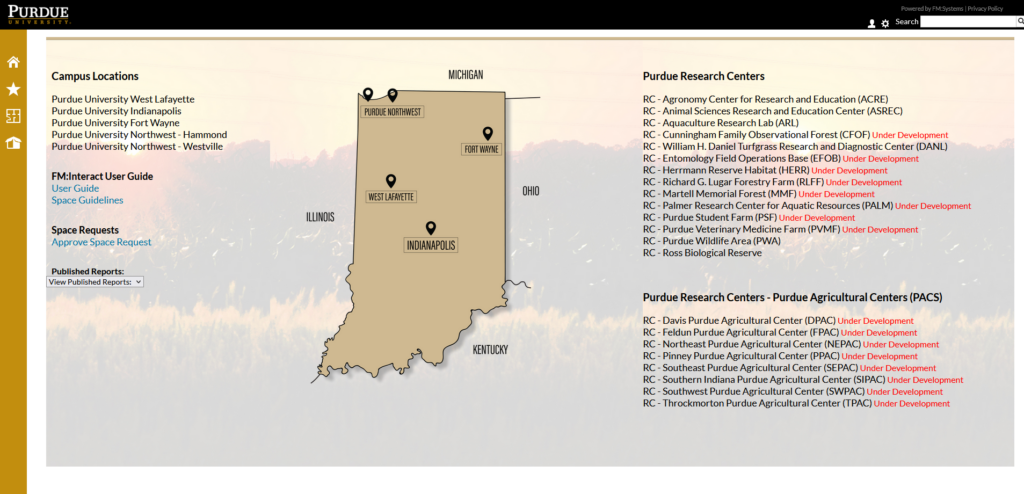
- The University’s space data and occupancy planning portal.
- Facilities management can be defined as the tools and services that support the functionality,safety, and sustainability of buildings, grounds, infrastructure, and real estate.
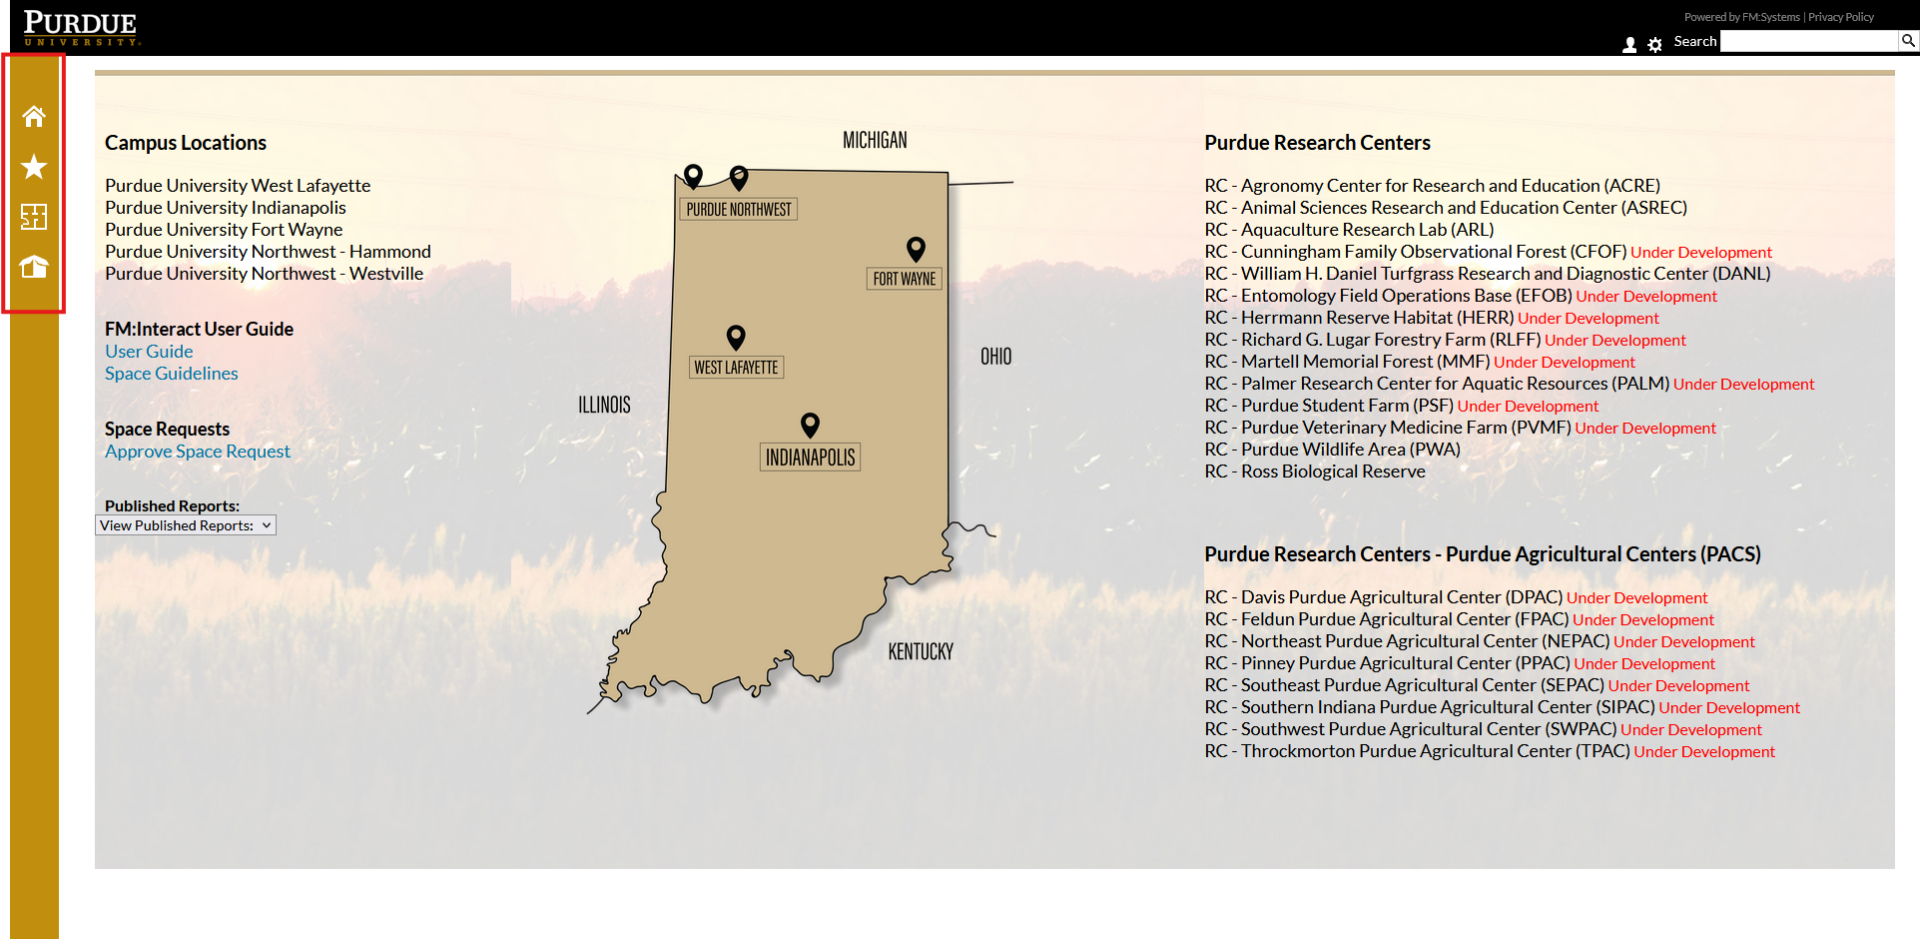
The left side toolbar consists of (from top to bottom)
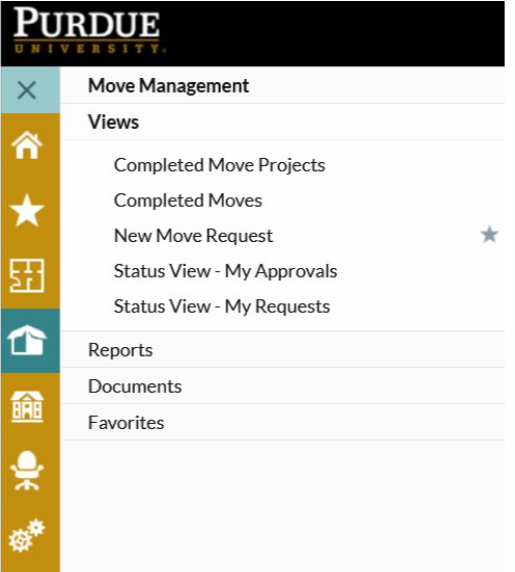
- Move Management: Used to notify changes of occupant’s locations in FM:S
- Home: Launching page to access building data and floor plans
- Favorites: List of favorite views and/or reports
- Space Management: Database of all campus building data, floor plans and reports
- Clicking on a campus site on the Indiana map will open a campus map for the selected campus.
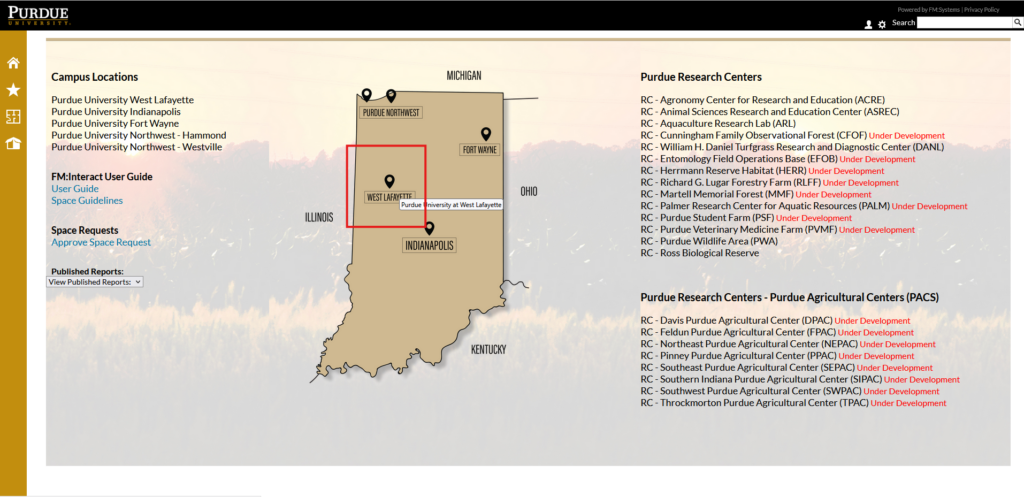
- Selecting buildings on the campus is linked to floor plans and data for that building.
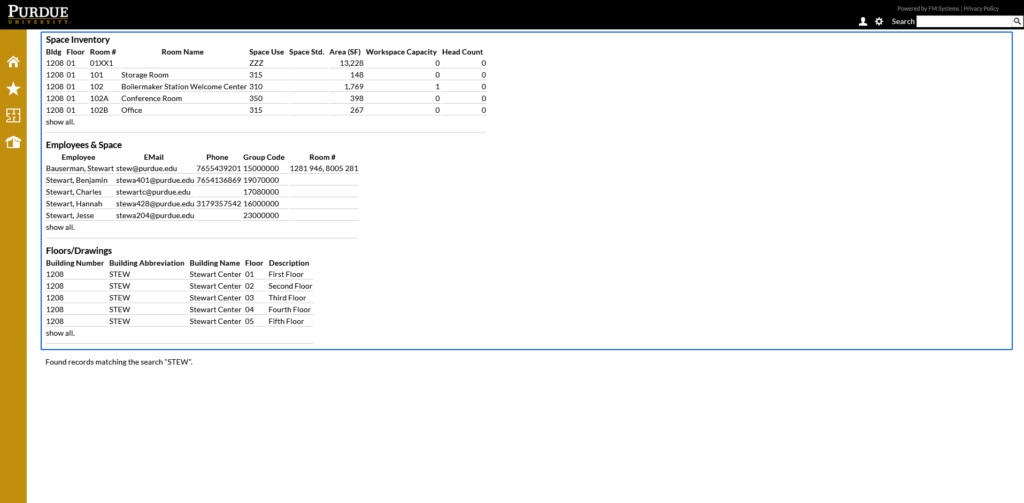
- Example: Click on STEW
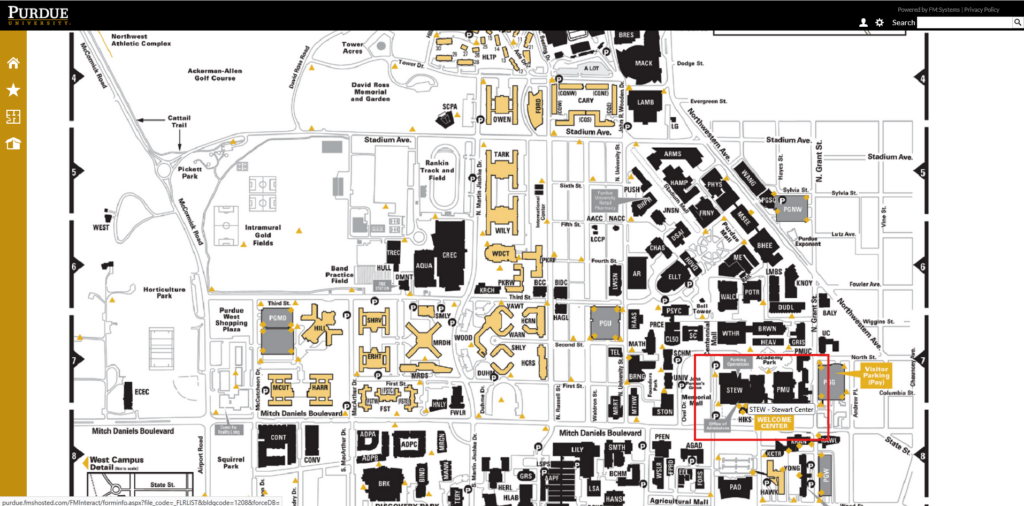
- Having selected STEW on the map, the building information screen will be displayed.
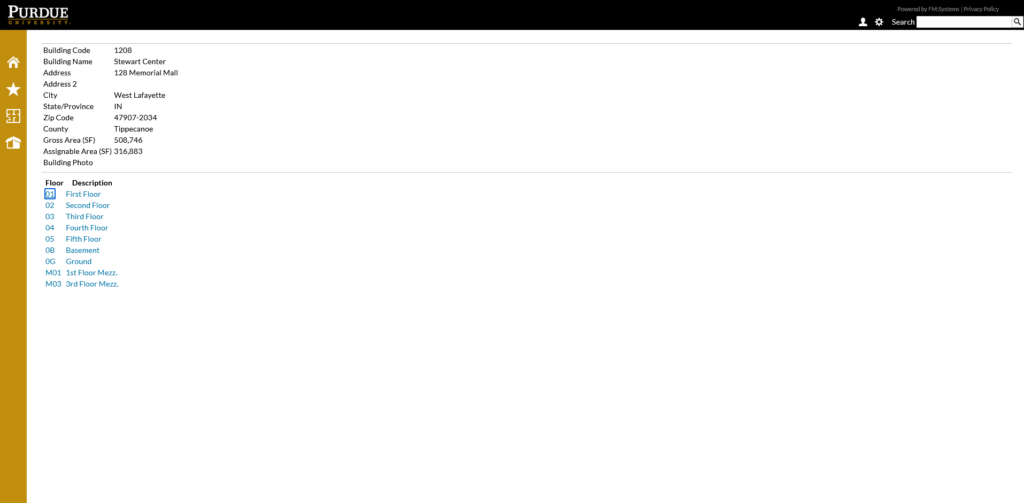
- In the Floor Description area, there is a list of floors that are linked to floor plans. Clicking on a floor will take you to that building’s selected floor plan.
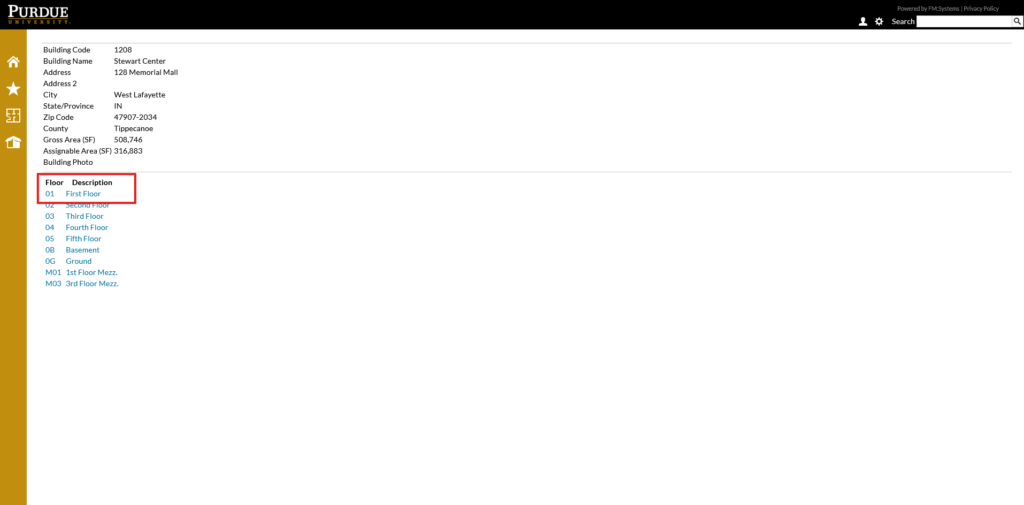
- Example: Click on First Floor
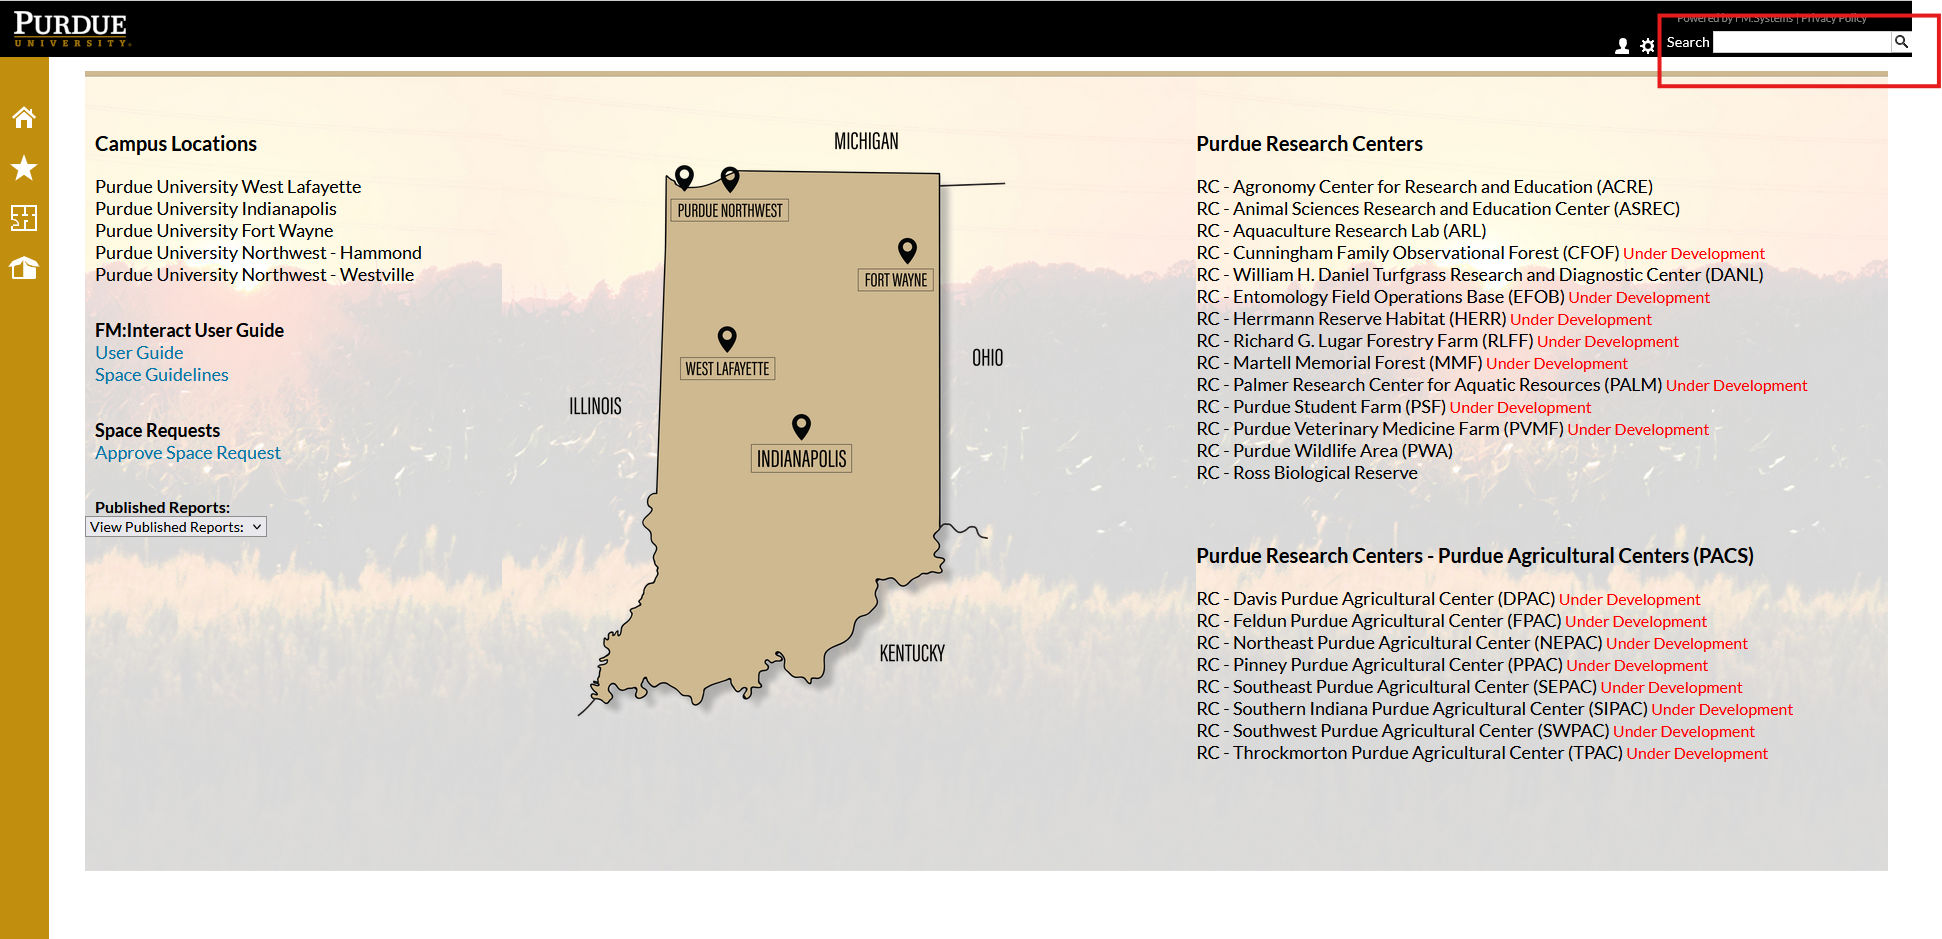
- Enter the building name, abbreviation, or SAP building number into the search bar.
- Example: Type STEW, then click Search
- This will bring up any information in one of three categories:
- Employee and Space information
- Space Inventory
- Floor/Drawings
- If you do not see the floor, you are looking for, please expand the list by clicking on the show all button at the bottom.
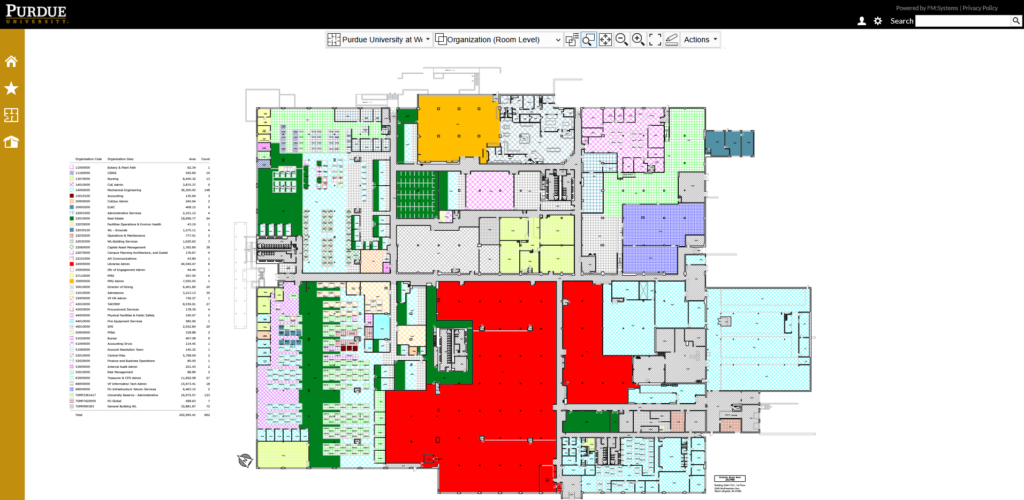
Space Management
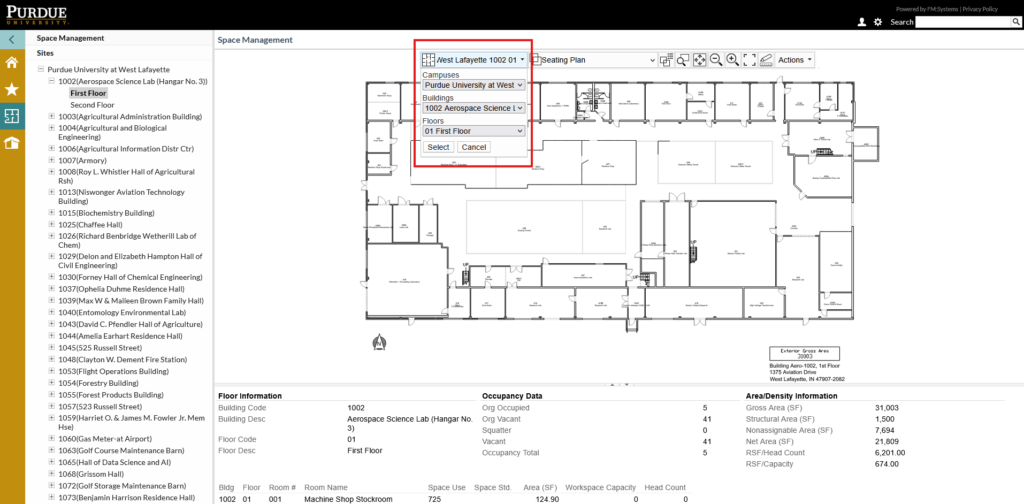
- The first drop-down menu at the top of the page allows you to change Floors, Buildings and Sites without returning to the main menu..
- Click on the inverted caret for drop-down menu.
- Select Campus > Building > Floor
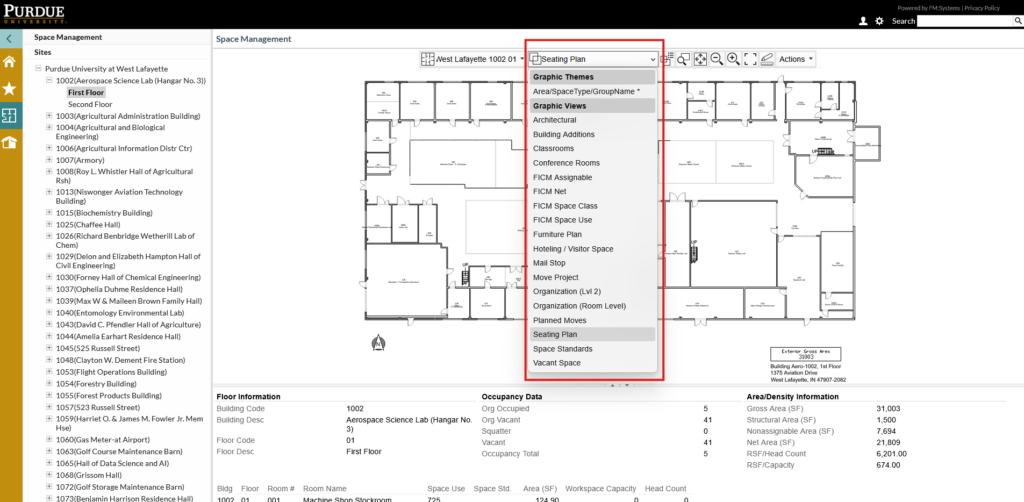
- The second drop down menu allows you to switch between Graphical Views.
- Click on the inverted caret for drop-down menu.
- Select floor plan type
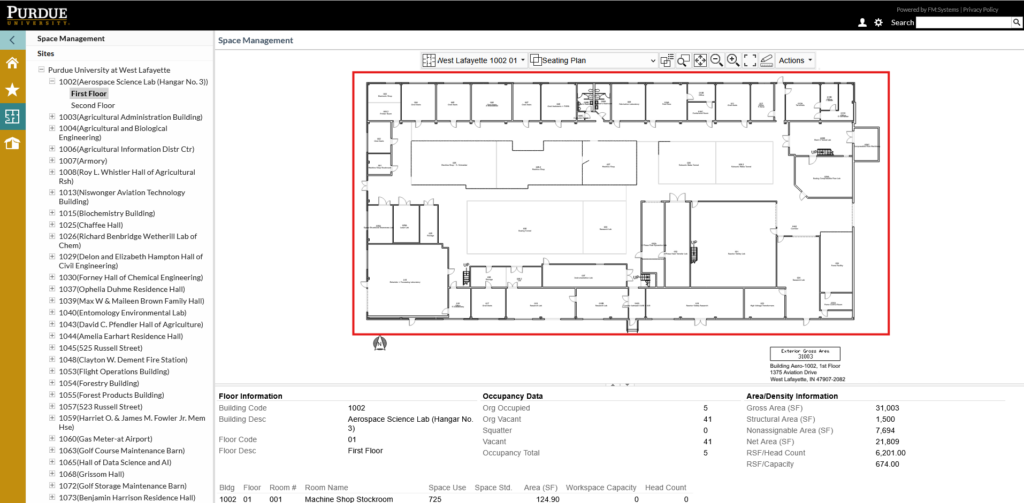
- Once a floor plan selection is made you will see the following:
- Visual Floor Plan
- Zoom in and out by using the mouse scroll wheel.
- Visual Floor Plan
- Window Split
- Hover over the thick gray line and pull it up or down to change the size of your windows.
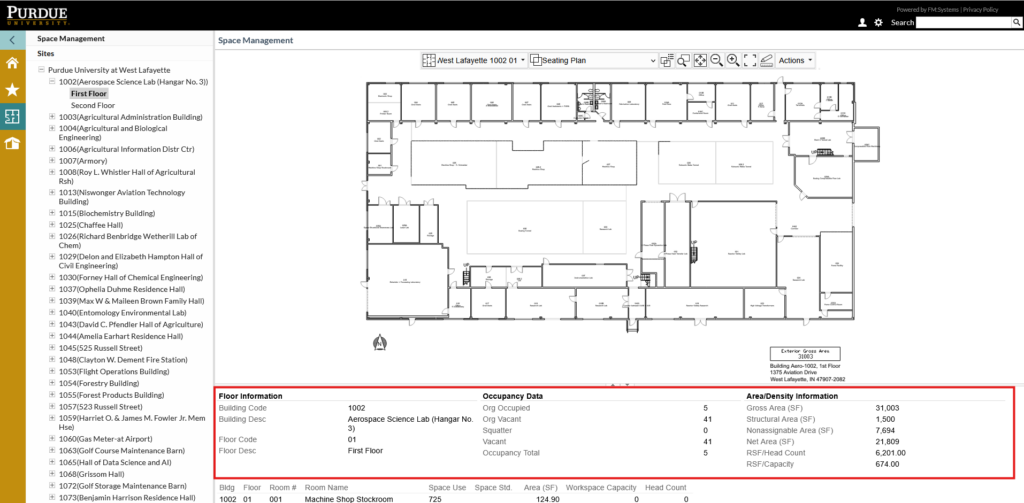
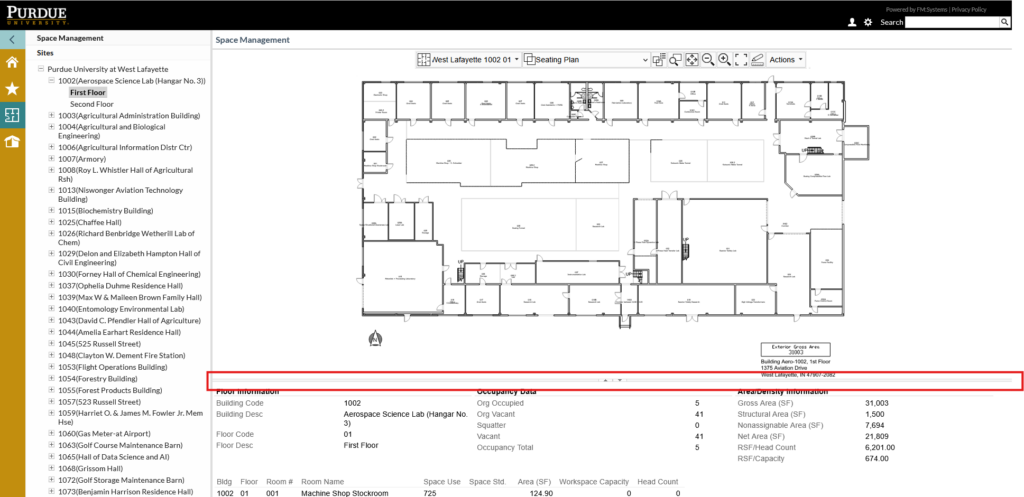
- Floor and Building Data
- Room Data
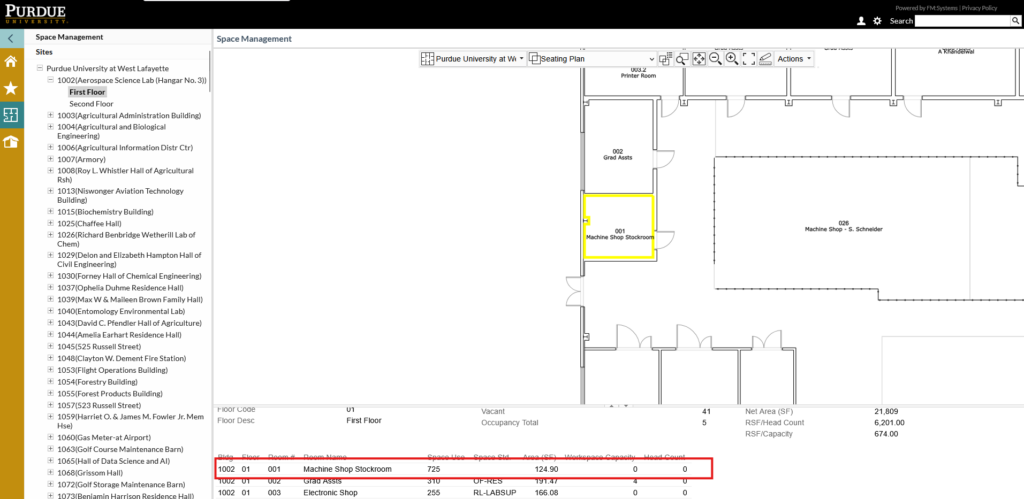
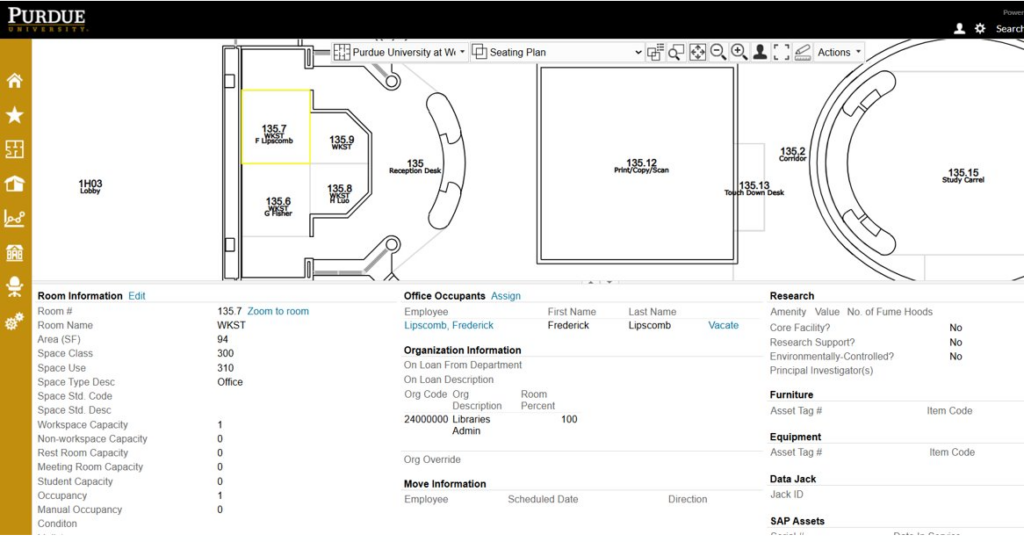
- Select a room by line.
- The specific room will be highlighted yellow in the visual floor plan.
- The following room data will be given
- Room information
- Office occupant
- Organization info
- Research specifics
- To deselect the room, left-click the room in the floor plan
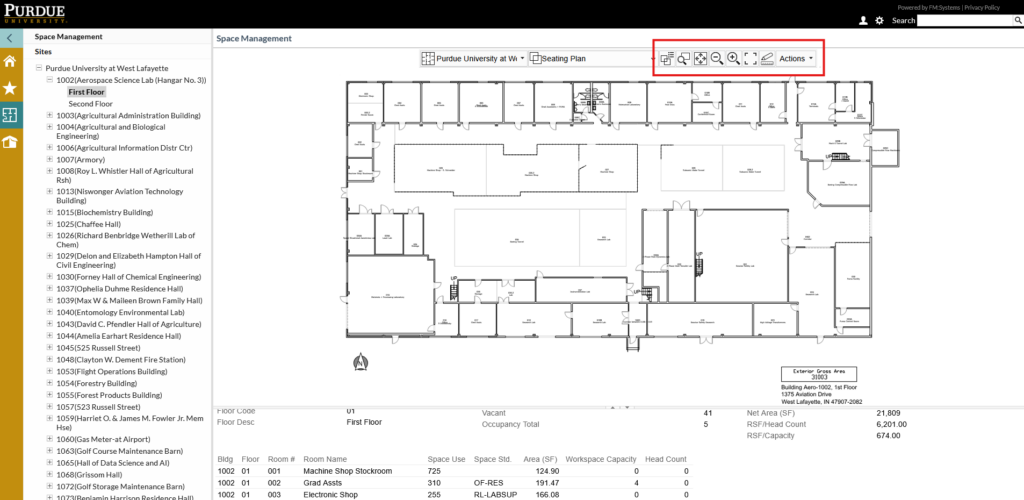
The following tools are available from left to right in the top floor plan toolbar:
- Multi-Selection Graphic Theme
- Zoom to Rectangle
- Fit to Window
- Zoom Out
- Zoom In
- Full Screen
- Floor Plan Markups
- Actions
The Floor Plan Markup tool is for reference only. Purdue & JLL FM:S are not liable for the accuracy of any measurements created by using these tools.
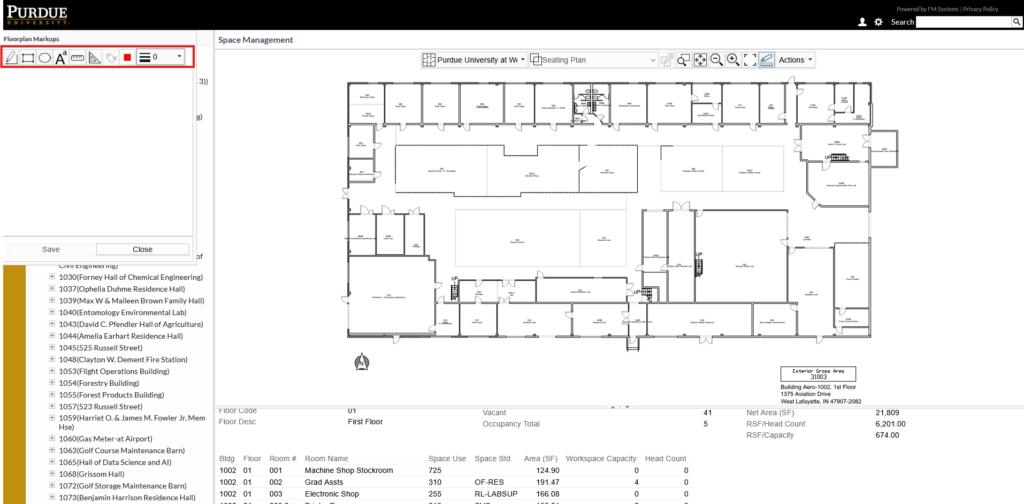
The following floor plan markup tools are available in the top navigation from left to right:
- Draw polyline.
- Draw rectangle
- Draw circle
- Add text
- Measure distance
- Measure area
- Line color
- Line weight
- Font & Size
- Rectangle information
Access the following actions by clicking the inverted caret next to Actions in the Floor Plan Toolbar:
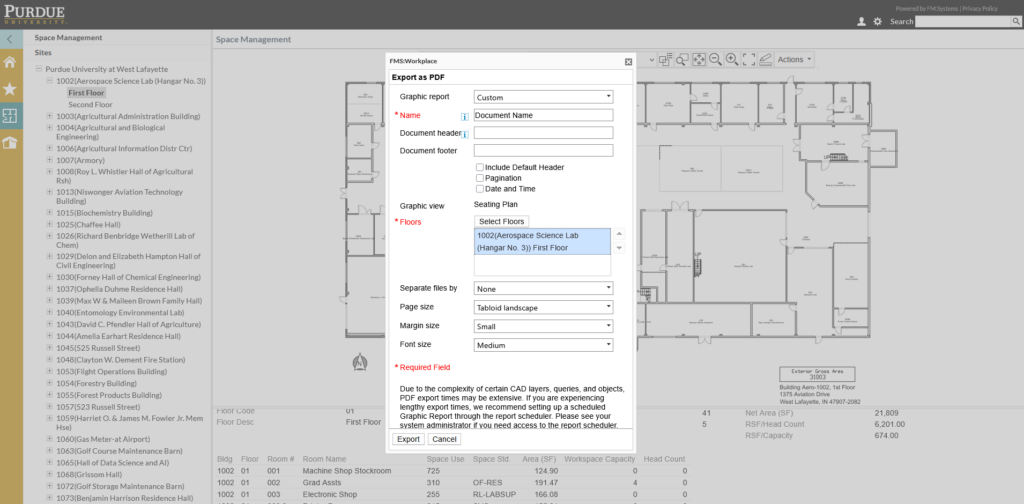
- Export as PDF
- Click on the inverted caret for drop-down menu.
- Click on Export as PDF.
- A drop- down window opens
- Name document (required * information)
- Click Select Floors
- Select additional floors
- Select additional buildings & floors
- Select page size.
- Tabloid 11×17 Landscape is preferred size.
- Select margin size.
- Small is preferred size.
- Click on Export
- Pop up box will show that the PDF is processing
- Downloaded PDF appears
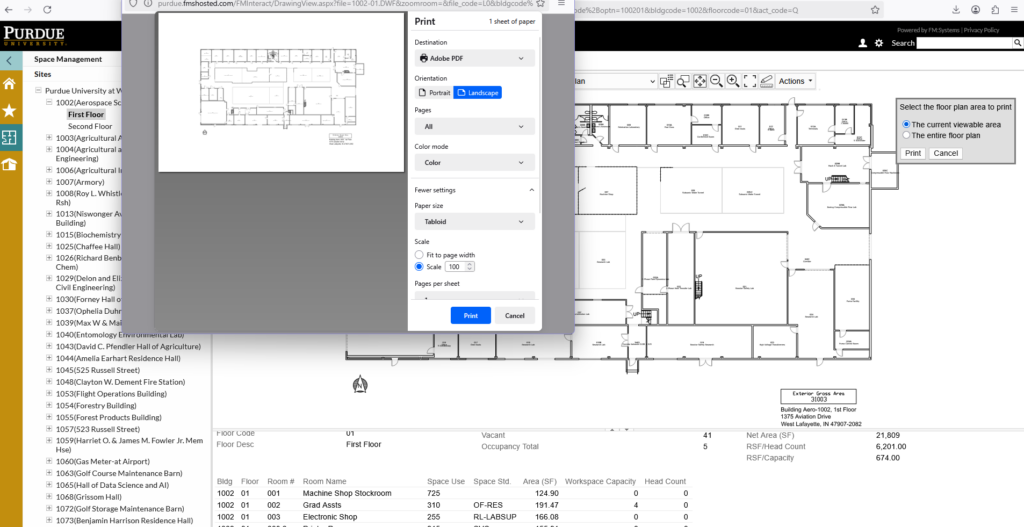
- Print
- Click on the inverted caret for drop-down menu.
- Click on PRINT.
- A drop- down window opens
- Select the floor plan area to print.
- Select PRINT.
- Select destination.
- Select Layout.
- Landscape is preferred layout.
- Select Paper size.
- Tabloid 11×17 is preferred size
- Select Margins.
- None or Minimal are preferred.
- Click SAVE.
- Downloaded PDF appears.
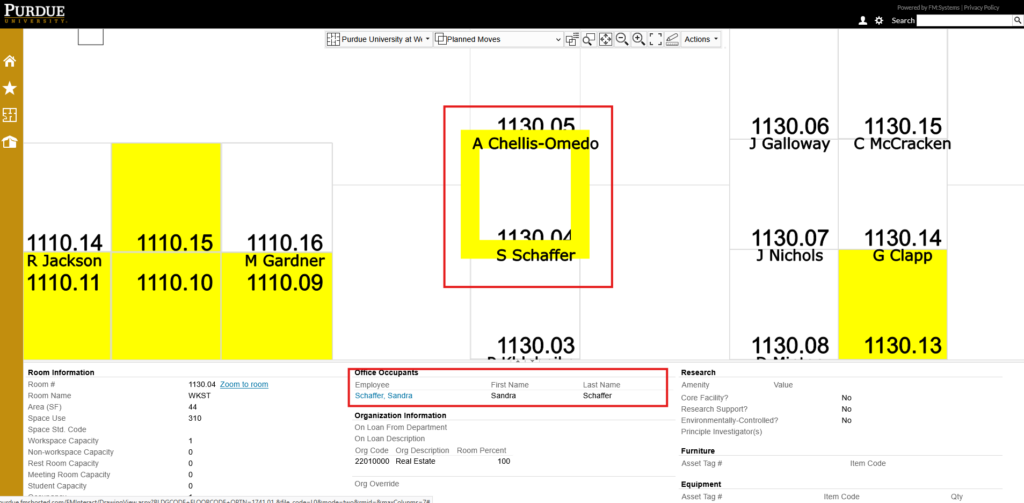
- Select a room in the floor plan.
- Room will highlight yellow.
- Employee information will show in the room information pane.
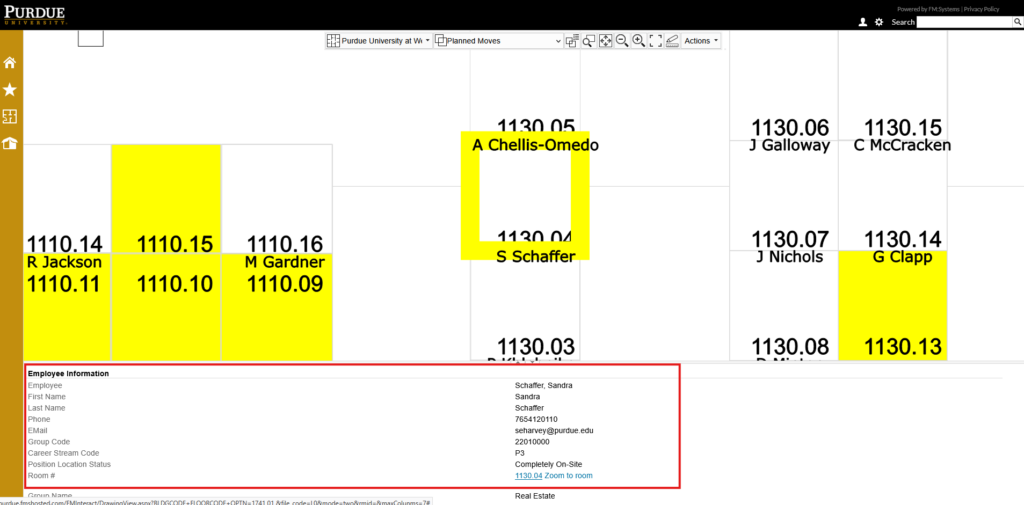
- Click on the blue hyperlink on the employee’s name.
- Employee information will be displayed: name, phone, email, group code, group name, and room number.
- Additionally, the Career Stream Code and Position Location Status will display.
- This can be used to identify appropriate space requirements for employees.
- Based upon the Purdue Space Guidelines,an employee with a P3 career stream and Completely On-Site should be provided a private workstation
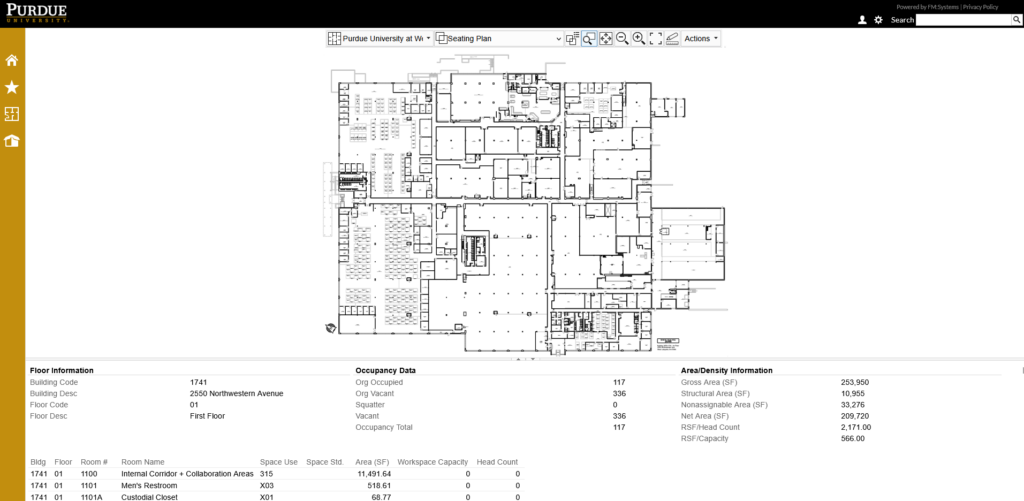
Key information displayed:
- Room number
- Room name
- Office or Workstation assignment

Key information displayed:
- Legend (By Floor)
- Highlights empty rooms or rooms under occupant capacity.
- Grad Student spaces appear as vacant because we do not assign offices or workstations to specific graduate students.
- If the workspace capacity is greater than the number of occupants listed, the room will be highlighted.
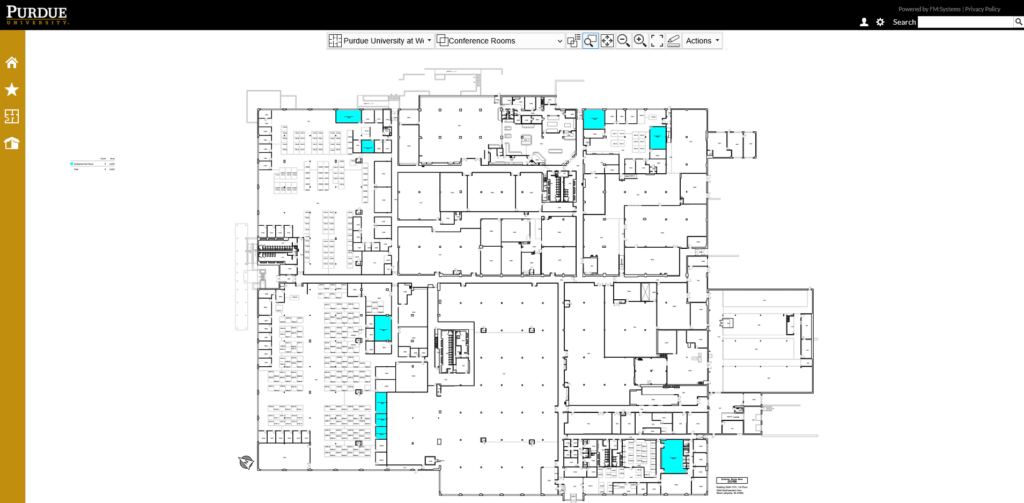
Key information displayed:
- Highlights Conference Rooms in blue
- Legend (By Floor)
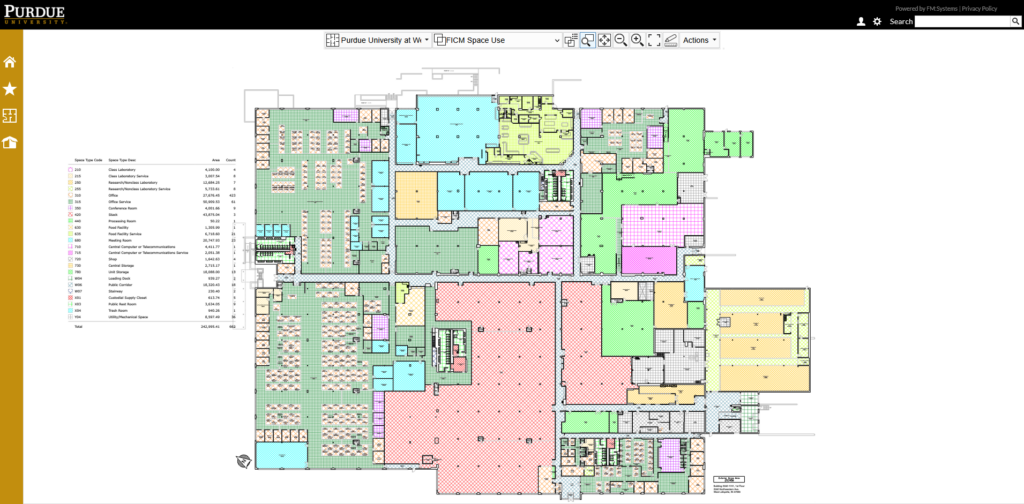
Key information displayed:
- Color codes the spaces by FICM code.
- Legend (By Floor):
Key information displayed:
- Color codes the spaces by department using.
- Legend (By Floor):
Reports
The 1.40 report provides details for each room including room name, department using the room, department the room is on loan from (if needed), space use code and category, organizational level, occupant capacity, assignable square feet (ASF) and employee’s name.
If many updates are needed to be made to a building or floor, you can also use this format to submit to occupancy planning a large quantity of changes.
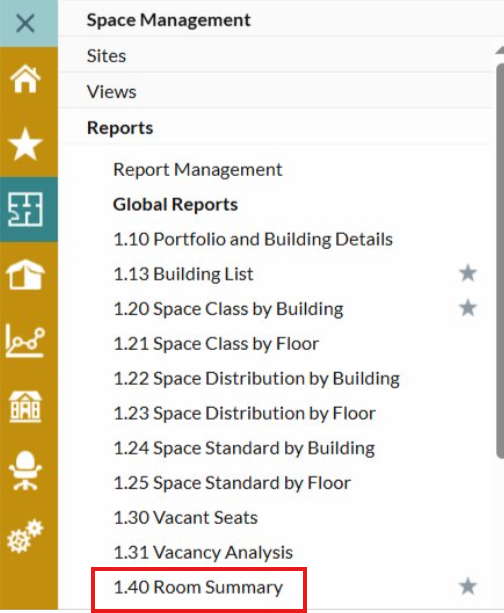
- Click on the Space Management icon located on the navigation tree.
- Select Reports from the list of options under Space Management.
- Select 1.40 Room Summary from the drop-down list under Global Reports.
Once you have navigated to the 1.40 Room Summary, do the following:
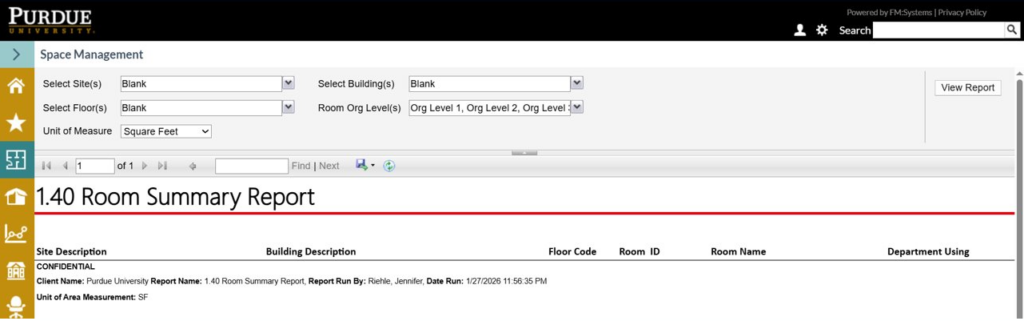
- Select SITE. (Indianapolis is included in the West Lafayette list)
- Select BUILDING(S)
- Select FLOOR(S)
- Select ORG Levels (Levels 1, 2, 3 by default)
- Click VIEW REPORT.
- Data will appear in lower pane.
- Select EXPORT to transfer data to your preferred application. EXCEL & CSV are most user-friendly.
Cognos is the authoritative reporting tool for the university.
- Access Cognos via https://one.purdue.edu/ or https://reporting.purdue.edu/bi/
- Click on the following path to navigate to FMS reports:
- Team Content > Departmental Content > PWL > President > Administrative Operations > Auxiliary Services > FMS
- FM:S reports will display. Not all reports will be available for your use.
- Report: Room Summary Details (1.40) provides the most information about all spaces.

- To generate the Room Summary Details (1.40) report, select report ROOM SUMMARY DETAILS (1.40)
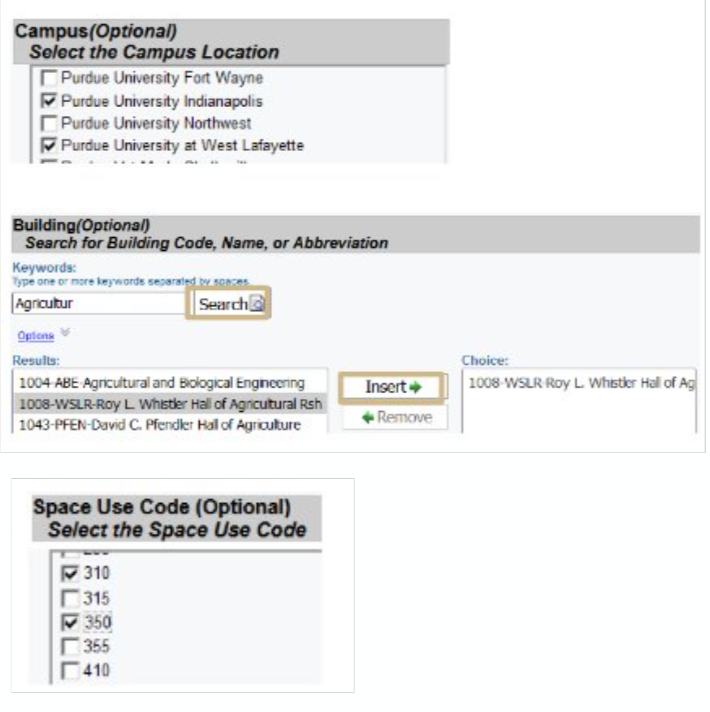
- Select filters as needed to achieve desired results.
- Campus
- Building – Code, Name, Abbreviation.
- Select building.
- Select INSERT.
- Space Use Codes.
- Submit request.
- Export to Excel, CSV, PDF, etc.
Using the “Move Request” function of FM:S alerts Occupancy Planning that an employee is changing locations, for updating FM:S purposes. Departments will need to coordinate the actual physical move of the faculty/staff/students being moved.
To see a list of all Move Requests you have submitted:
- Click on the Move Management icon located on the navigation tree.
- Select Views from the list of options under Move Management.
- Select Status View – My Requests. Search for your requests.
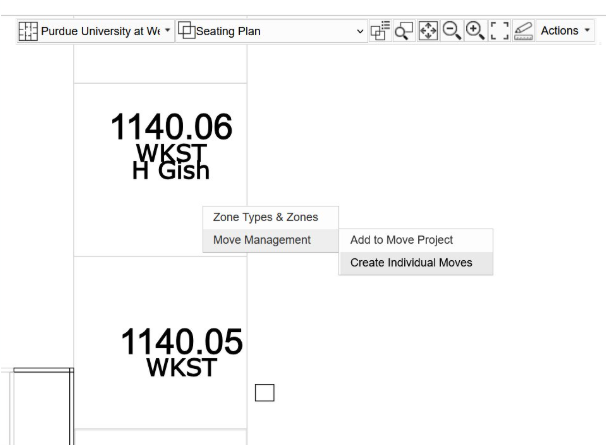
- Start on floor plan of building (Seating Plan view is fine)
- Hover mouse over room where the employee is to be removed.
- Right click on the room (pop-up will appear) select Move Management.
- Click on Create Individual Moves.
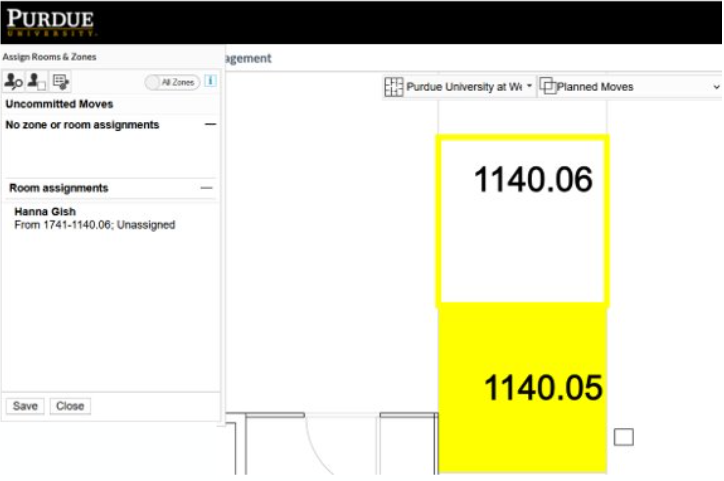
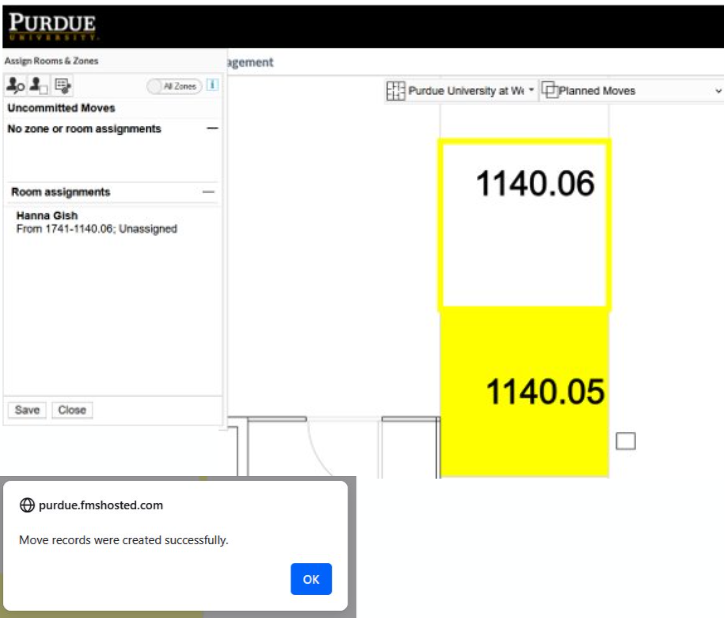
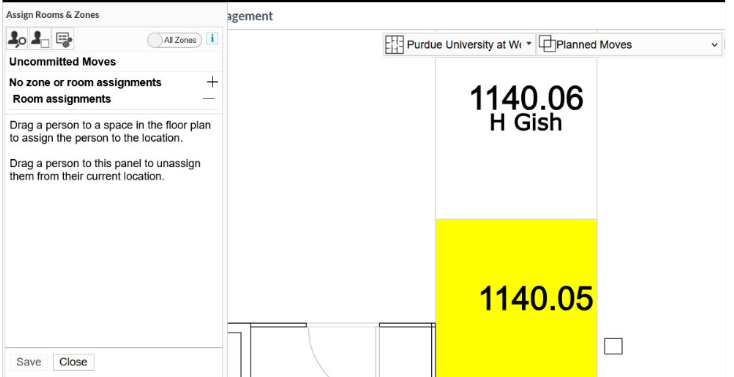
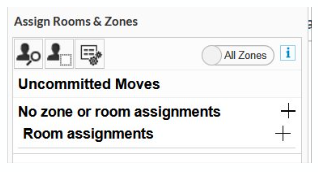
- A pop up will open Assign Rooms & Zones.
- The name of the occupant has been removed from room.
- The name of the occupant will appear in the lower box. Click on the name in the box.
- With the mouse, drag the name from the box to their new location (release your finger to drop the name in the room).
- The From and To location appears under the name.
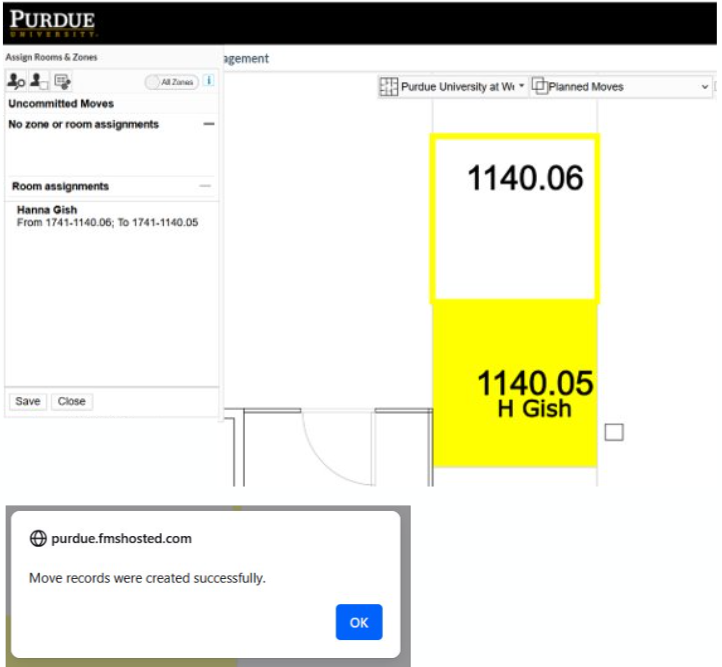
- Click SAVE
- Pop up appear. Click OK.
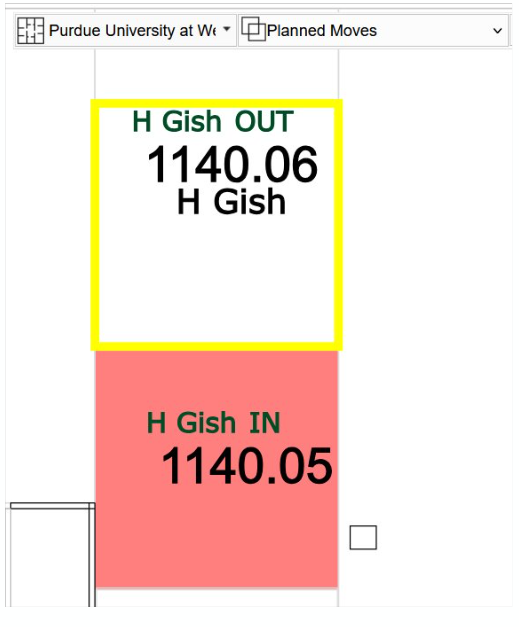
- Text ‘H Gish OUT’ appears in room moving FROM.
- Text ‘H Gish IN’ appears in room moving TO.
Last Steps to be completed by Occupancy Planning:
- Occupancy Planning will review and process Move Request.
- Occupancy Planning will receive notice of Move Request.
- Start on floor plan of building (Seating Plan view is fine)
- Hover mouse over room where the employee is to be removed.
- Right click on the room (pop-up will appear) select Move Management.
- Click on Create Individual Moves.
- A pop up will open Assign Rooms & Zones.
- The name of the occupant has been removed from room.
- The name of the occupant will appear in the lower box. Click on the name in the box.
- Click SAVE.
- Pop up appear. Click OK.
Last Steps to be completed by Occupancy Planning:
- Occupancy Planning will receive notice of Move Request.
- Occupancy Planning will review and process Move Request.
- Start on floor plan of building (Seating Plan view is fine)
- Hover mouse over room where the employee is to be added.
- Right click on the room (pop-up will appear)select Move Management.
- Click on Create Individual Moves.
- Room to be assigned is highlighted yellow.
- A pop up will open Assign Rooms & Zones.

- To search for individual. Click icon.
- A pop up will open.
- Enter text. Click Search.
- Click Advanced Search Mode. If option ‘a’ does not show results.
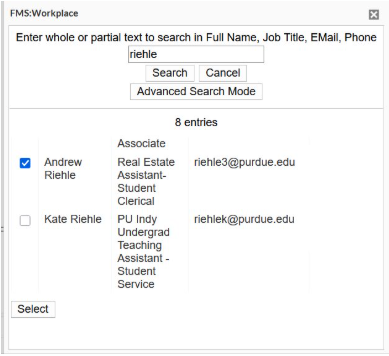
- Search Results pop up.
- Select individual
- Click Select.
- Go back over to Assign Rooms & Zones pop up.
- NOTE: The name you selected is NOT visible at this moment.
- Click + next to ‘No zone or room assignments’
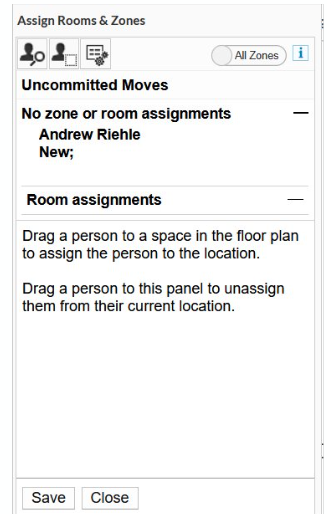
- You will now see name you selected.
- ‘NEW’ below the name, indicates this individual is not currently assigned to a room in FM:S.
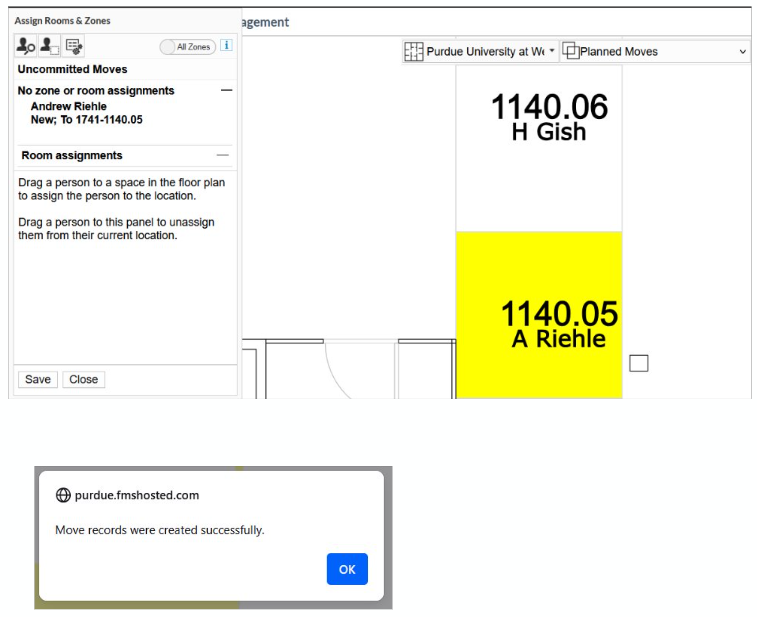
- With mouse, drag the name from to the box to their new location (release your finger to drop the name in the room).
- The To location appears under the name.
- Click SAVE
- Pop up appear. Click OK.
Last Steps to be completed by Occupancy Planning:
- Occupancy Planning will receive notice of Move Request.
- Occupancy Planning will review and process Move Request.
Update room data in FM:S
To update data in FM:S, send an email with information to be updated to occupancyplanning@purdue.edu.
- Updated room or workstation number.
- Update some or all room data.
- Update occupants, Purdue HR issued email address is required for any updates.
- Update department owning and/or department On-Loan From.
- Update research amenities and/or PI.
If you have questions, contact occupancyplanning@purdue.edu
- Taj’Sheed Wilkins ‘Taj’ | tswilkin@purdue.edu
- Josie Galloway | josejose@purdue.edu
- Sand Schaffer | seharvey@purdue.edu
- Haranadh Reddy ‘Ravi’ | hrravi@purdue.edu
- Jennifer Riehle | riehle0@purdue.edu
- Peter Khlebnikov | pkhlebni@purdue.edu