How do I set up weighted grades in Brightspace?
Weighted grades allow you to assign percentages to certain grade categories or individual items within Brightspace. Unlike points, weighted grades can allow you to place a higher value on certain categories of grades in the overall evaluation of learners.
Determine Grading Categories and Weights
Determine the grading categories you will use for your class and the weighting you will assign. The total must be equal to 100%. For example:
Assignments 30%
Tests 40%
Quizzes 20%
Final Exam 10%
You may also include individual non-categorized items; for example, if you have a Final Exam worth 10% of the total grade, that can be set as 10% on its own without being considered part of any category.
Set Gradebook To Use Weighted Grades
- Login to Brightspace and open the class where you want to set up weighted grades.
- From the course navigation bar, click Grades.

- Click Settings near the top-right.

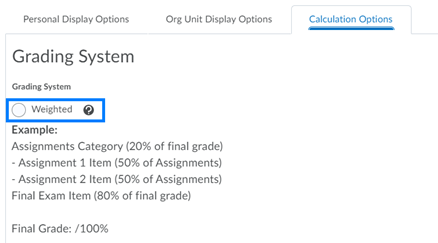
- The Personal Display Options screen will open. Click the Calculation Options tab.

- Click the Weighted option and click Save.
- Click Yes on the pop-up boxes to confirm the changes. Your gradebook is now set to use weighted grades.
- Click the Close button at the bottom of the screen to return to the gradebook.
Add Categories And Weights To Gradebook
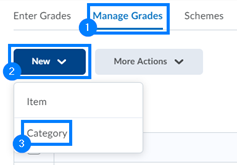
- In the Gradebook, click the Manage Grades. Click New and select Category from the drop-down.
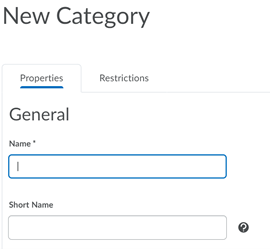
- On the New Category screen, enter a name for the category.
- Scroll down to the Grading section:
- Enter the weight for the overall category in the Weight text box. You may optionally choose to allow the weight to exceed the total for the column if you use any bonus within the category.

- In the Distribution area, select how you want individual grade columns assigned to the category weighted within the category itself:
- Manually assign weight to items in the category: Allows the choice to assign a percentage to individual grade columns assigned to the category. The total percentages to the individual grade columns must equal 100%.
- Distribute weights by points across all items in the category: If individual items within a category have different point values, those with higher point values will be given more value than those with lower values.
- Distribute weight evenly across all items: Regardless of the number of items assigned to the category, each item will have the same weight. If you have two items within the category, regardless of points they’ll be worth 50% each of the value of the category. If you have 10 items, they’ll be worth 10% each of the value of the category. This option also gives you the option to drop a specified number of highest and lowest scores for each user.
- Enter the weight for the overall category in the Weight text box. You may optionally choose to allow the weight to exceed the total for the column if you use any bonus within the category.
- Click Save and Close to finish your work on the category or click Save and New to create a new grading category with weights.

PLEASE NOTE: You may choose different distributions for your categories. For example, you can manually assign weights to items in one category and distribute weight evenly across all items in another category.
Create An Item Within A Weighted Gradebook
- In the Gradebook, click the Manage Grades tab.

- Click New and select Item from the drop-down.

- Choose the type of column you would like. In this example, the Numeric option is being used.

- Type in the name for your item.
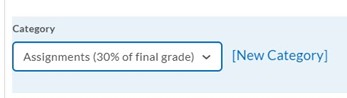
- If your item will be part of a category:
- In the Category drop-down, select the category for the item.
- Type in a description for the column (optional).
- In the Maximum Points area, enter the total possible points for the item.
- If you are individually weighting each item within the category with the Manually assign weight to items in the category option, enter the percentage weight for the column. Otherwise, this field will be disabled.
- If you will allow this column to exceed the maximum points, check the Can Exceed option. If this is for Bonus Points only, check the Bonus option.
- You may then change the scheme or add a rubric.
- Click Save and Close if you are done or Save and New to create and move on to a new item.
- In the Category drop-down, select the category for the item.
- If your item will stand alone and be weighted separately:
- Leave the Category drop-down set to None.
- Enter a description for the column (optional).
- In the Maximum Points area, enter the total possible points for the item.

- In the Weight text box, enter the percentage that this column will be worth for the overall course grade.

- If you will allow this column to exceed the maximum points, check the Can Exceed If this is for Bonus Points only, check the Bonus option.
If this is a standalone weighted column, it is not recommended to check the Bonus option. - If you will allow this column to exceed the maximum points, check the Can Exceed If this is for Bonus Points only, check the Bonus option.
- You may then change the scheme or add a rubric.
- Click Save and Close if you are done or click Save and New to create your item and move on to a new item.
Review Weighting
- From Grades, click the Manage Grades tab.

- Review your weighting scheme.

If there are any issues, Brightspace will include a notification at the top of the screen. If you plan on adding items through the term, you may ignore the notification, but you will need to fix any issues by the end of the term to generate an accurate final grade.
Last Updated: 3/3/2022