How do I create a group discussion in Brightspace?
This guide will go over how to:
- Create a group
- Create a discussion forum
- Create a discussion topic
- Add discussion to content module
Create Groups
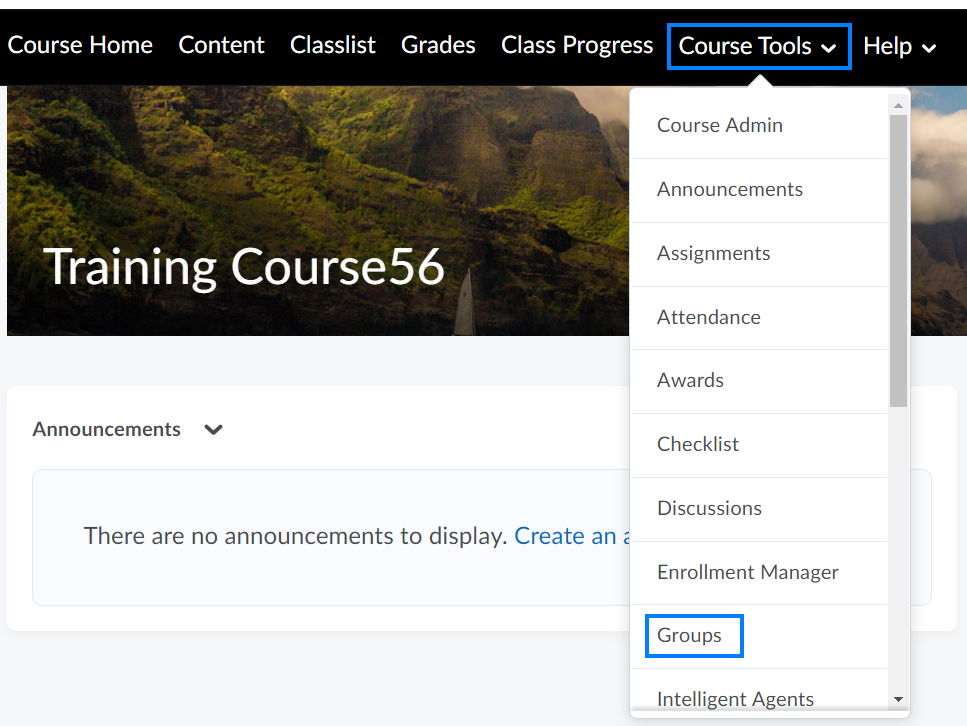
- From the course navigation bar, click Course Tools and select Groups from the drop-down.
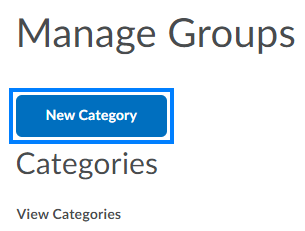
- Click New Category. This category will house the individual groups.
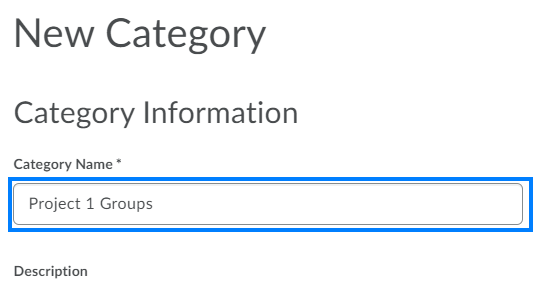
- Enter a name for the group category (i.e. Project 1 Groups). Multiple group categories can be created in a Brightspace course.
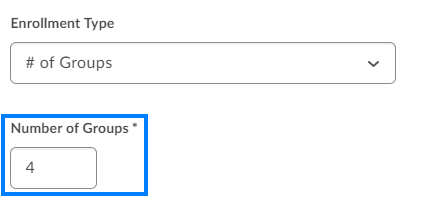
- Click the Enrollment Type drop-down and select the desired enrollment type.
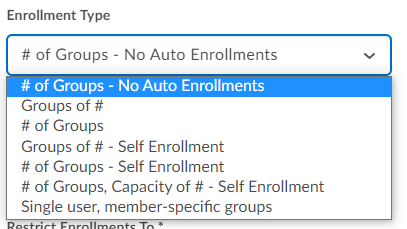
- If you would like to manually assign students to groups, choose # of Groups – No Auto Enrollments.
- If you would like Brightspace to automatically assign students to the groups, we recommend choosing either the Groups of # or # of Groups.
- Enter the desired number of groups or users. This option will depend on your previous selection. If you chose the Single user, member-specific groups enrollment type, you will not see this option.
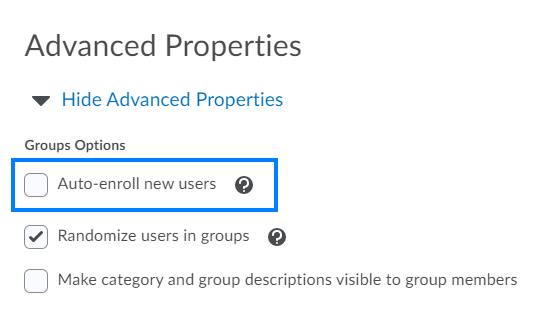
- If you previously chose either the Groups of # or # of Groups option, we highly recommend checking the Auto-Enroll new users option under Advanced Properties. With this option checked, anyone who adds your course after these groups are created will be automatically distributed into a group without any work on your part.
- Click Save when finished.

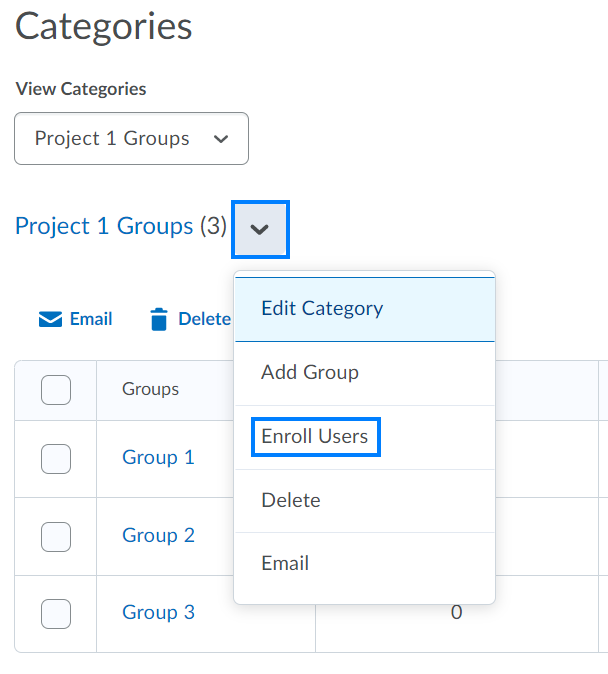
- If you previously chose the # of Groups – No Auto Enrollments option, click the drop-down to the right of the category you just created and select Enroll Users from the drop-down. From here, you can assign students to particular groups.
Create A Discussion Forum
Discussions in Brightspace consist of forums, topics, and threads; threads are further broken down into posts and replies.
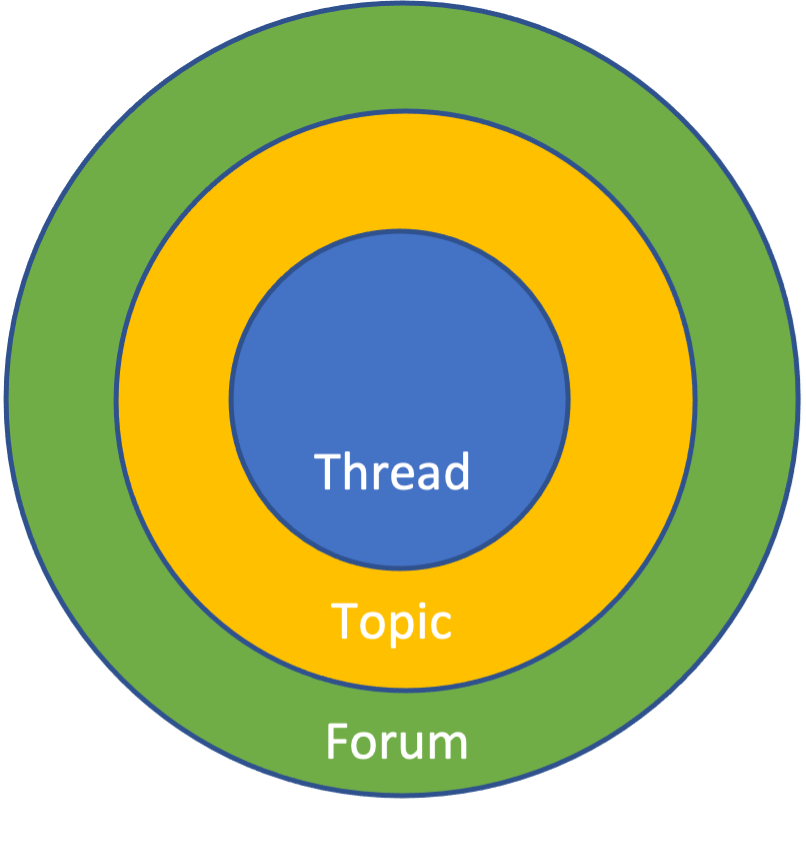
- A forum can be thought of as container in which discussions are organized. An empty forum does not allow students any way to participate. It must have topics inside of it for discussion to take place.
- A topic is where the discussion prompt will reside and where the conversation will take place through threads.
- A thread is created when an instructor, teaching assistant, or student initiates discussion per the original prompt; this initial entry and each individual reply are referred to as posts in Brightspace.
An example of this structure might look like a “Weekly Reading Reflections” forum containing a different topic for each of the weekly readings. Within a topic, students would create threads to post their original response to topic prompt and would create replies to respond to the threads of their peers.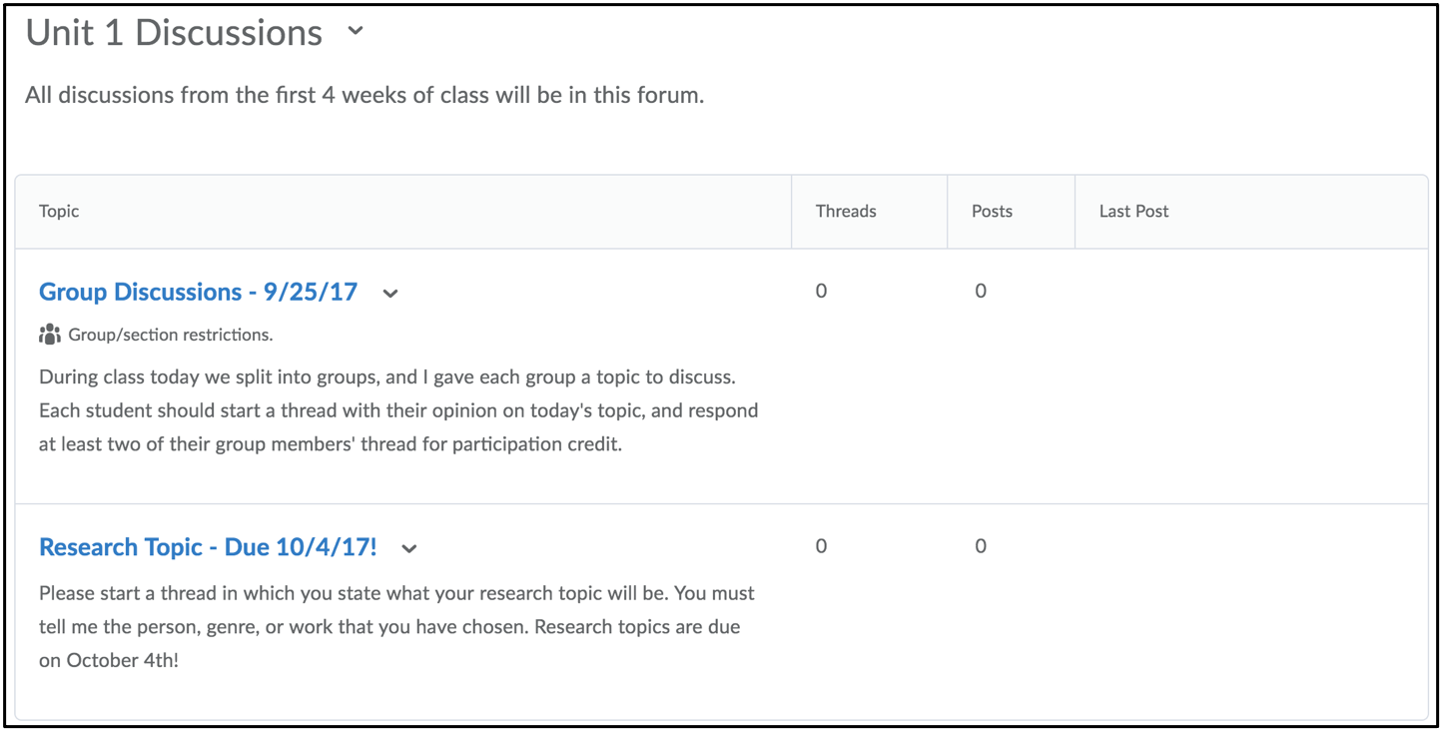
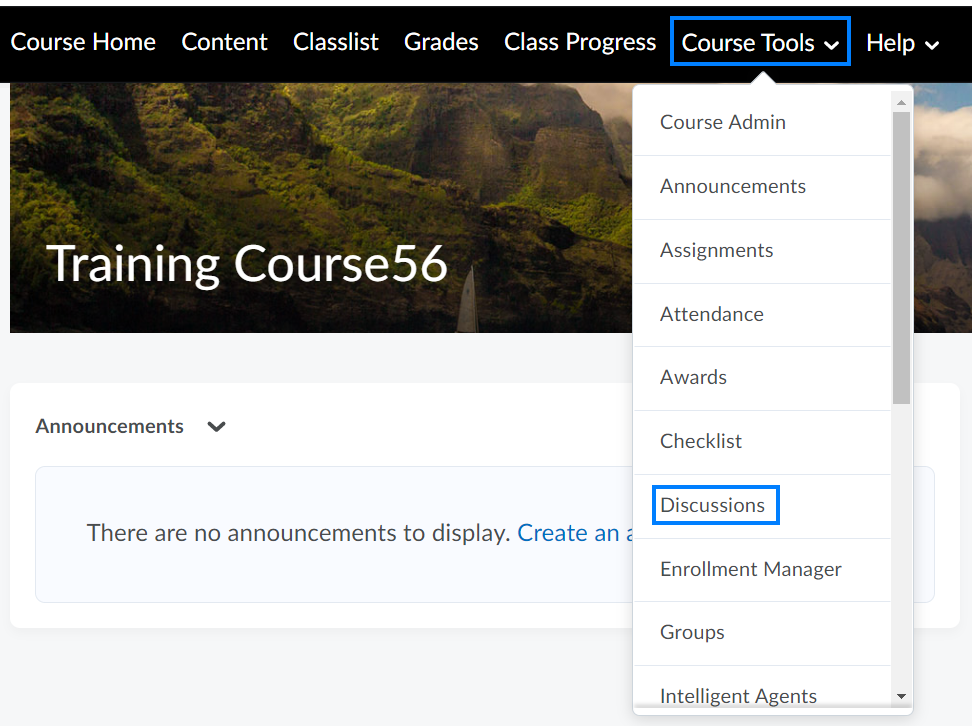
- From the course navigation bar, click Course Tools and select Discussions from the drop-down.
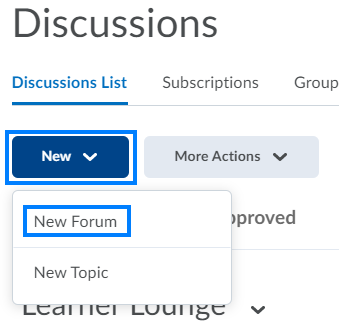
- Click New and select New Forum from the drop-down.
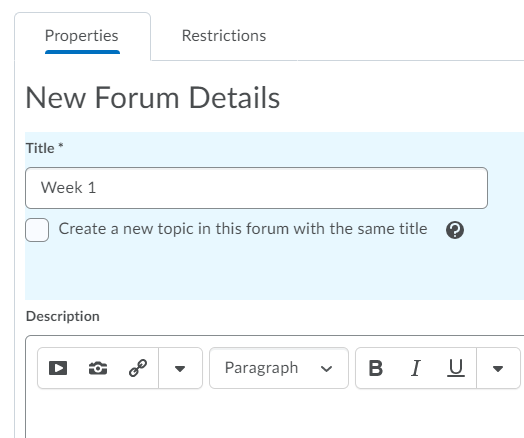
- Enter a Title for the forum and, optionally, a Description.
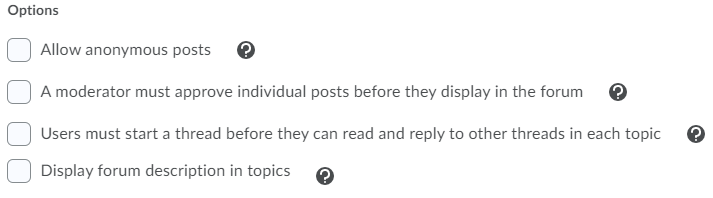
- Scroll down and review the forum Options. Options set at the forum-level will apply to topics within the forum. Similar options will be available at the topic-level when creating individual topics.
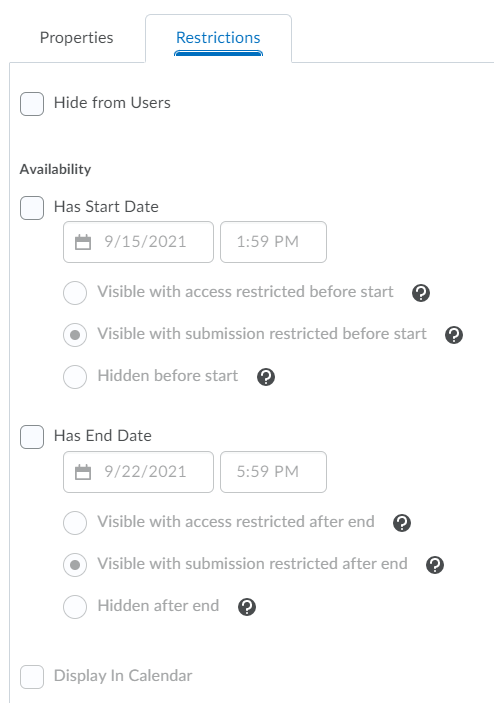
- Click the Restrictions tab to review the availability of the forum. Similar options will be available at the topic-level when creating individual topics. When finished, click Save and Close.
Create A Discussion Topic
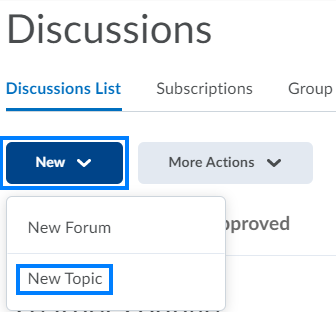
- Navigate to the Discussions, click New and select New Topic from the drop-down.
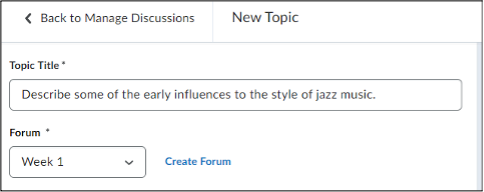
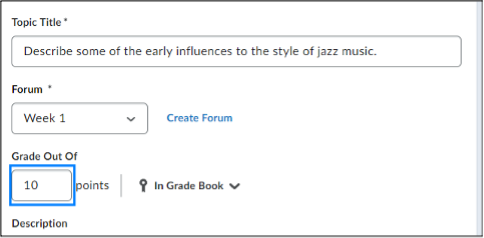
- Enter a Topic Title and select the Forum that will house the topic you are creating or click Create Forum to create a new forum for the topic.
- If the discussion will be graded, click within the Grade Out Of box and enter the point value of the discussion. An In Grade Book indicator will appear confirming a grade item for this discussion has been added in the grade book.
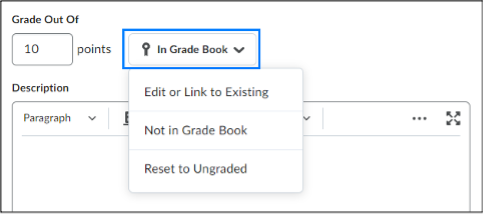
- Optional: Click the In Grade Book indicator and select one of the following:
- Edit or Link to Existing - to edit the newly created grade item properties such as category or connect to an existing grade item previously created in the grade book.
- Not in Grade Book - to associate a point value with this discussion that will not be included in the grade book.
- Reset to Ungraded - to remove all scoring
- Optional: Add a Description. The description is typically used to indicate to students what criteria should be included in their responses to the prompt and/or the question prompt itself.
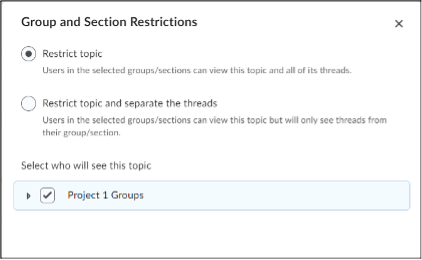
- Click Availability Dates & Conditions at the right side of the screen to review the availability of the discussion topic. Then select Manage Restrictions to set up the discussion as a group discussion.

- Click the group topic type and select the appropriate group category.
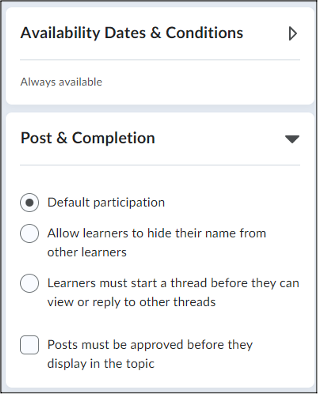
- Select your preferred options from the Post & Completion area below Availability Dates & Conditions.
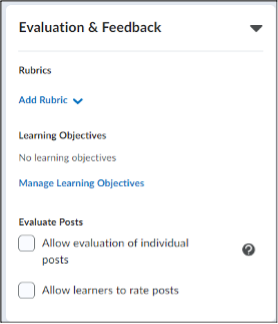
- From the Evaluation & Feedback area below Post & Completion, you can add a rubric by creating a new rubric or selecting an existing one.
- When you are finished, click Save and Close. The topic will display within the designated forum in the discussion list. NOTE: The default student visibility for new topics is "Visible"; you can toggle the slider to the right of the Cancel button to hide the topic.

Add The Discussion To A Content Module
The Discussions area under Course Tools lists all of the discussions in the course. You can insert them into any Content module to list them with related content.
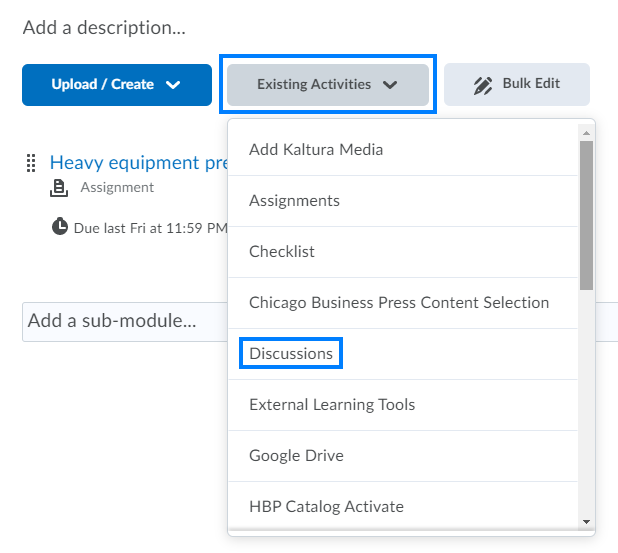
- From the course navigation bar, click Content and navigate to the module location where the discussion should reside.
- Click Existing Activities and select Discussions from the drop-down.
- Locate and click the discussion forum in which the topic resides.
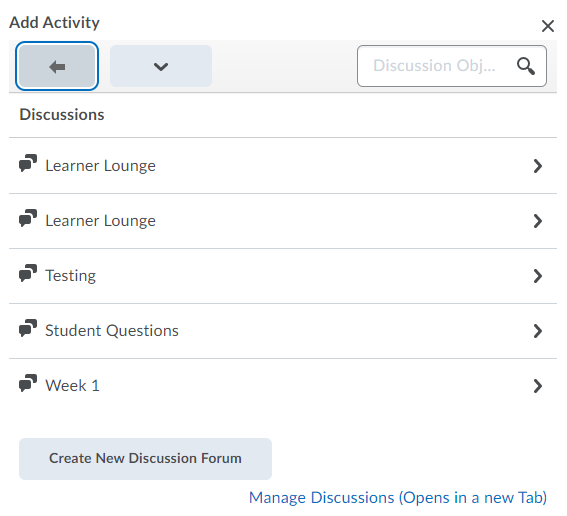
- Click the name of the discussion topic you would like to insert.

Last Updated: 12/21/2023