Learning Objectives
From reading and studying this chapter, you should be able to:
- Understand the Benefits of Professional Design
- Understand the Series of Steps Involved in the Landscape Design Process
- Customer Contract/Interview
- Base Sheet
- Site Inventory and Analysis
- Programming/Functional Diagrams
- Preliminary Design/Conceptual Design
- Master Plan
- Gain an Appreciation for Landscape Design Fundamentals
- Graphics and Drafting Techniques
- Principles of Landscape Design
- Planting Design Fundamentals
Introduction
This chapter deals with landscape design. It will review the importance of professional landscape design, outline the landscape design process (the procedure for preparing a landscape design solution) and discuss the fundamentals of a successful landscape design. This is only a brief overview and is not intended to prepare you for professional practice in design. It is, rather, a brief survey to give you a basic understanding of the terminology, process, and characteristics of design so that you are better able to collaborate with professional designers. Moreover, as a professional landscape contractor with an appreciation for design, you will be better able to construct and maintain designed landscapes.
What is Landscape Design?
Landscape design is the art of creating a functional and aesthetically pleasing outdoor environment for human use. It is the process of identifying the opportunities and constraints of a site, taking advantage of the opportunities, solving problems, and mitigating conflicts by creating workable solutions.
A successful landscape design is accomplished through a series of important steps, each an important part of an overall design process. Working through this process requires an understanding of design principles, as well as a fair amount of creativity. Ideas are presented through drawings which require the designer to be competent in drawing and/or in computer aided design graphics. Additional skills required of the professional working through the design process include a knowledge of natural environmental factors that can affect design decisions such as soil conditions, wind, sun, and precipitation.
The designer must also have an understanding of materials like wood, stone, brick, asphalt and concrete. In terms of plant material, the designer must not only be familiar with the aesthetic characteristics of the plants such as their size, form, texture, color, and seasonal interest like flowering and fruiting, but also the cultural requirements of plants (sun, water, and soil requirements).
Both landscape architects and professionally trained landscape designers are typically the people preparing landscape designs.
Benefits of Professional Design
A successfully designed landscape can solve or mitigate functional problems or constraints on sites such as bad views and lack of privacy. A well-designed landscape can also enhance the design of the home and extend the available living space by providing an outdoor living environment. These benefits are not only improvements on one’s quality of life, but also the value of the property.
The Landscape Design Process
The design process is a series of steps to develop a complete landscape design proposal. The ultimate goal is generally to prepare a master plan that shows your client a complete design proposal for the entire site. Although many clients may not choose to develop their entire site at once, an overall design will enable them to plan the development based on their budgetary requirements and goals. The master plan shows how the various parts of the design relate to one another and discourages random approaches to developing one’s property.
Beginning Considerations
The chart shown in (Figure 1) shows the steps which should be followed when preparing your landscape design plan.

Figure 1. Design Process
The Landscape Design Process: A Step by Step Guide
Base Sheet Preparation
The first step of the design process is to obtain a “base plan” locating the building, the property line, and existing site features. Normally, your client will have a detailed plot plan that was created by an engineer when the property was surveyed. This document is usually produced or acquired upon the purchase of a property. When this information is not available it is up to the designer to take measurements of the site in order to prepare a scaled base plan. For the average site (approximately one acre or less) the recommended scale for constructing a base plan is 1”=10’ or 1/8”=1’. A base plan must be scaled. This drawing will serve as the base sheet upon which a design can be generated. (Figure 2)

Figure 2.
Residential Client Interview
For residential clients, the landscape designer must meet with the homeowner to discuss the client’s needs, desires, and interests in order to prepare a design program. The designer must distinguish how the client intends to use the site (interests for recreation, gardening, and other activities) as well as the client’s personal likes or dislikes. Does the client have any favorite plants or conversely any plants that they particularly don’t like? Designers must understand the client’s outdoor entertainment needs, if any, and also the extent to which they intend to “use” the outdoor amenities that may be proposed. Another question that is often a difficult one to both ask and answer is how much the client wants to spend, what is their budget? Many clients don’t have a very strong appreciation for the costs associated with landscape improvements, so a “budget” proposal prepared by the designer and included as part of a design is often very helpful.
Developing a Residential Design Program
Use the following checklist to stimulate your thinking as you begin to question your client about the different ways that they may use the outdoor property. Answer the questions and make additional notations that pertain to your specific situation.
Inventory Client Interview:
General:
- What are their outdoor hobbies?
General Gardening:
- How much time and energy does the client want to commit to landscape maintenance?
- What are some of your client’s favorite plants (trees, shrubs, flowers)? List them.
Entertaining:
- What type of entertaining does your client do (formal, informal)?
- What size groups do they entertain?
- Do they want a terrace, patio, or deck?
- Do they prefer a specific paving material (brick, flagstone, redwood)?
- Do they do outdoor cooking?
Shelter/Shade Requirements:
- Where would shade be preferred? Required?
- Is privacy fencing or screening required?
Recreation:
- Is there need for space for lawn games?
- Is area lighting necessary?
- What structures are desired for children’s play (swings, sandbox)?
General Features:
- Is there adequate lighting (landscape, utility, safety)?
- Do you want to include plants and other features which attract birds or other wildlife?
Public Area:
- Is the driveway visible and large enough? Is the layout convenient?
Site Inventory
The physical characteristics of the land will influence and perhaps determine your landscape design. Make on-site observations to obtain basic information about the quality of the property. This is called a site inventory. (Figure3). And remember, your site need not end with its property boundaries. Think of the site as one part of a larger area. Considering the area beyond the boundaries as the extended landscape will help you understand the relationship of your land to surrounding properties. Now you must perform a site analysis.

Figure 3. Site Inventory
Site Analysis
A site analysis is the next step of the design process, which may be accomplished together with the preparation of the base plan. Note that the site analysis is combined with the site inventory (Figure 3).The purpose of this step is to familiarize the designer with the opportunities and constraints existing on a site. During this step the designer considers views, soil conditions including drainage, the condition and value of existing vegetation, sun angles, shade angles, shady areas, and wind direction. The designer should also check on the location of the utilities and access to the site (equipment access might be required) as well as water spigots. The designer should also confirm the location of doors and windows or mark these on plan if no scaled elevations of the home are available to locate doors and windows.
Site Inventory/Analysis Checklist:
Use the following checklist as you carefully examine the site:
Natural Features/Topography:
- Determine the location of the highest and lowest elevations on the
- What are the elevations of the land relative to its surroundings?
- Are there signs of erosion that may need attention?
- Are there restrictively steep slopes?
Water:
- Does water drain away from the house and other structures?
- Does water stand on the surface in any area?
- Is there run off water from neighboring property or onto neighboring property?
- Are there signs of water erosion?
Soil:
- Identify the soil’s basic structure (clay, loam, sand, etc.)
- Is the soil acid or alkaline?
- What is the condition of the topsoil?
- What is the depth of the topsoil?
Existing Vegetation:
- What is the condition of the lawn?
- What is the general quality of the plant materials?
- Are there trees which you may want to feature or remove?
- Are there existing plant materials which you can identify?
- Identify the trees and shrubs by
Macro-climate (general climate conditions of a particular part of the state):
- What are the temperature extremes of the area?
- In what USDA plant hardiness zone is your site located?
- What is the direction of prevailing winds in summer? In winter? Micro-climate (client conditions specific to your property)
- Are there parts of the site where excessive wind is a problem?
- Are there areas that are consistently wet or dry?
- Are there areas which are consistently in the sun or the shade?
Identify the location of each of the above conditions.
Structures:
- Locate and describe the condition of all existing structures.
- What construction materials have been used?
- Locate and describe the condition of all walks and
- Locate and identify overhead utilities and
- Locate and identify all underground utilities and
Extensional Landscape:
- Do you want to change the views from and onto the property?
- Locate the views you would like to visually screen or camouflage.
- Locate the views you would like to draw attention to or to highlight.
- Are noises and odors from surrounding land a problem anywhere on the property?
- What kind of privacy is offered?
- Locate utility easements and public right-of- ways that are on the property
Developing a Site Analysis
Now transform your site inventory checklist information into graphic form, a site analysis. To make a site analysis graphic, start with your prepared site drawing and use it as a base sheet. Overlay the base sheet with a piece of tracing paper. Transfer the site inventory information to this top sheet using graphic symbols and written notes to convey all the information. Locate all additional structures, vegetation, topographic features, views, and any other information gathered during your site inventory.
Functional Diagrams/Programming
The next step of the design process is to begin to organize the design of the site by identifying areas that will accommodate your intended design program (the program has been accomplished through the joint meetings and decisions reached between designer and client). This step is a programming exercise. It is the first attempt at organizing a design on the site. Major uses and elements of the design are suggested in various areas of the site on a series of options (overlays). Lawn areas, terraces, walkways, planting, screening requirements, buffers, possible areas for visual focus are all considered in this stage of design. The graphics are generally proportional to the site, but very schematic, often appearing as “bubble drawings” and notes. (Figure 4). Make several comparison studies to explore alternative activity locations (Figure 5,6).

Figure 4. Functional Diagram and Programming – Iteration 1

Figure 5. Functional Diagram and Programming – Iteration 2

Figure 6. Functional Diagram and Programming – Iteration 3
Be prepared to modify your site plan to accommodate any conflicts which arise between your present landscape and your projected landscape. Be sure to review your checklists and to include all activities. Evaluate these comparison studies and make modifications until you arrive at a solution which provides for the best use of the site and accommodates the activities you desire.
Summary
You should now have a clear understanding of how the site might best be developed. You have carefully considered and recorded all the activities that the client would like to have included. The property has been inventoried, its conditions observed and recorded. You have considered a variety of optimum locations for the various use areas which will be on your site. As a result, you have succeeded in finding the best fit between the clients’ interests, and the existing features of the property.
The diagram you have produced will be the basis for future, more specific design decisions. At that time structural dimensions will be determined, construction materials will be chosen, plant materials will be selected, and your plans will be revised and refined.
Developing a Landscape Design
Once you have analyzed the site and considered your client’s program and performed several alternative planning studies (functional diagrams) you can move forward to refine those studies, developing them now to fit the site.
Refining Preliminary Design Studies
Now that you have made some comparison bubble diagram studies to explore alternative activity locations based on your design program and your site analysis you can begin to develop some design concepts for your site. The information that you laid out in your functional/ bubble diagrams will:
- help you visualize the location of activities.
- help you evaluate optional locations in relation to existing site conditions.
- help you determine (in general terms) the amount of space needed for each activity.
- help you determine conflicts which may arise by having incompatible activities next to each other.
- help you draw alternative studies in a quick manner.
Select the diagram which best fulfills your program needs and makes the best possible use of the existing site conditions. It should also provide the least amount of conflict between activities.
Now consider just how functional your arrangement of activities is. Think in terms of moving through your site plan. Generating alternative studies at this point, and evaluating the function of each is a very important step in design.
Preliminary / Conceptual Design
After the designer is satisfied with the arrangement of the programmed areas, they can proceed with possible design solutions. The designer then begins working with form composition – studying possible shapes and forms that evolve from the intended function of different areas of the site. (Figure 7).

Figure 7. Preliminary Conceptual Design
The conceptual or preliminary design should include existing and proposed grade changes and an idea for the size of proposed areas. A general idea of planted areas with initial suggestions for the location of shade and ornamental trees, flowering and evergreen shrubs and hedges, and herbaceous materials should be delineated based on site conditions (sun, shade, soil conditions, drainage, etc) (Figures 8 and 9).
-

- Figure 8.

-

- Figure 9.

Also, areas to accommodate site amenities should be considered. Several iterations of these preliminary designs (Figures 10 and 11) should be reviewed with the client in order to obtain their feedback before proceeding to the next step in the design process.
-

- Figure 10.

-

- Figure 11.

The Master Plan
The final step of the design process is to produce the Master Plan. This may be fairly similar to the preliminary design if that was acceptable to your client, but the Master Plan is drawn in more detail. The Master Plan shows all areas in exact dimensions, specifying all materials, both hardscape and plant materials to be used. A plant schedule listing materials proposed is included on the plan, as well as any landscape notes required to make the plan clear to those installing the work. This plan can serve as a working drawing for the project. (Figure 12)

Figure 12. Master Plan
Often, a more illustrative plan is presented to the client, with artfully rendered plan graphics. (Figure 13)

Figure 13. Illustrative Site Plan
In larger design projects, the process would proceed from this stage to construction documents, which are measured and detailed drawings of the design proposal as well as specific construction details of constructed features proposed. Specifications outlining specific product requirements and methods for installation would accompany the construction drawings.
Presenting the Master Plan
It is important to involve your client in decision making throughout the design process, and to help them to visualize what the project will look like when it is completed.
In order to help your client to visualize the design intent, it is helpful to include supporting drawings. This can be accomplished by including sections, elevations and sketches to illustrate the plan in 3 dimensions. (Figure 14, 15)
-
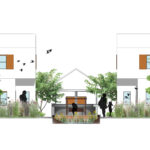
- Figure 14. Site elevation.

-
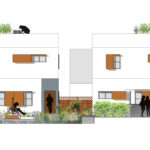
- Figure 15. Site evaluation.

There are several 3D modeling computer programs available for a broad range of drawing and design applications.
Principles of Landscape Design
There are no magical combinations or rules which automatically guarantee a good design. Rather, each solution is unique and should be evaluated on its own. There are, however, some common traits of successful design which can be discussed in general terms, regardless of their individual applications. Listed below are five characteristics typically contained in all successful landscape designs.
Characteristics of Successful Residential Landscape Design
Satisfies the needs of the client
A successful design exhibits influence indicative of the designer’s preferences; however, it also reflects and is directed by the client’s tastes and needs. The proposed design should be functional and be visually pleasing. The designer needs to be able to make decisions based on the client’s wishes and interests, but those must also be
qualified as appropriate based on the designer’s knowledge and experience.
Functions properly
The design should be logically organized and work easily and safely. Constructed elements should be fabricated with suitable and durable materials. Selected plant materials should be sensitive to the cultural and microclimatic conditions.
Sensitive to the site
The landscape design respects and works with all site features emphasizing the positive qualities of the site. Simultaneously, plans should minimize any negative aspects. Other limitations are also considered such as soil types and location of utilities and their easements in regards to locating proposed elements. A sympathetic understanding is given to natural seasonal phenomena such as prevailing winter winds, summer breezes, and annual variations of sun angles, temperature, etc.
Enhances the quality of life
A pleasing landscape improves our day-to-day surroundings. It makes life more enjoyable and pleasant by providing a setting that reduces tensions, anxieties, and conflicts in our daily environment.
Aesthetically successful
Successful designs have all of the previously listed features composed in an aesthetically satisfying manner. Many times, a design’s worth is judged totally by its appearance, without consideration of all the other equally important criteria. Remember, good looks alone do not necessarily make a design successful. Similarly, a design which works functionally but fails visually is not desirable. Successful designs combine both functional and aesthetic qualities into the total composition.
No Magic Formulas
Attractive and functionally organized designs are usually not accidental occurrences. Typically, much forethought and planning goes into design proposals. While there are no magic formulas for good design, certain principles have evolved over time, that when used, are most likely to yield orderly and aesthetically pleasing results.
Landscape architects and other designers use a vocabulary which can be confusing to people with no design training. To help this situation, brief definitions of selected design principles follow.
Order
Order is the organization and basic structure of the design. A design without order is simply a collection of unrelated parts working independently.
Unity
In a design context, the concept of unity has several applications. First, unity is the harmonious relationship among all elements of design. When achieved, logical relationships are apparent and nothing seems out of place or inappropriate. Secondly, when applied on a smaller, more intimate scale, unity becomes a way to simplify the number of differing elements within a given design to reduce the competition for attention. Examples of this are unity of form, of texture, or of color within a composition.
Dominance
Dominance is the authority of one element over all other parts within a design. Dominance is frequently referred to as the focal point of a design. Specific characteristic of the dominate element, such as its color, texture, form, or size, draws attention to its presence; however, to be effective it is equally important to have a subdued background against which the dominant feature or features can be contrasted. Use caution when placing more than one focal attraction in a single composition since dominant elements too closely spaced will conflict with each other, thus defeating their purpose.
Repetition
The concept of repetition in landscape design frequently generates negative feelings with many people. This is unfortunate because, when used discreetly, repetition can be very effective, it involves the repeated use of a particular element – a plant or construction material throughout a design. It is a technique used to tie together the various components of a design helping to unify the scheme. As long as the repetition is not carried to an excessive degree, the appearance and reappearance of a consistently similar element is an
effective means of stimulating “recall” in the perceiver’s mind, thus giving a total cohesiveness to the overall composition.
Scale
Scale is the relative size of an object in space. Appropriateness of scale is essential to the success of a design. In landscape design, scale is equally critical both to the parts of the design which shape the various spaces as well as the spaces themselves. A uniform consistency of scale throughout a design is mandatory. A properly scaled design appears normal and comfortable, while an area with a conflict of scale generates uncomfortable tension.
Balance
Balance is the equalization of visual weight within a composition. Most designs contain accents or dominant elements, but there also needs to be a majority of subdued neutral background for the design to be successful. This means that much of the space within a composition has to remain unfilled to achieve sufficient amounts of neutral space. Designs in which no space has been left open appears cluttered and messy.
Achieving an effective balance between the features and the open areas requires looking at the whole composition as one entity. Basically, there are two types of balance; symmetrical and asymmetrical. Symmetrical designs have identical compositional arrangements on both sides of a control axis. Asymmetrical designs are balanced by implied equivalent counterbalance on opposite sides of the compositions; balance is achieved without repetition.
Fundamentals of Planting Design
Composition
Gardens are a constantly changing scene that should offer a sequence of visual pleasures throughout the year. To accomplish this, garden designers must work to create dynamic compositions of interesting shapes and textures with exciting colors using plants with characteristics that contribute to the garden in many different ways.
The structure of a composition is one of the most important components of successful planting design. The forms and shapes of various plants must work well together to create visually pleasing composition. When they do, other physical qualities- like texture and color can add to the garden’s beauty. These are the building blocks of garden composition (Figure 16).

Figure 16
Note in the first drawing of this series of composition studies, (Figure 17), the “Outline” drawing traces the garden and identifies all of the elements within the composition.

Figure 17
Structure
In the second drawing, the “Form” drawing, (Figure 18), individual plant forms, as well as plant forms in mass within the planting scheme take on an abstract quality, developing as a collage of form to help emphasize the uniqueness of each 3-dimesional shape in the composition.

Figure 18
A garden’s structure or framework exists as a combination of both distinct forms and similar ones that are combined in mass. These “bones of the garden” are visible throughout the year. Evergreens, for example, are visually present in the garden all the time. They contribute structure to the garden all year long and also create a backdrop against which other seasonal plantings can be presented (Figure 19).

Figure 19
A plant’s natural growth habit determines its form. It is the entire plant mass-its trunk, branches, and leaves-that establishes form, unless it is pruned into some artificial shape (as are some in Figure 19). Many plants with a distinct shape, such as those that are characterized as columnar, horizontal, or pyramidal, have a big impact on a composition. Plants with a strong vertical shape give a garden height (Figure 20), while plants with a broad or horizontal orientation act as a base layer that supports the more dynamic elements of a planting scheme.

Figure 20
A mass planting of herbaceous material with a rather loose, organic outline is given form through contrast when combined with a few plants of more precise geometries. Plants with unique shapes tend to direct attention to themselves, serving as focal points in a landscape. These plants can be effective at attracting views to various areas of the garden where other complementary plants create interest around them (Figure 21).

Figure 21
Repetition of a particular form within a composition can create harmony and a pleasing rhythm in a planting scheme. The repeated form encourages your eye to travel through the composition, visually uniting it. A repeated form can also lead the eye to a particular vista or to specific areas of the garden to view (Figure 22).

Figure 22
Texture
The texture drawing, (Figure 23), is a study of the texture within the garden examine the plantings in the composition and note the textural qualities of the plants in a sketch. Here, coarse textures are distinguished from fine textures through the use of graphic symbols, like hatching patterns of various densities and line weights.

Figure 23
Foliage is one of the key makers of texture in the garden. Each of a plant’s leaves has its own textural quality created through characteristics of venation, leaf surfaces and shape, but it is the overall effect of a plant’s “leafy” characteristics that contributes to the visual qualities of a composition.
Plants with different textures can be combined to create a very interesting and lasting visual effect in the garden. Large leaved plants are quickly spotted and can draw attention to plants that surround them, while plants with smaller leaves often become part of the background. Grasses stand out against most other leaf patterns and can be added for variety. Plants with glossy leaves tend to attract the eye because they reflect the light. Pubescent or hairy leaves draw attention, as well, as they appear very different from others around them.
Foliage texture should be varied, but not so different as to create visual distraction. A composition of typical leaf textures can be interrupted occasionally with plants of different textures to create a pleasing contrast. The overall visual effect should be unified, with occasional variation in texture, but always well-balanced. (Figure 24)

Figure 24
Though texture in the garden is typically created by plant foliage patterns, bark, stems, flowers and fruits should also be considered, especially when designing gardens for year-round interest. Plants with late fall and winter interest contributed by other characteristics besides leaves should be combined in the garden to provide a sense of continuity.
Color
The last two drawings in the sequence studies color in the planting composition. The first is a sketch of the garden using colors similar to those that appear in the landscape (Figure 25).

Figure 25
In the second drawing (Figure 26) the garden is “painted” using a different color palette borrowed from a painting, with particular attention given to color placement, balance and contract.

Figure 26
A garden designer’s choice of colors for the garden can be challenging. Typically, all colors can be good, but their combination with other colors may or may not be most pleasing to the eye. Most gardeners attempt to group related colors, creating color harmonies. Color theming is also popular and rather safe approach. In this technique, closely associated colors- like lavenders, mauves, and blues are combined, with visual contrast accomplished by other effects, such as leaf and flower shape and texture.
Creating color contrasts in the garden tends to be a bit more difficult. Using complementary colors is a rather straight forward and effective way to incorporate color in the garden. Complementary colors are particular pairs of colors that tend to increase the clarity and brightness of each other, making them appear more vibrant and intense. Yellow, for example, may be introduced to a blue garden (yellow’s complementary color is blue), creating a very pleasing contrast. Orange flowers work nicely with purple, again a complementary pairing.
Softer colors, like pinks and lavenders, are often easier to combine than reds and yellows, which tend to be more dominant colors in the garden. Dominant colors are useful in establishing a sense of rhythm in a planting. They can be used occasionally as highlights to move your eye through a composition. Large blocks of these colors, however, are less effective and a bit difficult to digest without combining them with other, more subtle colors.
Colors tend to establish a particular mood in the garden. Each color seems to affect the observer in a certain way. Here are a few generally accepted principles of colors to consider:
- Red is a hot color that is noticed instantly in a composition. It stirs emotions and can be unsettling if not combined with softer hues.
- Orange is also a warm, exciting color. It seems to look best paired with purple, green, or even blue. (Figure 27)
- Yellow is warm and cheerful. It tends to be less dominant than red or orange. Yellows are typically more stimulating when combined with subtle hues, like blues or violets. (Figure 28)
- Blue is a cool color that relies on contrast to highlight its presence in the garden. True blue flowers are rare; thus, garden designers often incorporate lavender or lilac-colored flowers within their blue borders.
- Violet, or purple, is a very rich color and, compared with other colors in the garden tends to be rather dark. Purple flowers should be placed closest to the observer to be effective. A strong color contrast like yellow, for example will heighten the presence of purple and draw attention to it.
- White is a neutral color. It is neither cool nor warm, though it appears cool when combined with other cool hues and warm when associated with warmer colors. White and yellow are common colors within the same flower and equally compatible when combined on a larger scale with individual plants.
- Green is a neutral color and perhaps the most soothing color in the garden. It typically acts as a buffer or background color in a planting composition to link more vibrant, dominant colors.
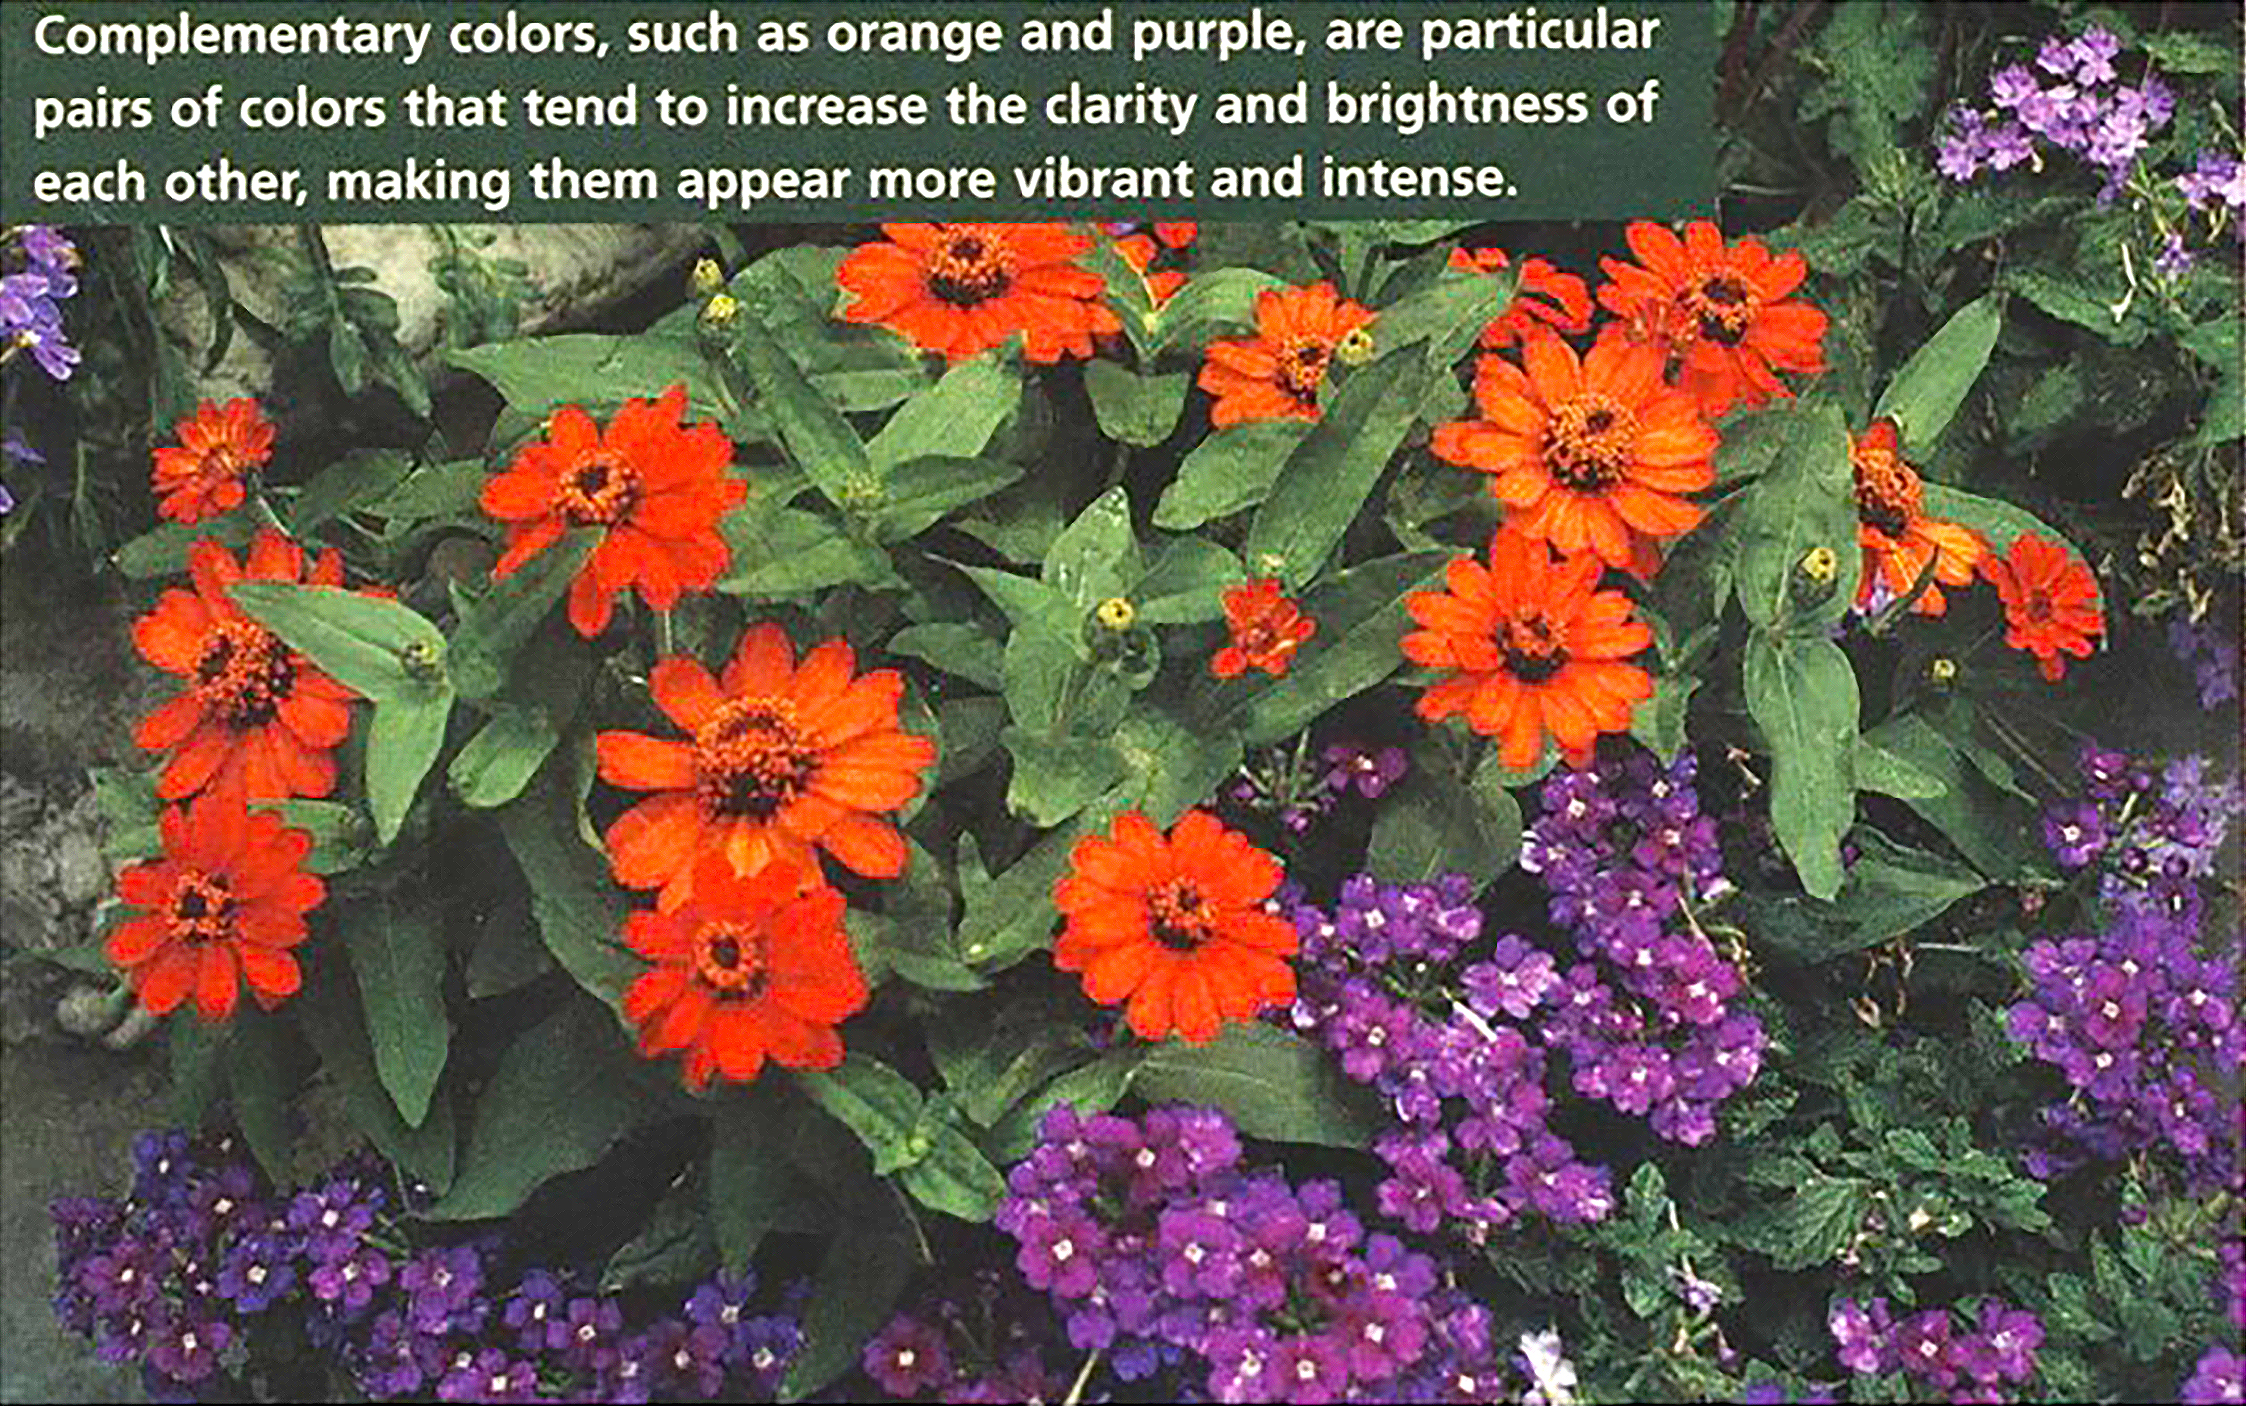
Figure 27

Figure 28
A successful planting scheme capitalizes on the best qualities and characteristics of individual plants, and at the same time, it is effective as an entire composition. For many garden designers, a plant’s particular qualities may be intuitive. A further understanding of the principles of composition, however, is required in order to make the most effective use of these characteristics when combined with other plants in exciting garden schemes.
The Constructed Landscape: Walls, Walks, Terraces and Overhead Structures
Retaining Walls
Grading is the changing of existing elevations of land by either cutting, taking away soil, or filling by bringing in soil. Sometimes changes in elevation between level areas are achieved through the use of grading structures, such as retaining walls. The function of a retaining wall is to hold soil in place between differing elevations of the ground.
The type of wall constructed depends on the amount and type of soil being retained. Severe soil pressures require substantial walls with sturdy foundation. Materials used in retaining walls must be able to tolerate direct contact with soil and moisture. A retaining wall should be considered an architectural unit, designed with a foundation, and constructed of materials that will blend with other architectural units. There are numerous reputable manufacturers of Segmental Retaining Wall block products that provide an array of color and style options along with detailed installation guidance.
You should be aware that changing soil elevations around existing plantings is very likely to harm the plants. This is true for both cutting and filling. (Figure 29)

Figure 29
Freestanding Walls
Enclosure structures are vertical elements such as walls that help define and enclose spaces. These structures can be made of many different kinds of materials and can be constructed in different sizes for different purposes. (Figure 30)

Figure 30
A low wall may function as a seat, if it is approximately 18 inches in height. This type of wall, while it interrupts movement, does not block vision. A taller wall on the other hand, may obstruct movement as well as vision.
Walls are sometimes used along a property line to mark boundaries. Walls can also be used to enclose areas for privacy. The mass and form created by the wall must be considered in your design. Some materials that are used for walls would include brick, stone, concrete, and concrete blocks.
Materials used in the construction of enclosure structures should relate to the other building materials used throughout your landscape design. Consider scale, texture, and color. Walls sometimes work to extend the house walls into the outdoor area, and if this is the case, they should be constructed materials similar to those used in the house.
Walkways and Driveways
Driveway surfaces can be of a variety of materials. Some potential materials include crushed limestone, gravel, concrete, asphalt, brick, and grass pavers.
When selecting a construction material for a driveway, consider durability and permanence as well as ease of maintenance. Also consider the expense of installation and the appearance of the material.
Circulation structures for people are intended to provide physical access to the different use areas. A walk can help unify a landscape design by connecting different spaces, but a walk can also create a division between spaces. If a walkway is a major circulation route and intended for frequent use, then it should be the shortest distance between two points. Secondary walks are those other than entrance approaches and they provide access to the landscape for pleasure as well as utility.
Shape is important in walkway design. The most pleasing walk will move along with a gentle curve. Some materials that might be used for pedestrian circulation are brick and flagstone pavers, poured concrete, precast concrete pavers, or asphalt. (Figure 31)

Figure 31
Ramps and steps are used to connect different walkway levels. In designing steps the total height of a group of steps should not be greater than its width. Use landings to break steps into sections as well as to indicate a change of direction. In the design of steps, care needs to be taken to provide appropriate tread to riser relationships. (Figure 32)

Figure 32
Terraces and Decks
The materials selected for terraces and decks will depend on how the surface is to be used. Brick is frequently used as a surface material and is very workable as well as attractive. Using brick pavers can result in a pleasing surface texture and variety in pattern. Flagstone is another material that is often used, and is appealing because of the subdued colors in which it is available. Flagstone is a durable material with interesting texture.
Because of the fluid characteristics of concrete it can be used as a surface material and formed to take a variety of shapes. The surface of concrete can be textured for interest and safety.
With surface structures, particularly where the initial costs are high, a design must be carefully laid out. The edges must be clearly defined: the size of the units must be known; and the pattern must be determined.
A wooden surface functions well for many activities and blends well with many other construction materials. A deck is a wooden surface structure built just off the ground or at an elevated height. A deck can effectively provide access from the house by serving as an extension of an interior house floor.
Overhead Structures
Overhead structures are also used to enclose an area. They are especially effective for extending indoor use areas into the outdoors, such as an eating area adjacent to the kitchen. Overhead structures establish a connection between the house and the landscape in a manner which is difficult to achieve in any other way. They can also provide shade or shelter from rain.
An overhead structure does not have to be a solid roof to provide a sense of enclosure. It can be partially open, and the amount of openness or solid roof area will determine the amount of protection or climate control that you achieve. Wood is often used to construct an overhead structure such as a pergola or arbor. (Figure 33, 34). It is relatively easy to work with and lightweight.
-

- Figure 33.

-

- Figure 34.

Landscape structures are intended to increase the functional use given to an outdoor area. Since they may involve a large outlay in both time and money, their placement and design should be carefully planned. Before any construction is started, check on zoning ordinances, setbacks, easements and other legal requirements.
When selecting construction materials, first evaluate how well the material will function in the particular area where you intend to use it. Will it allow the kind of activities to take place which you have intended? How well does it relate in line, form, color, and texture to the proposed and existing materials around it? Also, consider durability and wear of construction materials as well as ease of maintenance.
Combining Traditional and Digital Technology
Today, most design drawings are prepared using computer aided design programs (CAD) rather than traditional hand drafting methods. CAD drawing is preferred for its advantages of accuracy, neatness, ease of presenting large and small scale drawings, ease of adjustments and modifications, and easy access and remote sharing of drawing files. However, many designers prefer hand drafting methods in preliminary or conceptual design, arguing that it facilitates the design thinking process and increases the range of innovation and creativity in early design. Therefore, it is important to understand and to establish skills for traditional hand graphics. These skills will be useful to your work in the design thinking process.
Summary
This chapter has given a glimpse into some of the design considerations which are involved in giving form to landscape designs. The landscape architect strives to manipulate and coordinate these design elements into visually attractive and functional landscapes. But this must be done in a manner which exhibits a genuine understanding of and sensitivity to the site itself, environmental influences, client needs and plant construction material characteristics.
- (True or False): A landscape designer must be familiar with the aesthetic characteristics of plants, but can leave the knowledge of cultural requirements to others.
- (True or False): A skilled designer can easily and successfully go directly from the site analysis step in the design process to the creation of the master plan.
- (True or False): Repetition can be a positive characteristic of a successful landscape design.
- (True or False): Garden / landscape structures are intended to increase the functional use of an outdoor area.
- (True or False): In this modern era of computer aided design (CAD), it is irrelevant and completely unnecessary for a landscape designer to develop hand drawing skills.
- Which of these is the first step of the design process?
- Site Inventory & Analysis
- Base Sheet Preparation
- Client Interviews
- Which of these refers to the relative size of objects or spaces, compared to other objects or spaces, in a landscape design?
- Balance
- Dominance
- Scale
- A key “maker” of texture in a planting design composition is which of these?
- Foliage (leaves)
- Plant architecture (branches)
- Plant height
- Which of these is considered a “cool” color?
- Red
- Blue
- Yellow
- Orange
- For a low wall to function as a seat, it should be about how tall?
- 12 inches
- 18 inches
- 24 inches
Answers to Review and Study Questions
-
- False
- False
- True
- True
- False
- B
- C
- A
- B
- B