
PLEASE INSURE YOU READ THE TUTORIAL – SOME STEPS ARE NEW THIS YEAR!
Instructional Video: https://youtu.be/wxJrly6FT44
NX to STL Video: https://youtu.be/-ft34yQtMDc
BASIC RULES
Before printing please use this survey, it is part of a research study and will also help you evaluate whether or not your object is going to print successfully! SURVEY https://purdue.qualtrics.com/SE/?SID=SV_efItdh95sotu1cp
- There is a strict 25 grams per student per week limit on free printing (PLA Material Only) supplied by the lab. If you want to print more than the allotted amount or in a color of your preference, you will need to provide your own spool of material labeled with your name and Purdue email. Weekly limits do not combine when unused, it is a hard cut 25 grams a week.
- If your printing is for a class or sponsored research, we ask that students purchase their own spool. The free spools are meant for exploration and personal projects, please help us keep our internal costs down on this free service.
- If you are providing a personal spool it must be 3mm diameter Hatchbox or eSun brand regular PLA or ABS filament only. Other brands, sizes, and material types will not be accepted. Also glow in the dark or other exotic blends will not be accepted.
- Personal spools must have your email written on it.
- We only print to 3dprinteros accounts made with Purdue emails. Do not use gmail.
- We have the right to cancel your print if it appears to be an illegal, dangerous, or inappropriate object whether it is functional or not.
- Every print submitted must include a note of which material profile was used to slice the part.
- ex: “Lab Spool profile 1 used.” OR “PLA profile 2 used my spool color is ___”
- For prints done with a personal spool a note must be included with the color of your spool and the email on the spool.
We have the right to cancel your print if the above rules are not followed.
We try to print jobs in the order they are submitted and in the most timely manner. Most jobs can expect a lead time of one week to complete. If your print is not completed by then please contact a lab TA.
About the Printers Available
Lulzbot Mini
Build volume: 152mm x 152mm x 158mm (6in x 6in x 6.2in) Dimensions are in X,Y,Z axis order
Layer height: 0.2mm-0.3mm (0.008in – 0.012in)
Lulzbot Taz 6
Build Volume: 280mm x 280mm x 250mm (11.02in x 11.02in x 9.8in) Dimensions are in X,Y,Z axis order
Layer height: 0.2mm-0.3mm (0.008in – 0.012in)
Please use the appropriate size printer for your part unless the queue is empty for the larger printers.
HOW TO EXPORT STL FILES
If you have questions on how to export an .STL file from your CAD system, refer to the FAQ link at the top of this page.
HOW TO INSTRUCTIONS FOR STUDENTS WHO WANT TO USE THE LAB:
(A) Create an account at cloud.3dprinteros.com
- Create an account at cloud.3dprinteros.com using your Purdue email. Do this by selecting the “Sign Up” option.
- Click ‘Not Now’ when asked to provide a license key. You will be using the Purdue license once you have completed the remaining steps.
* You only have to do this step once.
(B) Link to the Boilermaker Lab Printers
- Go to the Printers tab.
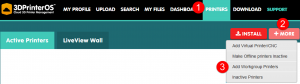
- Click the +More link on the top right side of the page to
expand the menu. - Select Add Workgroup Printers.
- Use the access code realize_network in the Student access Code field to gain access to the printers’ queues.
- Click the +More link on the top right side of the page again and this time select the Make Offline Printers Inactive button.
* You only have to do this step once.
(C) Upload Files
This is where you upload the files that you want to print to the cloud printing platform.
Before uploading make sure:
- Files are in .stl or .obj format.
- The original file is saved in millimeters (or it will not upload properly to the site)
- Geometry created in NX is in the first quadrant (positive X, positive Y, positive Z space)
- Go to the Upload tab
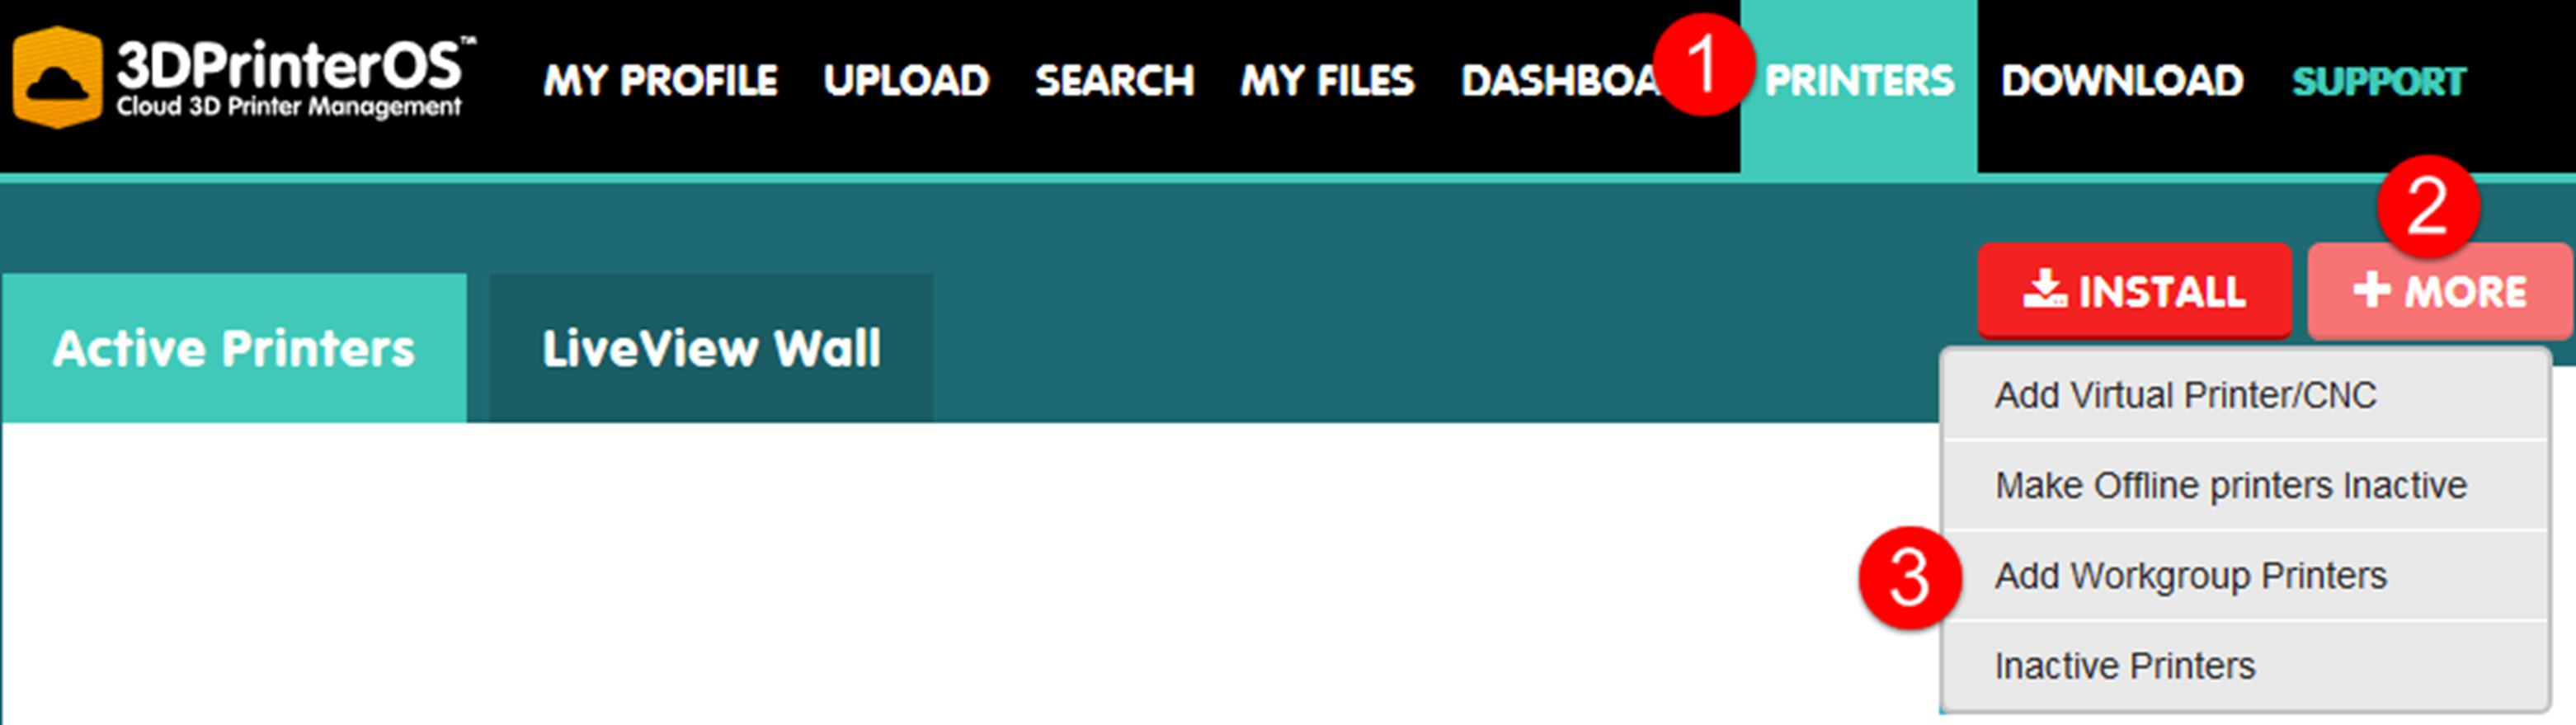
- Choose the Single File option to add files to the default folder. If you have several files to submit, choose the Project option (highlighted in the image below) where you can type in a new project name or select an existing project to organize your files better.
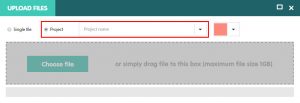
- Drag files into the Upload Files dialog or select Choose file to browse for files.
- Click Save and go to My Files or go to My Projects.
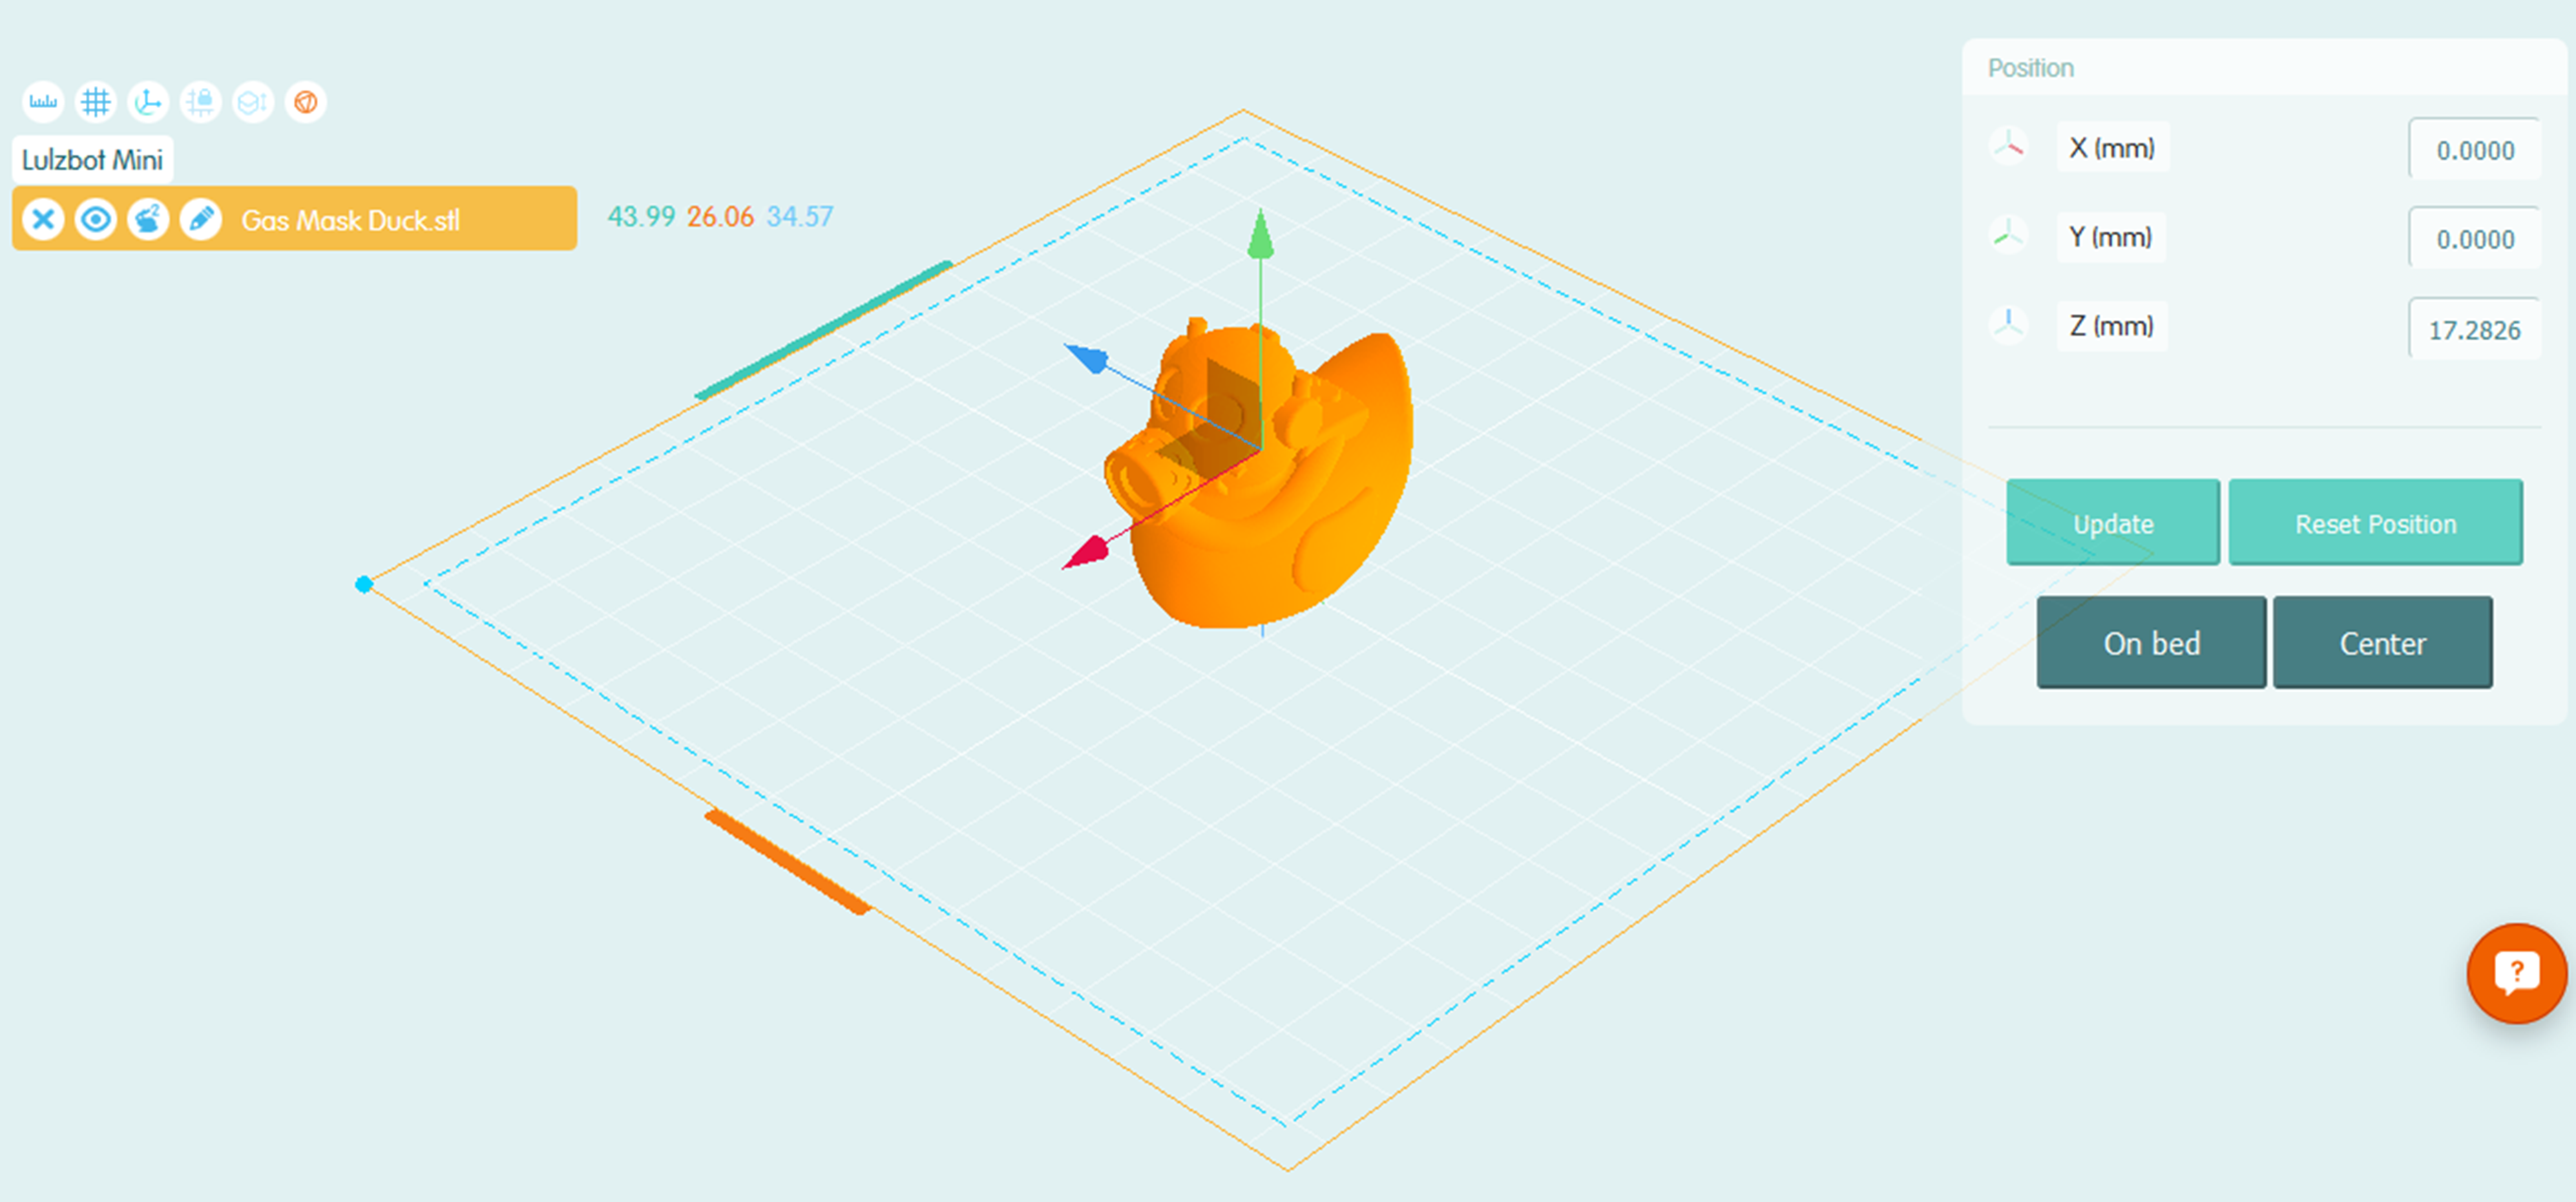
(D) Place File(s) on the Build Plate
This is where you arrange your part or parts on the build plate of the printer.
- Select one of the .stl files and press the APPS button.
- Choose STL Editor from the Applications dialog.
- The part will be placed in the center of the preview of the build plate.
- Use move or rotate and grab the green, blue or red handles to position the file.
- If you move the object off of the print bed, use the On bed option to return it to the plate.
- Choose Add File to continue adding files to the build plate.
- Reposition all files so that they are not overlapping and are inside the build plate tolerance lines.
- Press Save to save the configuration with multiple parts on one build plate.
Notes about the quirkiness of adding muple files to a build plate
- Once multiple files have been placed on the build plate and the STL file is saved, their location relative to each other cannot be changed. You can continue to add files to the build plate after saving, but the placement of the files when the last save was performed will “lock” their positions relative to each other.
- The name of the first file that was selected to open the STL Editor will be the name of the file containing multiple parts. This is an easy way to forget which files have been added to the plate but it is the only option available to us! It is recommended that you rename the file using the Edit option once it appears in the list of files.
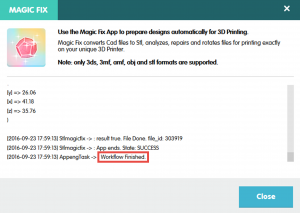
(E) Prepare Files for Printing using Magic Fix
This cleans up the geometry (finding small gaps or overlaps) so that it will improve the chances of the print being successful.
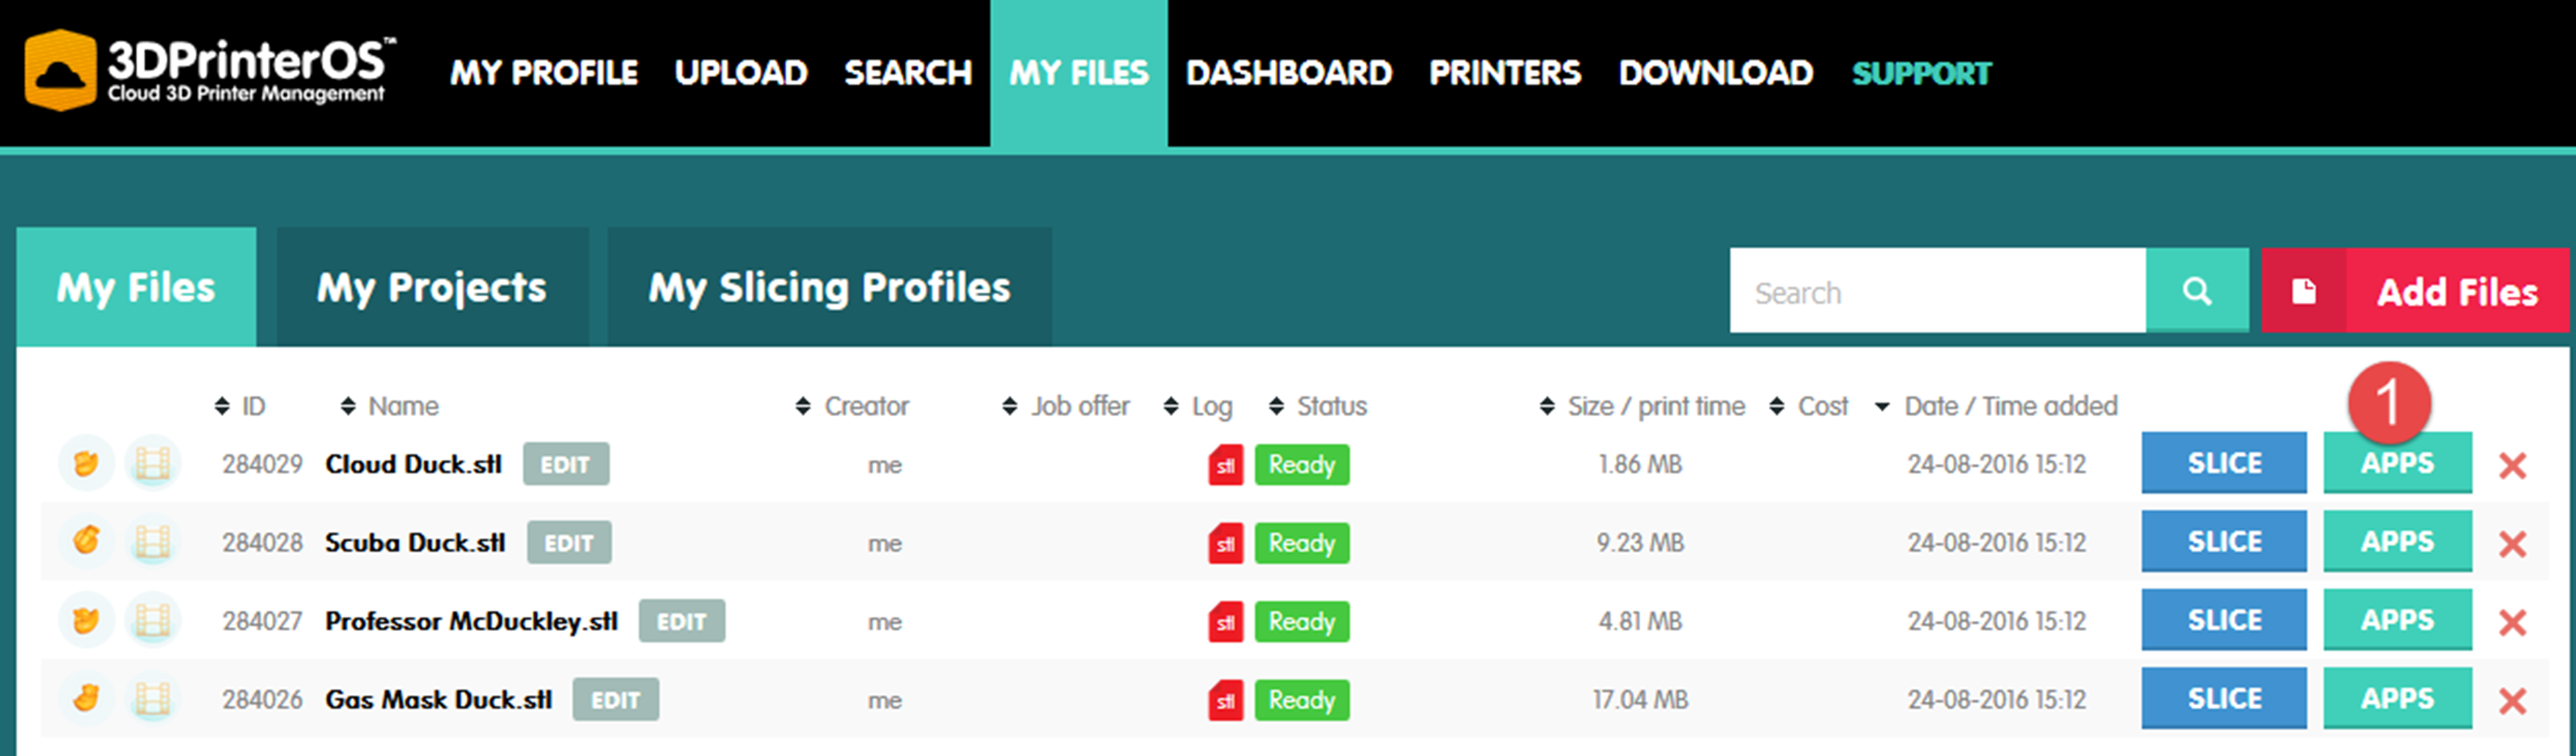
- Once your file is uploaded, go to the My Files tab find it in the list. Select the APPS button associated with the file you want to print.
- From the dialog that appears, select Magic Fix.
- Select the printer type from the drop down list.
- If you know your print is smaller than a 6 x 6 x 5.5 in cube, select Lulzbot Mini as your printer option.
- If you know your print is bigger than a 6 x 6 x 5.5 in cube, select Lulzbot TAZ5 as your printer option.
- If you are not sure, select Lulzbot Mini.
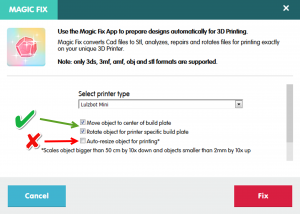
- Make sure the first two boxes, Move object to center of build plate and Rotate object for printer specific build plate are checked.
- Make sure that the third box to Auto-resize object for printing is not checked.
- Press the Fix button.
- Wait until the text in the Magic Fix dialog stops updating and you see a link that says Workflow Finished. Press the Close button.
- You should now see a new file added with a name similar to the original file name, but with a number and the phrase _stlmagicfix at the end.


If you have several files to print in one job, magic fix them all before moving on to the next step.
(F) Slice the Part
This step tells the printer how each layer will be laid down.
- On the file to be printed, select the Slice button.

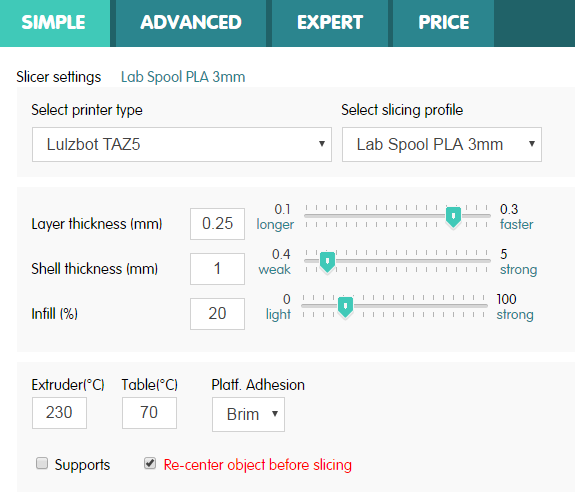
- In the Select printer type drop down box select the same printer you ran the magic fix app for in step 3.
- In the Select slicing profile drop down box choose the profile that matches the type of material you are using.
- ABS prints should select ABS 3mm
- PLA prints have two options:
- Select PLA 3mm if you will be using a personal spool that is 3 mm
- Select Lab Spool PLA 3mm if you will be using a personal spool that is 3mm
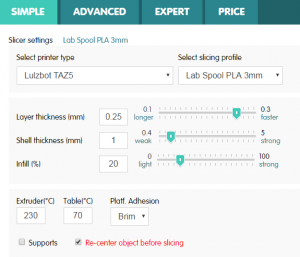
- Once you select a profile all of the other settings will be changed to meet lab requirements.
- At the bottom of the dialog are options including a drop down box where you can choose platform adhesion type and a check box to add Supports. If you do not know if your part will need a raft, brim, or supports please ask a lab monitor for assistance.
- If you would like to speed up the time to print and your part does not need to be rigid, the Infill % can be lowered. Even as low as 10% parts are usually pretty rigid.
- Press the Slice button.
- While the file is being prepared the status will show a status of Progress.

- When the file is done slicing a new file with the same name as the magic fix file but with a .gcode extension will now be created.
- To double check that the part fits on the printer you have selected, scroll over to the green viewing window located to the left of the print name and see if the object fits within the printing area. If it does not then you will need to rerun the file through the magic fix app and the slicing process again with the larger TAZ5 printer selected. If it was already sliced for the TAZ5 then you won’t be able to use the printers in this lab for your part or you will have to break it up into multiple pieces.


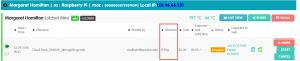
(G) Send File to the Print Queue
- Select Apps –> Print from Industrial Printer. You will now see the list of printers and their current status. Under the list is an area to Add a note for a printer operator. If you are printing with your own spool, have a color preference, or have any other informatino to provide, write that here. This is also where you will write the profile name you are using.
- Choose Queue to put the job in a print queue.
- Please select a BoilerMAKER labs printer queue for those that have a spool of material in Knoy. Select a BIDC printer for those that have a spool in BIDC.
- Once your file is in queue, check the weight to make sure it sounds reasonable for the piece you are printing.
- Check to make sure it is under 25 grams if you plan on using free plastic.
- If the file size is a gram or less in weight and it is not supposed to be very small then the original .stl was most likely not saved in millimeters.

A lab monitor will begin your print when the printer is ready.
You should receive an email once your print is completed, although you should also keep watch on your job in the queue. Be patient! If lots of jobs have been submitted it can take several days for your part to get to the printer. All prints may be picked up in the 3D printing lab in Knoy 155.
When you pick up your part, there will be a “raft” on the bottom that should be removed. It should be able to be removed with your hands and not need any specific tools.
If you have any issues please send a support ticket to boilermakerlabs.org/help
3D printer OS Video Tutorials
Anywhere it says BIDC in the tutorials use Boilermaker Labs in Knoy instead