This project came out of a want to build something in our time at Purdue we can use to further innovate, develop, and create with once we lose access to the wonderful facilities at the Bechtel Center. Luckily 3D printing is a great testbed to develop products with. Using the tools at the BIDC, the team of three of Alan Kraft, Alex Josten, and Matthew Fitzgerald were able to touch almost every machine in the BIDC to manufacture parts. Throughout this experience, we were able to learn generative design, Laser, mill, Lathe, and Waterjet CAM, as well as G Code.
Project Timeline
Project Inception: August 2018
Design Completed: May 2019
Materials Procurement: August 2020
Manufacturing: November 2020 – November 2021
Assembly: November 2021
First Prints: January 2022
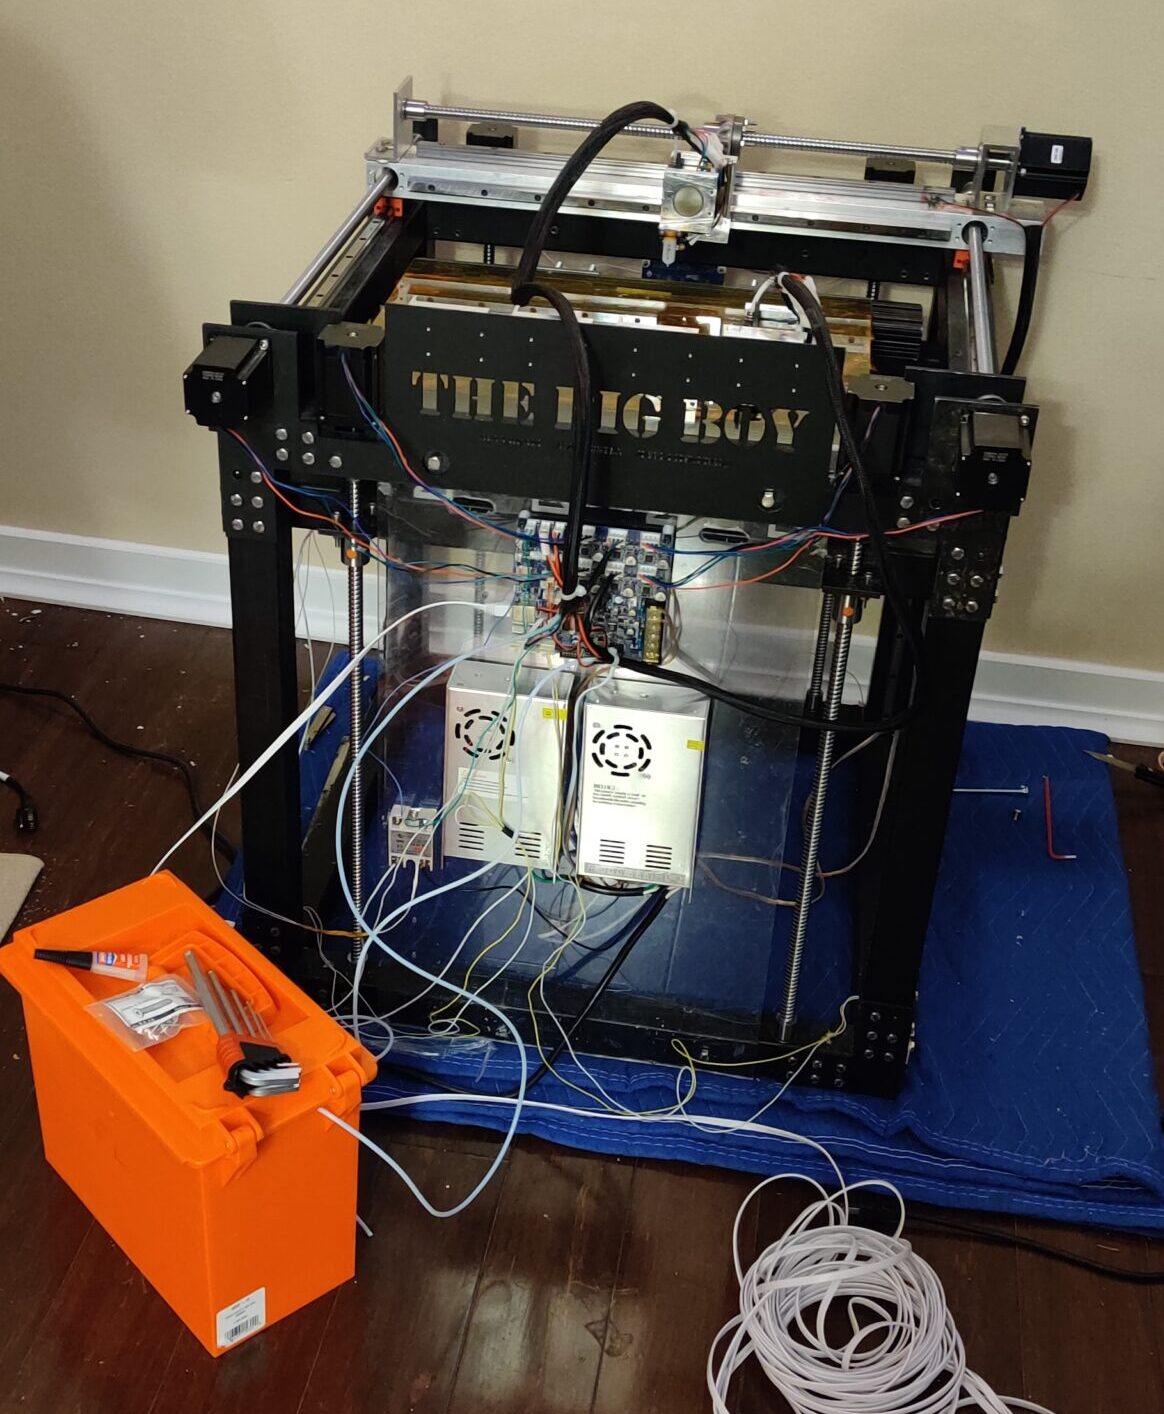
Printer Specifications
Print Area of 330mm x 475mm x 500mm
Suitable for printing most large objects and prototypes for our team to continue learning with!
Overall Size: 700mm x 700mm x 900mm
Our requirement was for the printer to fit through a standard door. We were able to meet that requirement.
Weight: Approximately 250 lbs
Since this is steel construction through and through, the printer weighs a fair bit. This weight and rigidity make it easy to add a spindle.
Reliable 80mm/s Print Speed
The 7 NEMA 23 steppers provide more than enough speed and force to move the X,Y, and Z axes.
Polycarbonate Enclosure and Heated Bed
The polycarbonate enclosure is useful for temperature control. The silicone mat heater keeps the bed nice and warm. In the future we hope to heat the chamber to print more exotic materials.
Custom Designed Tool Changer
Our custom milled dovetail magnetic tool changer is a completely novel design, we even had to buy a special insert for manufacturing it!
Machines Used
Notable Design Choices
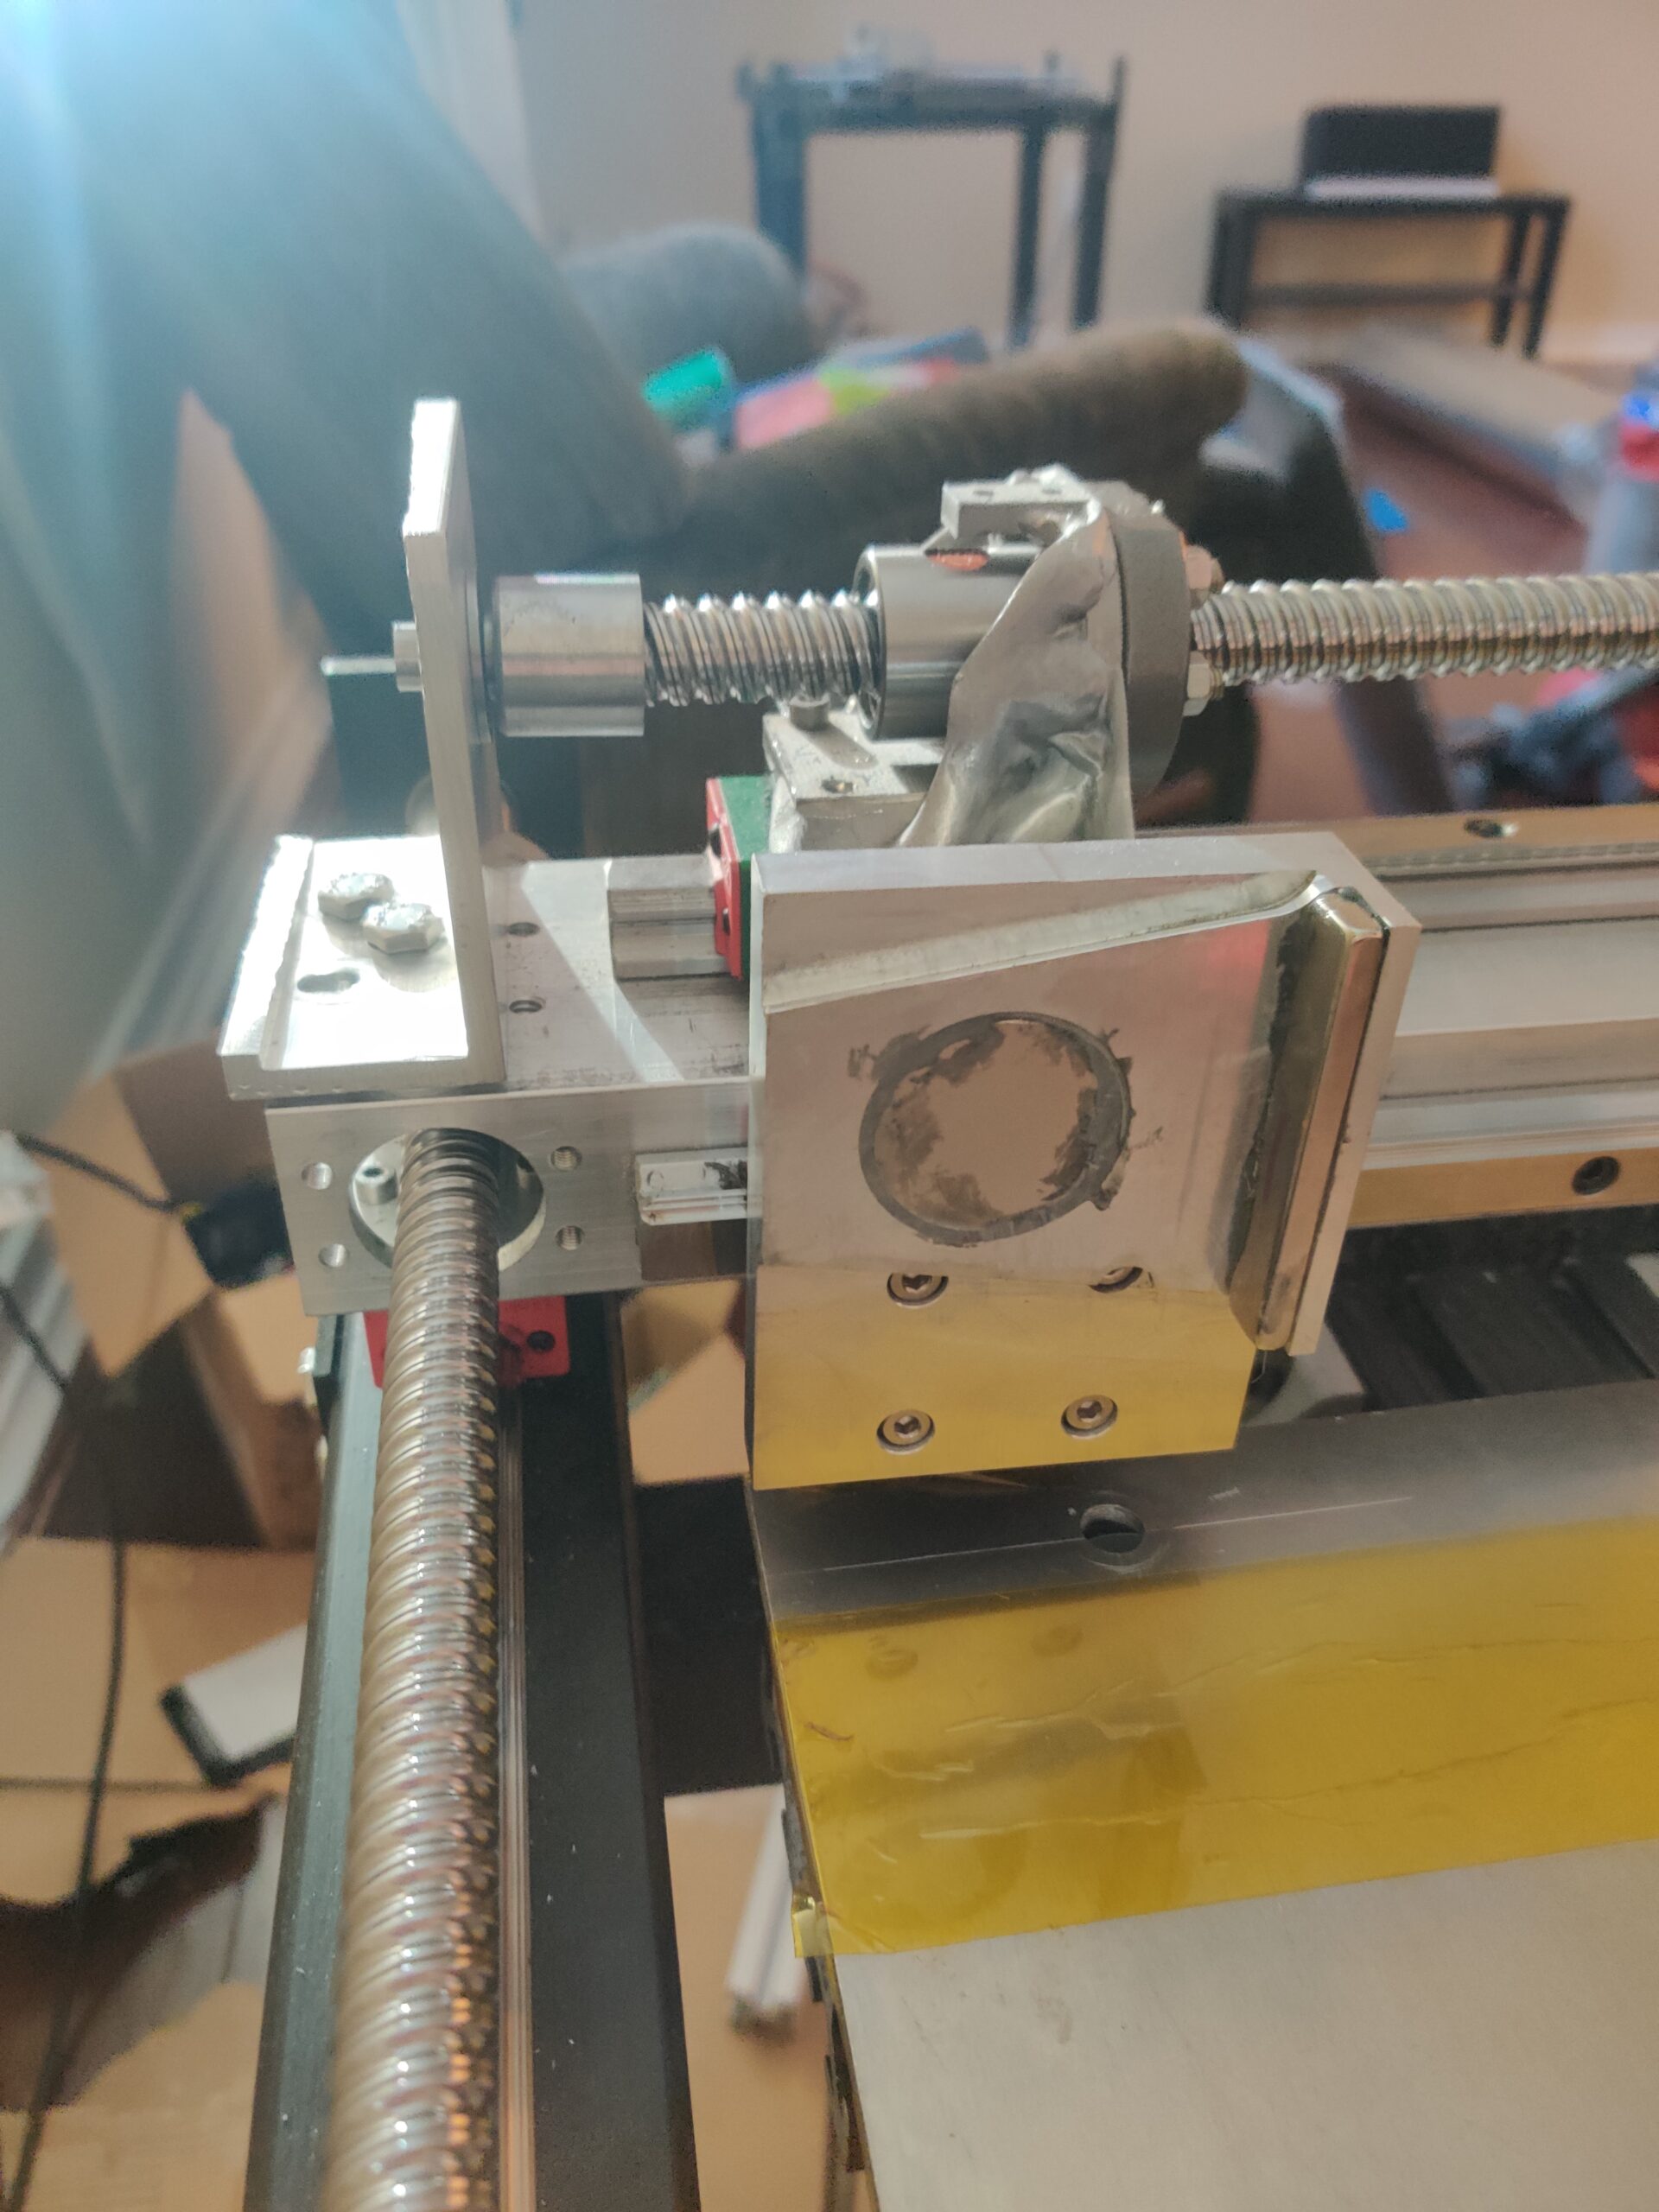
Generative Design Tool Mount
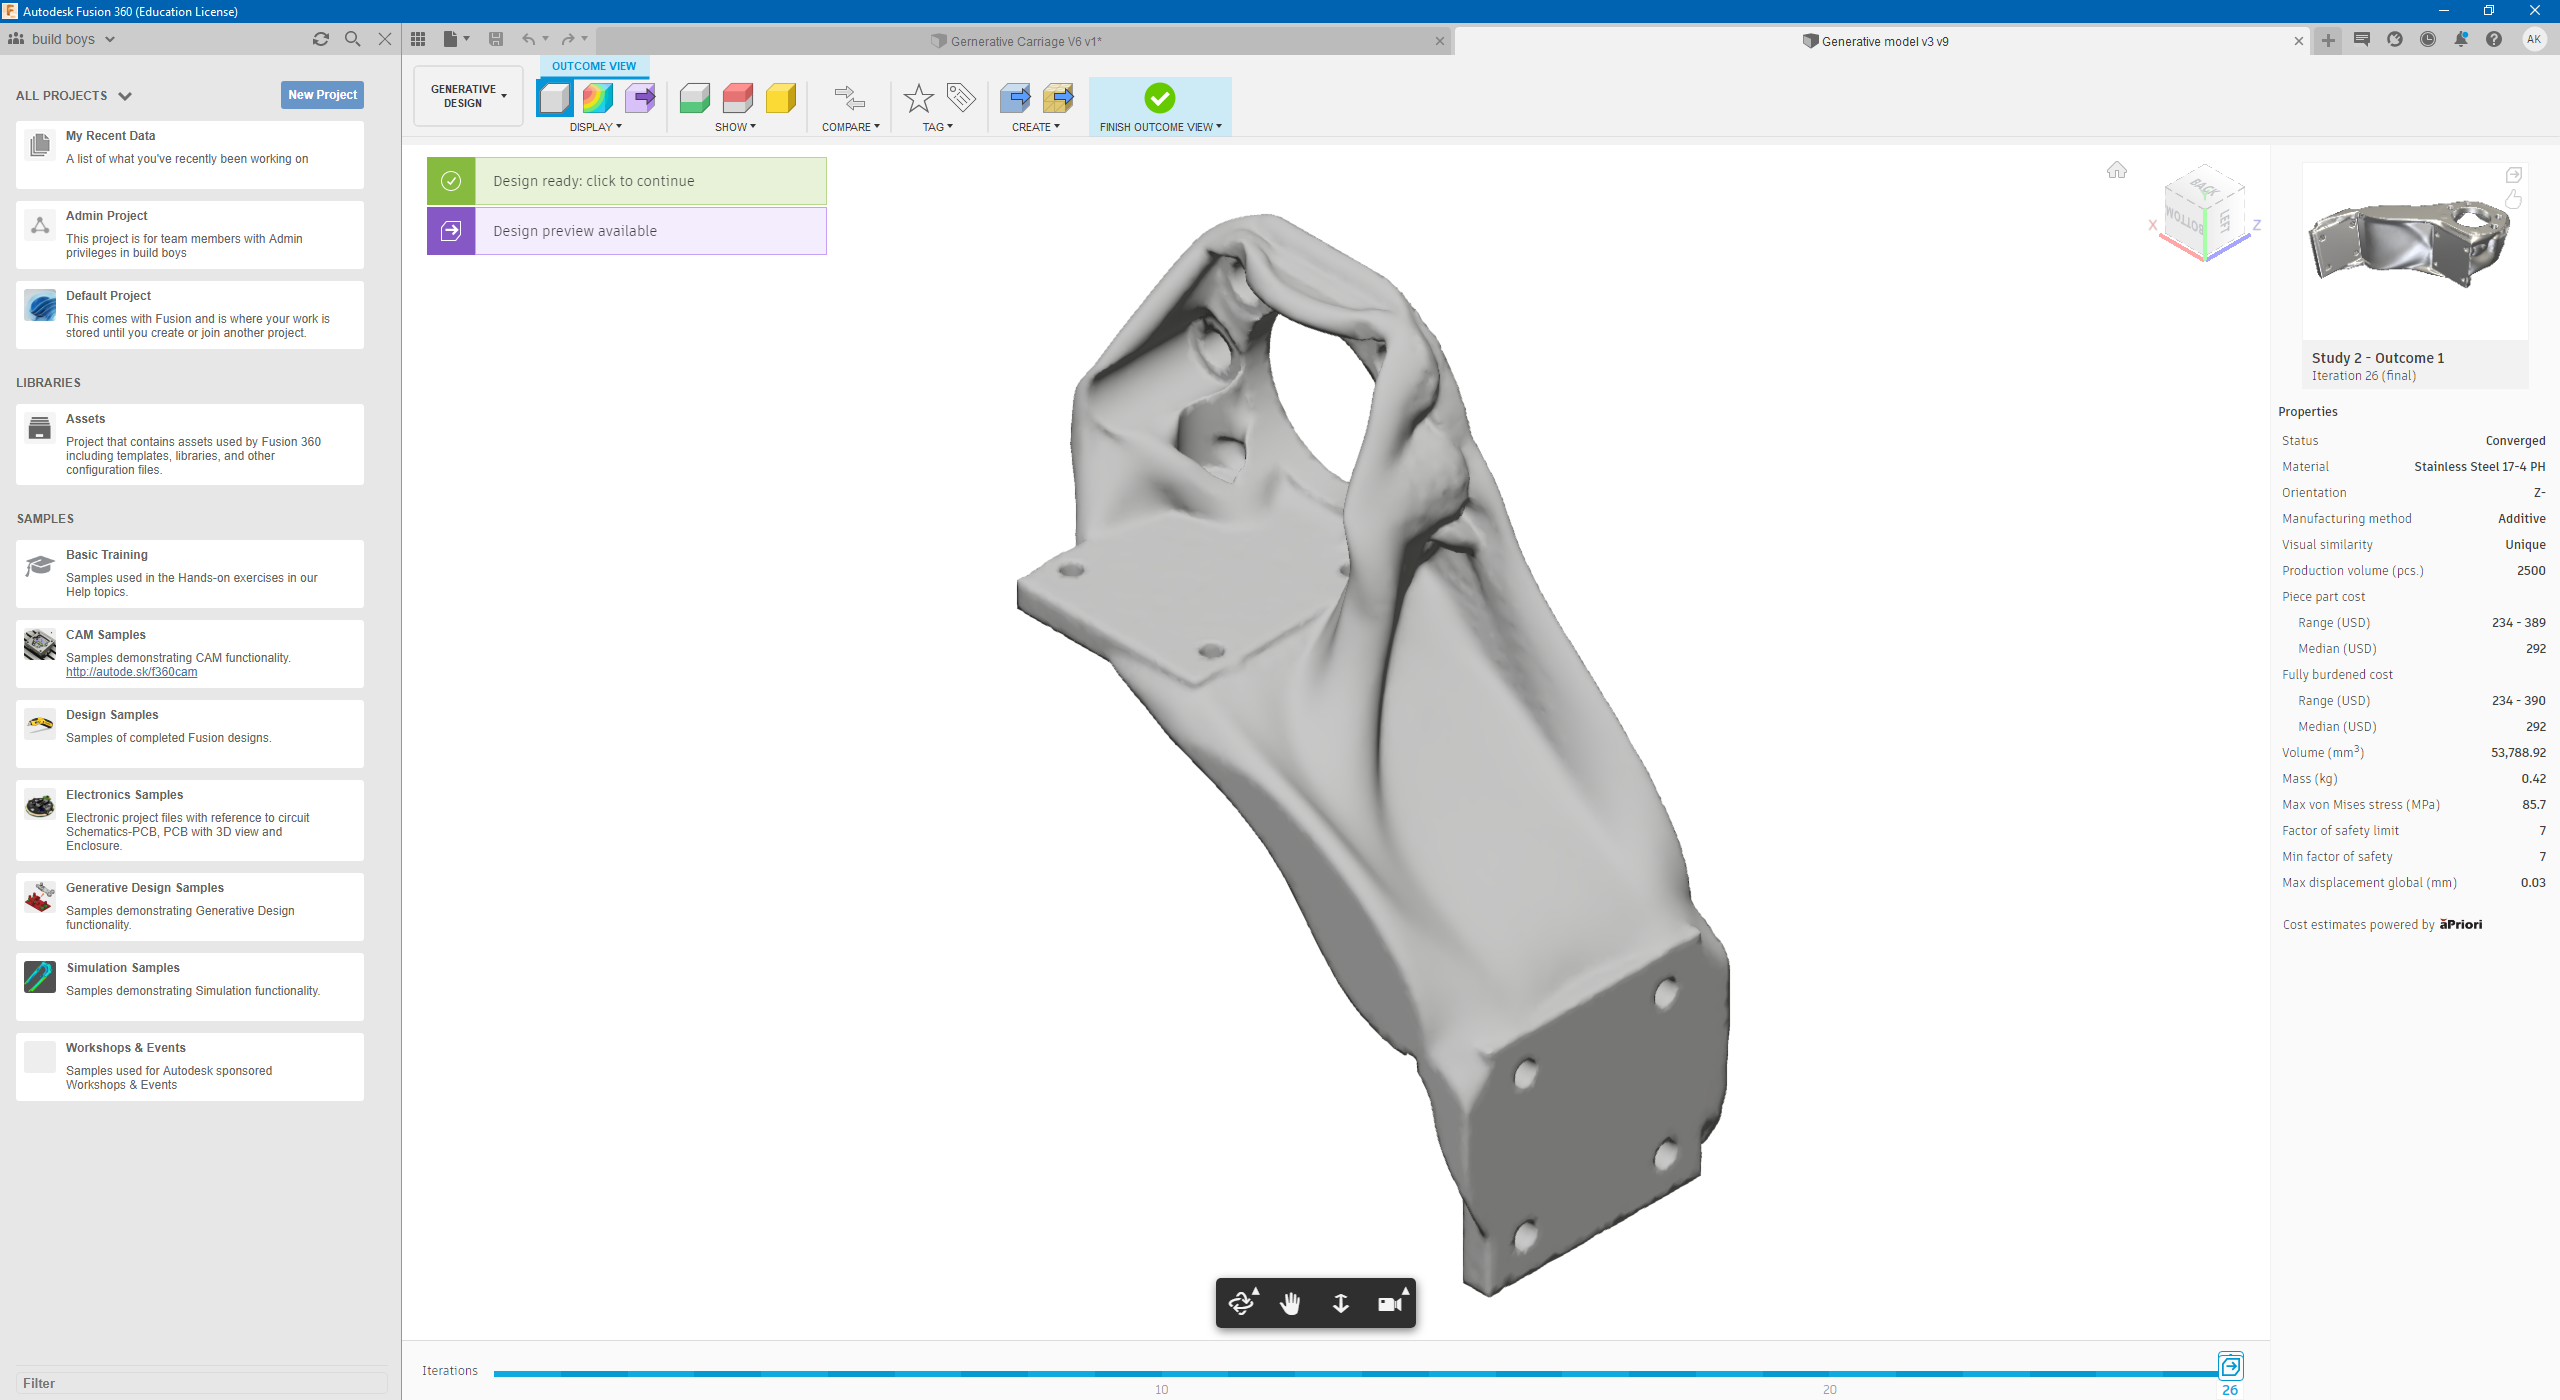
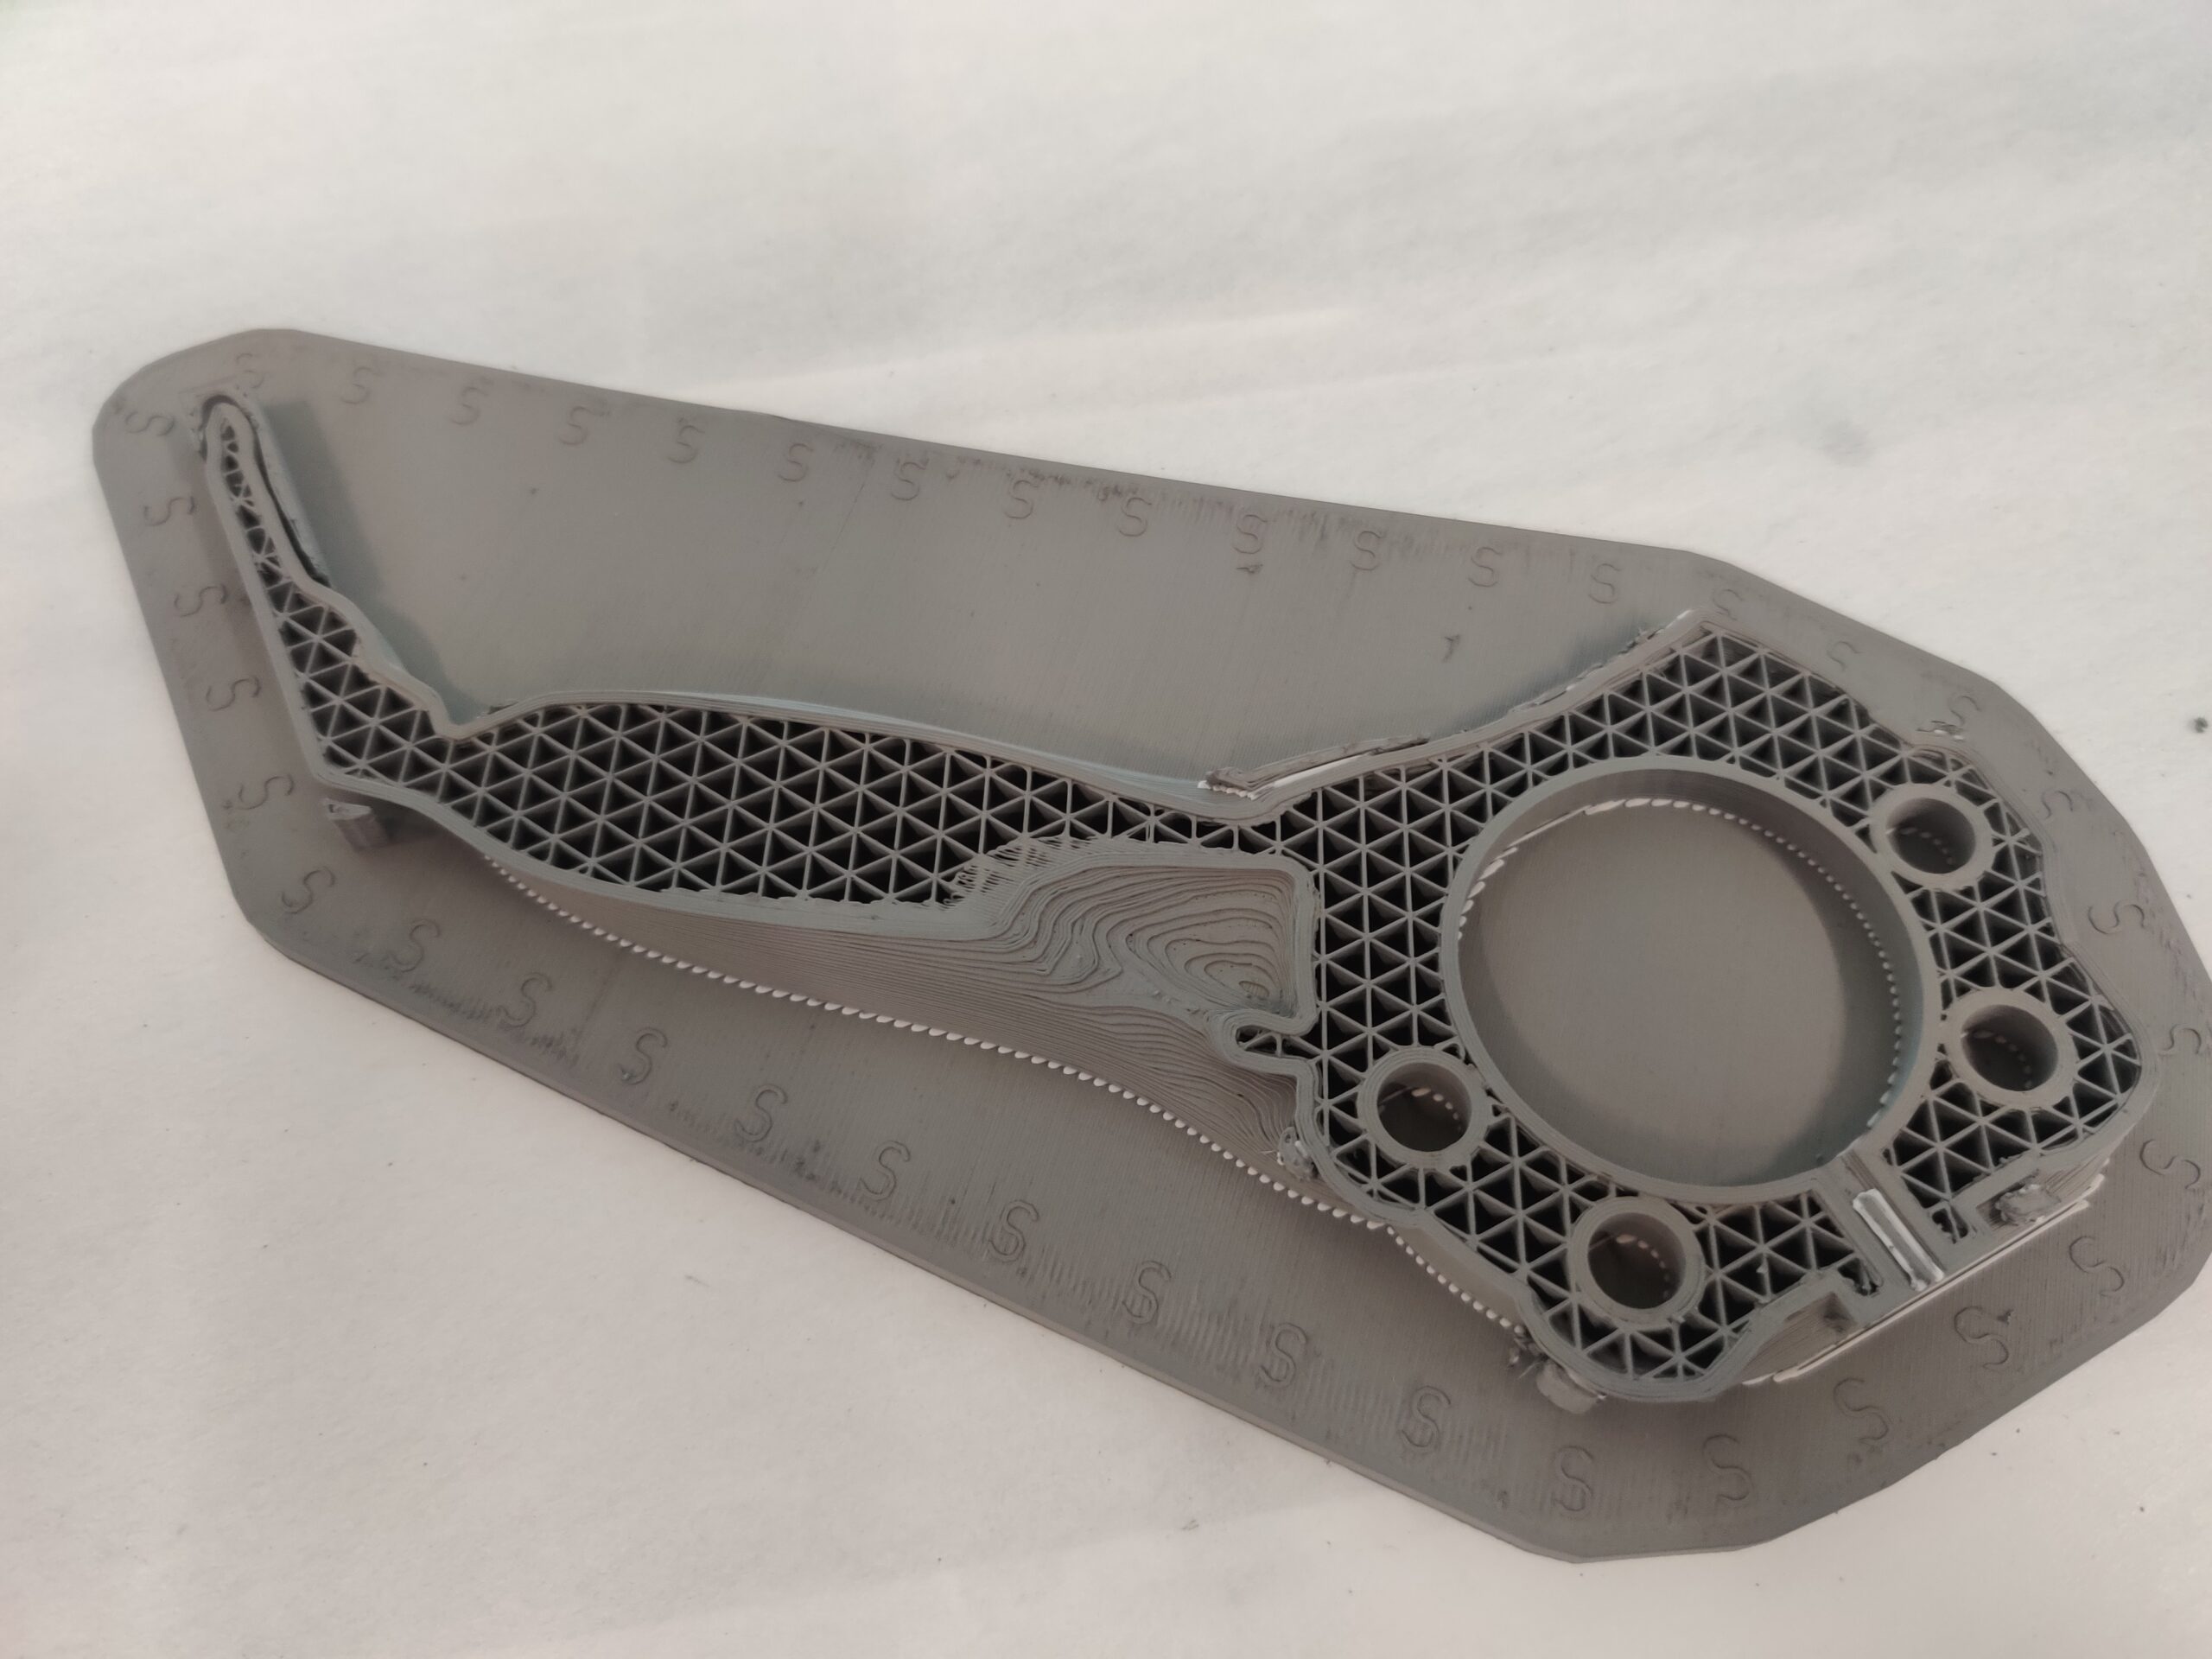
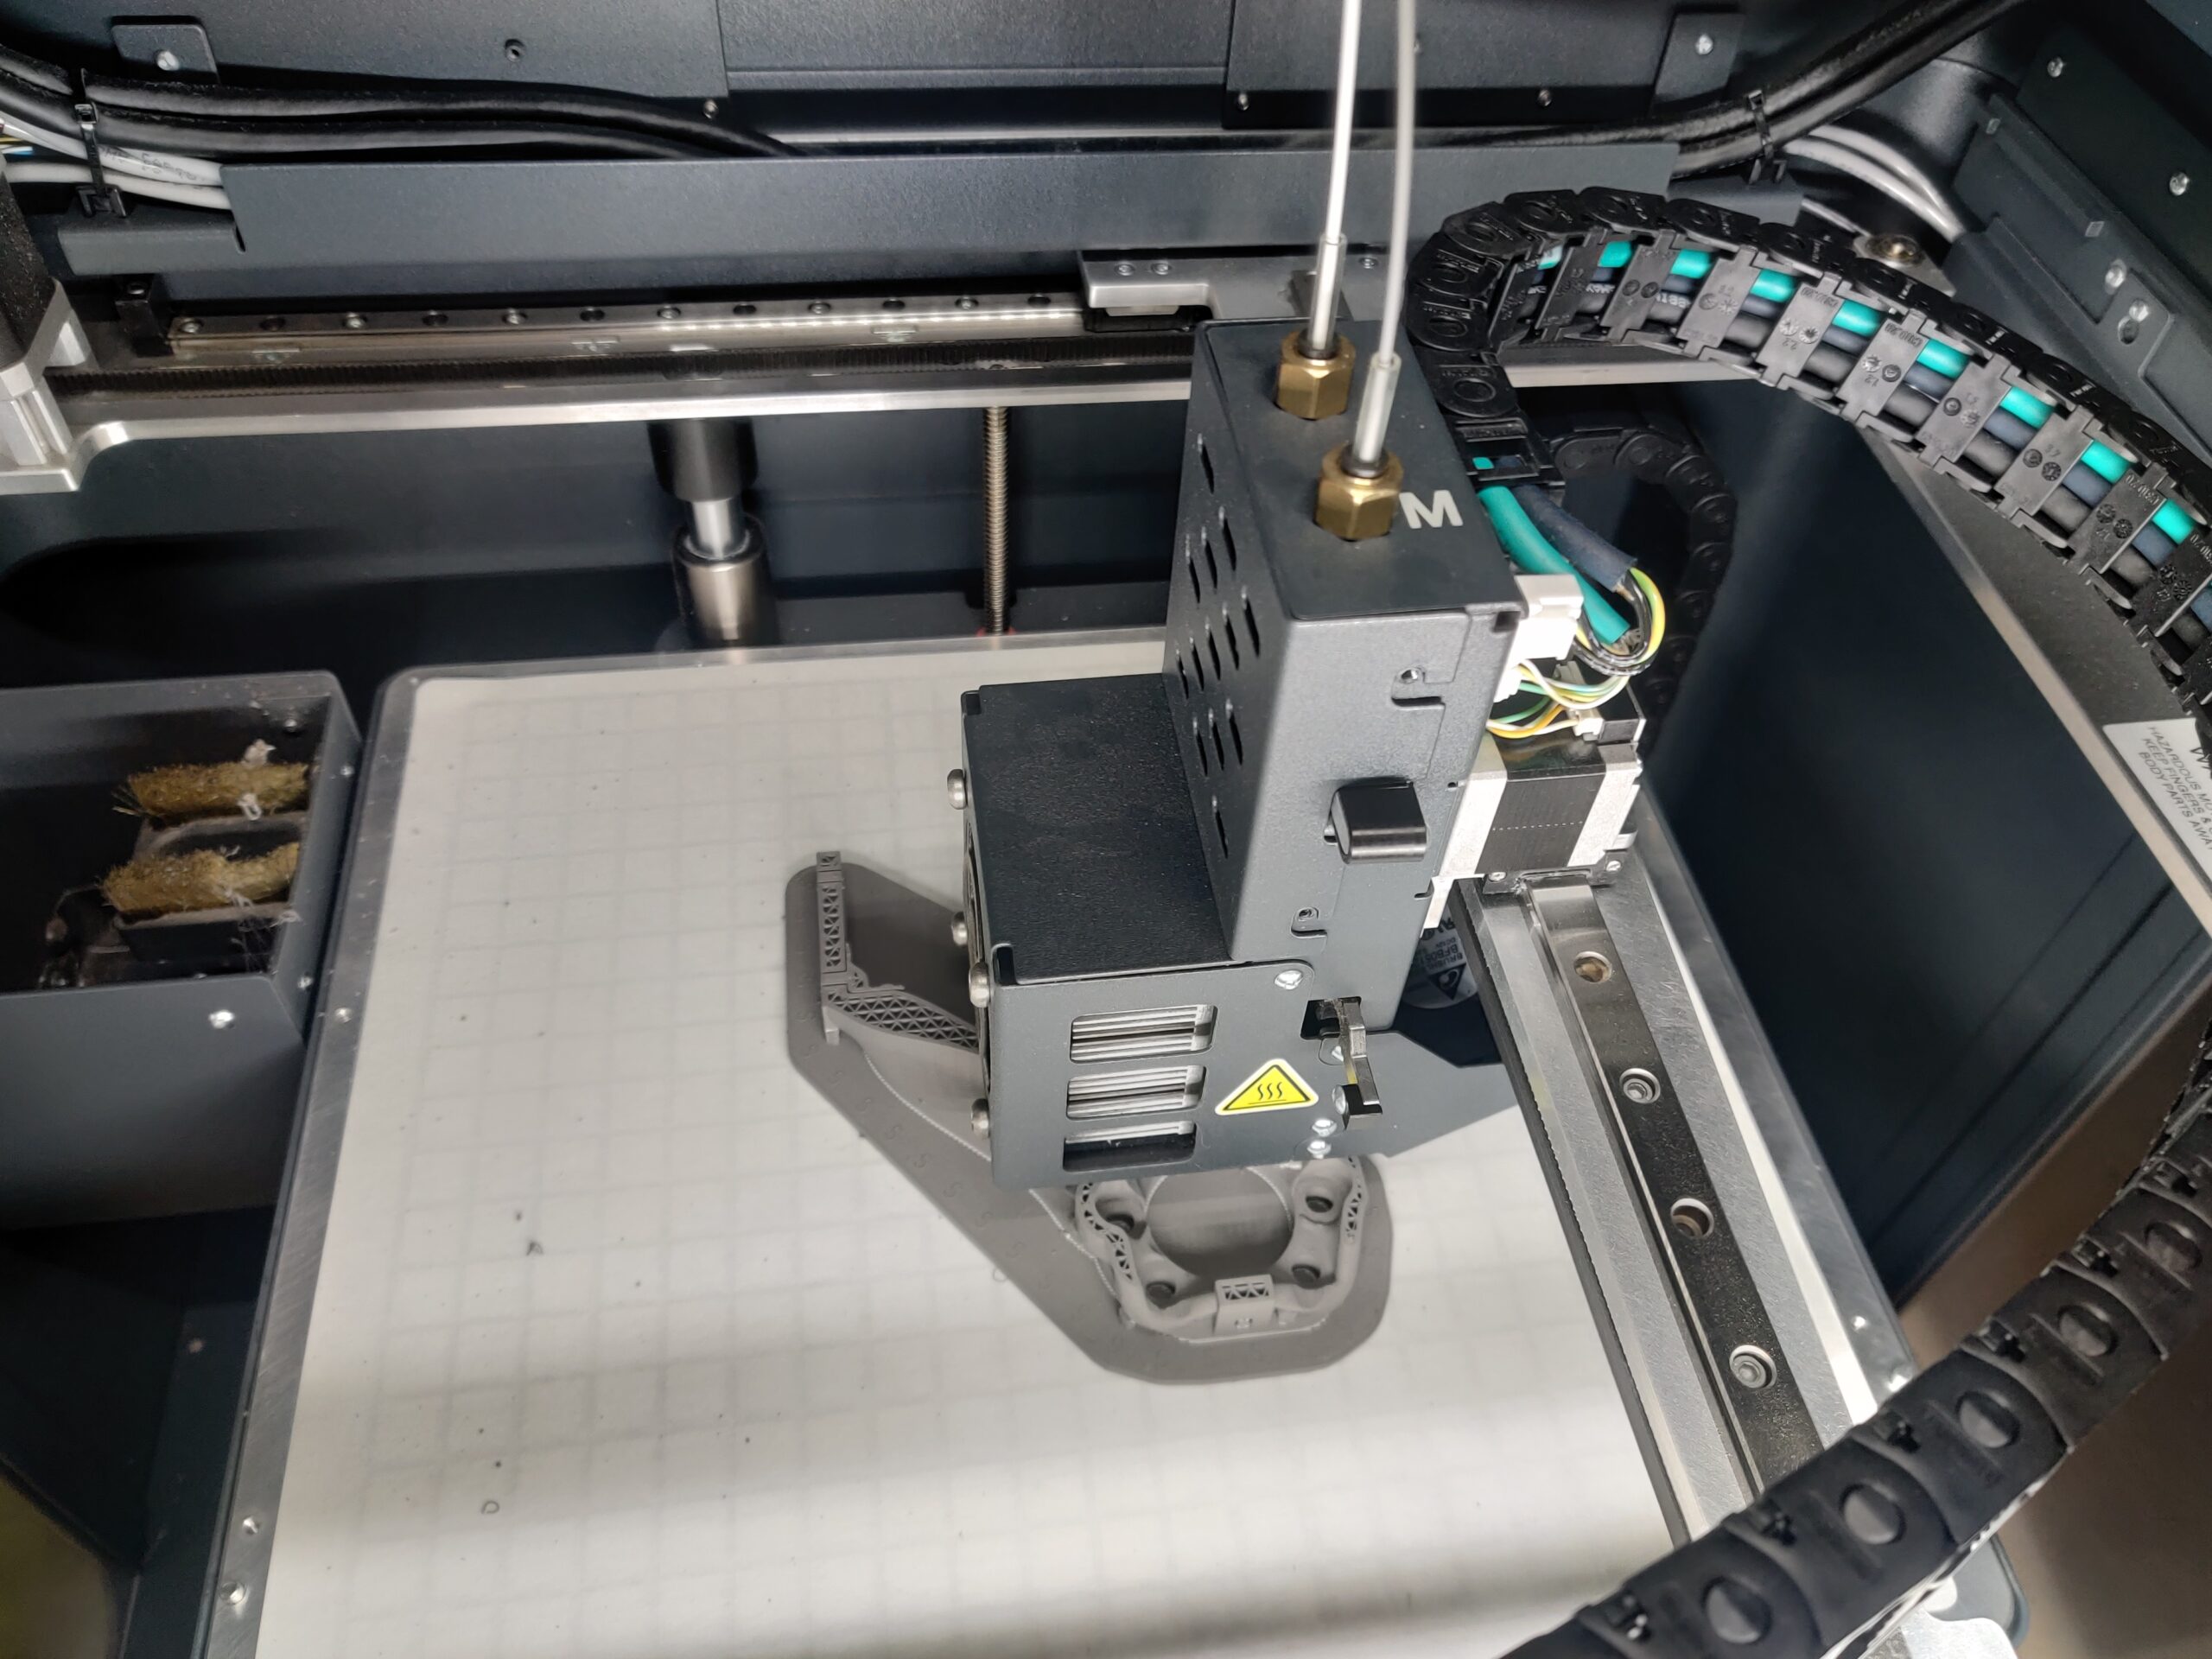
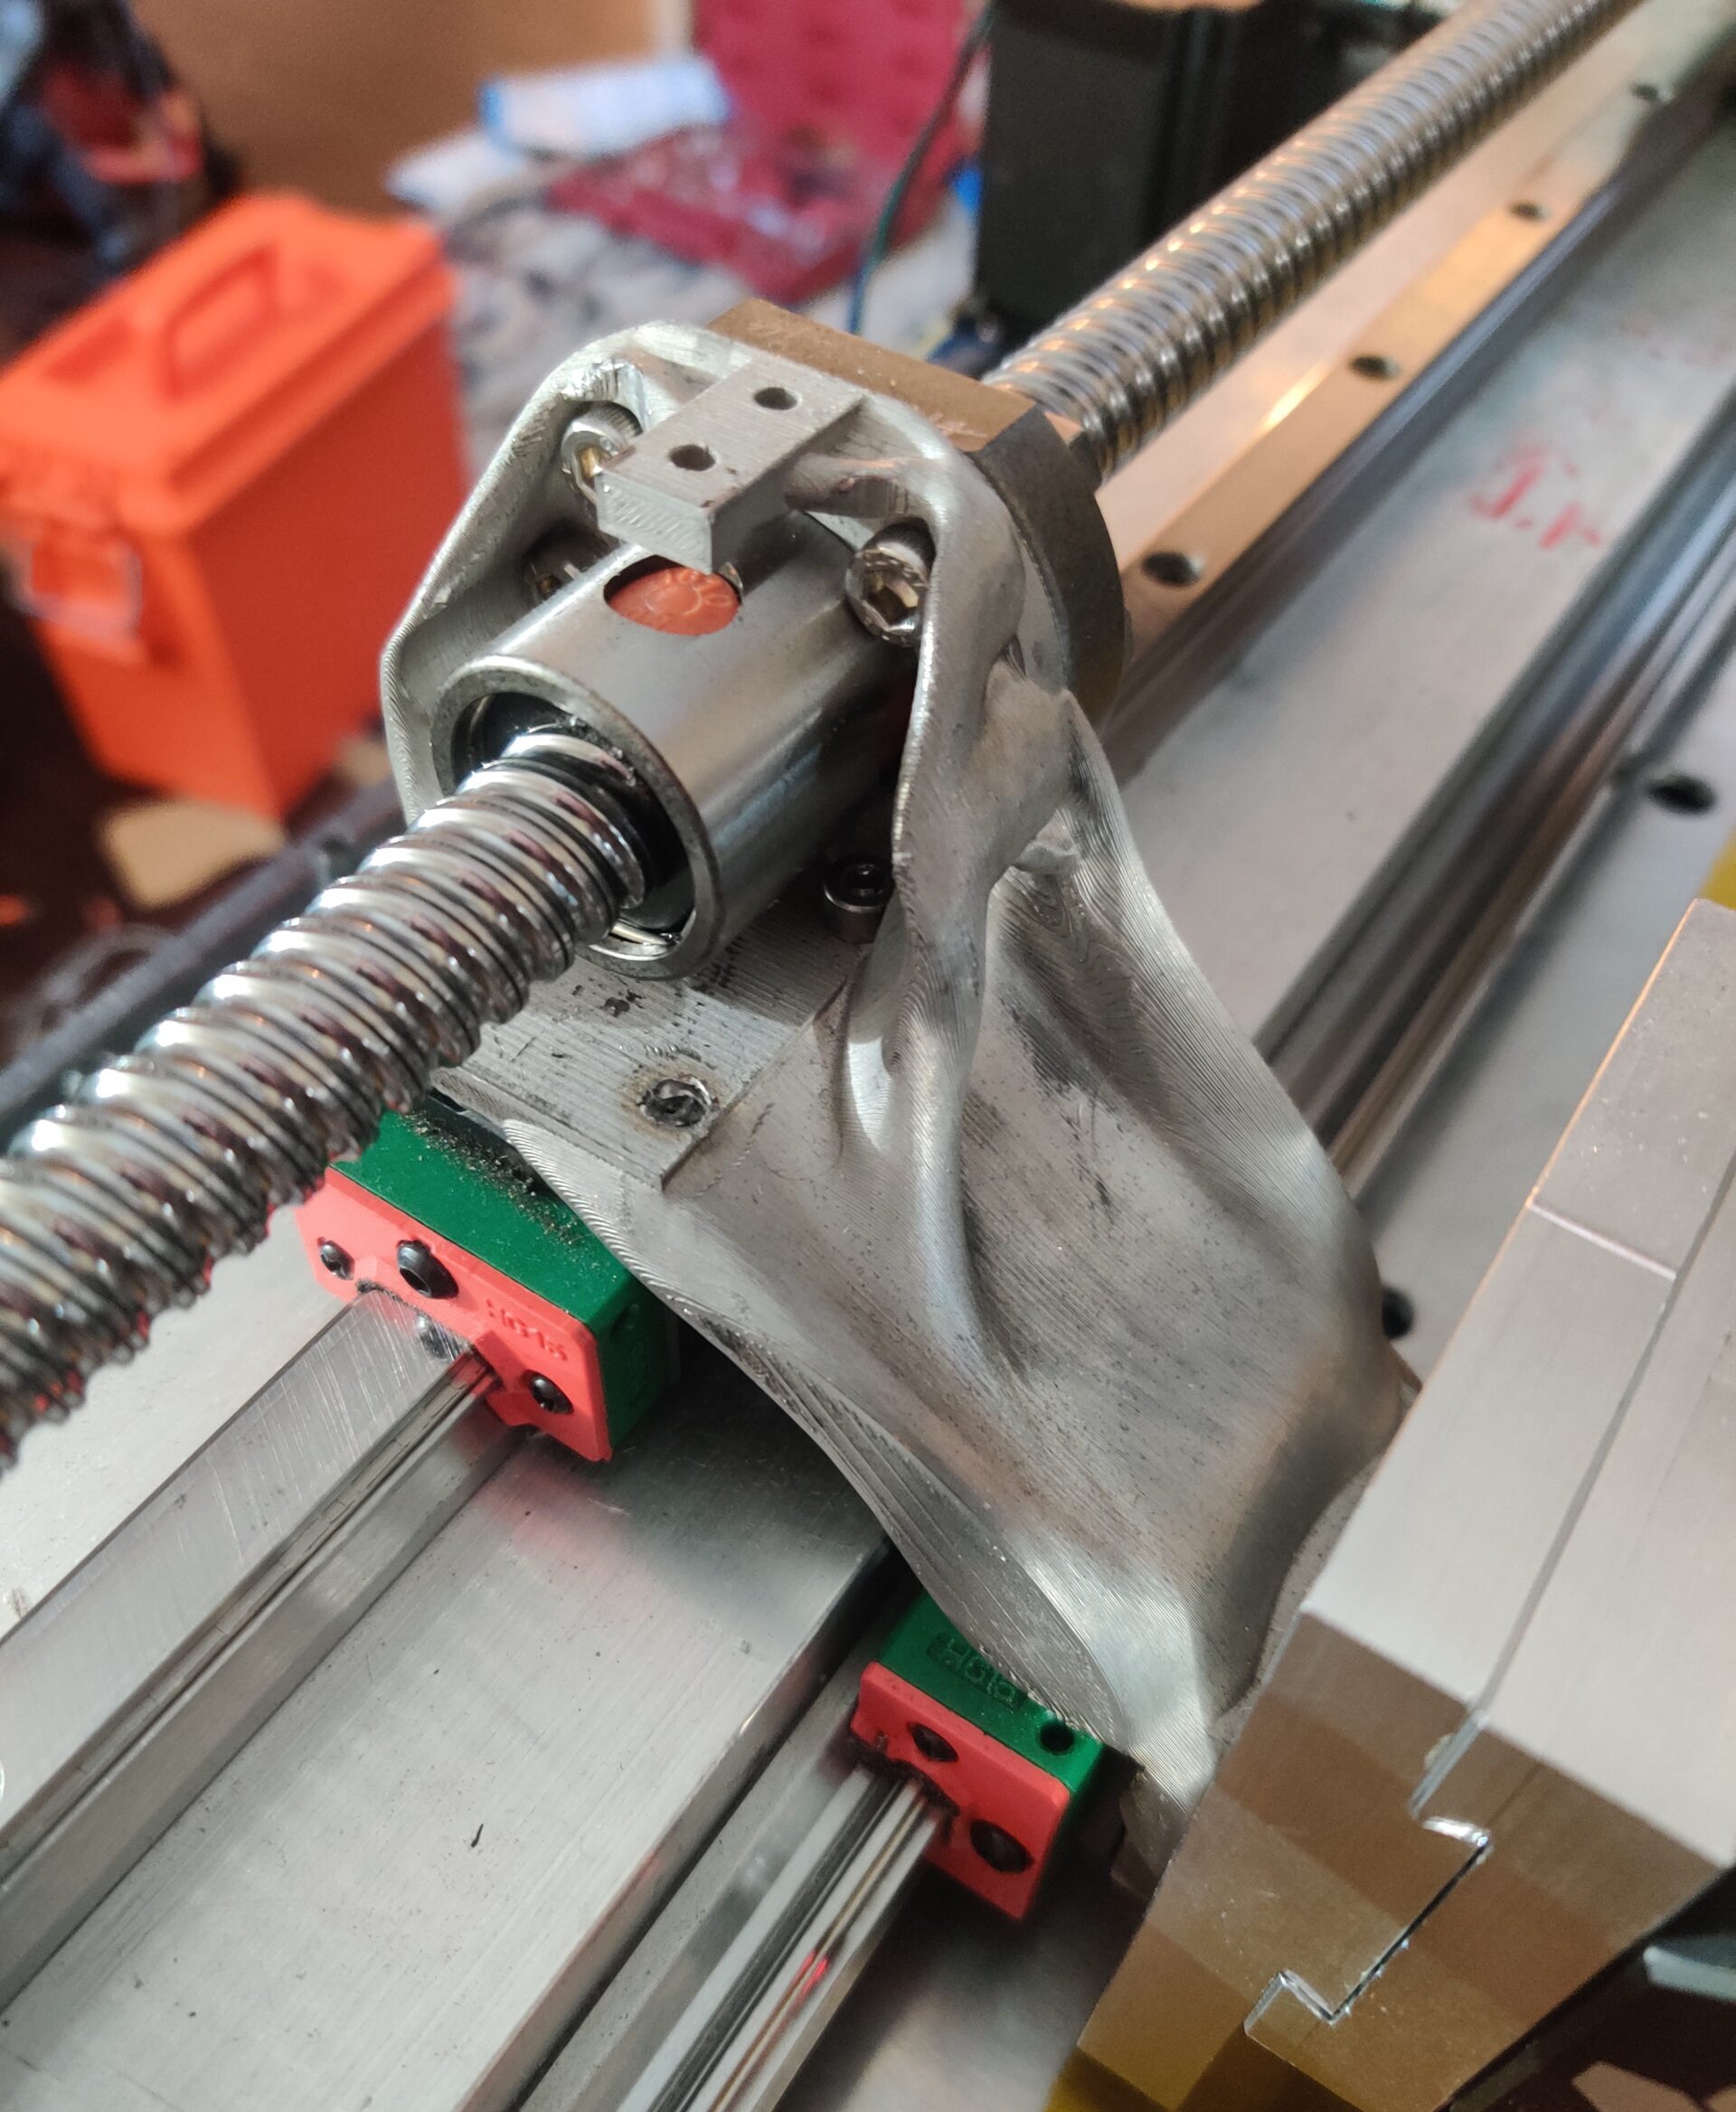
Generative Design is a new trend in Computer Aided Design where simulated loads are put on a structure and the computer determines the most optimized design for the stresses put on the part. In this case, we designed our tool mount to be able to withstand the forces of both a spindle as well as a 3d print head. Our part was Printed with the Markforged Metal X in Stainless Steel. Unfortunately one of our prints failed due to a filament break (Pictured above)
The benefits of generative design are as follows:
- Optimized parts for load
- Less material used
- Ability to be additively or subtractively manufactured

Design
39 hours -- Including Fusion360 Cloud Computation time

Manufacturing
12 Hours printing on Metal X, 10 Hours Post Processing

Assembly
3 Hours
Milled Steel Frame with Laser Cut Gussets
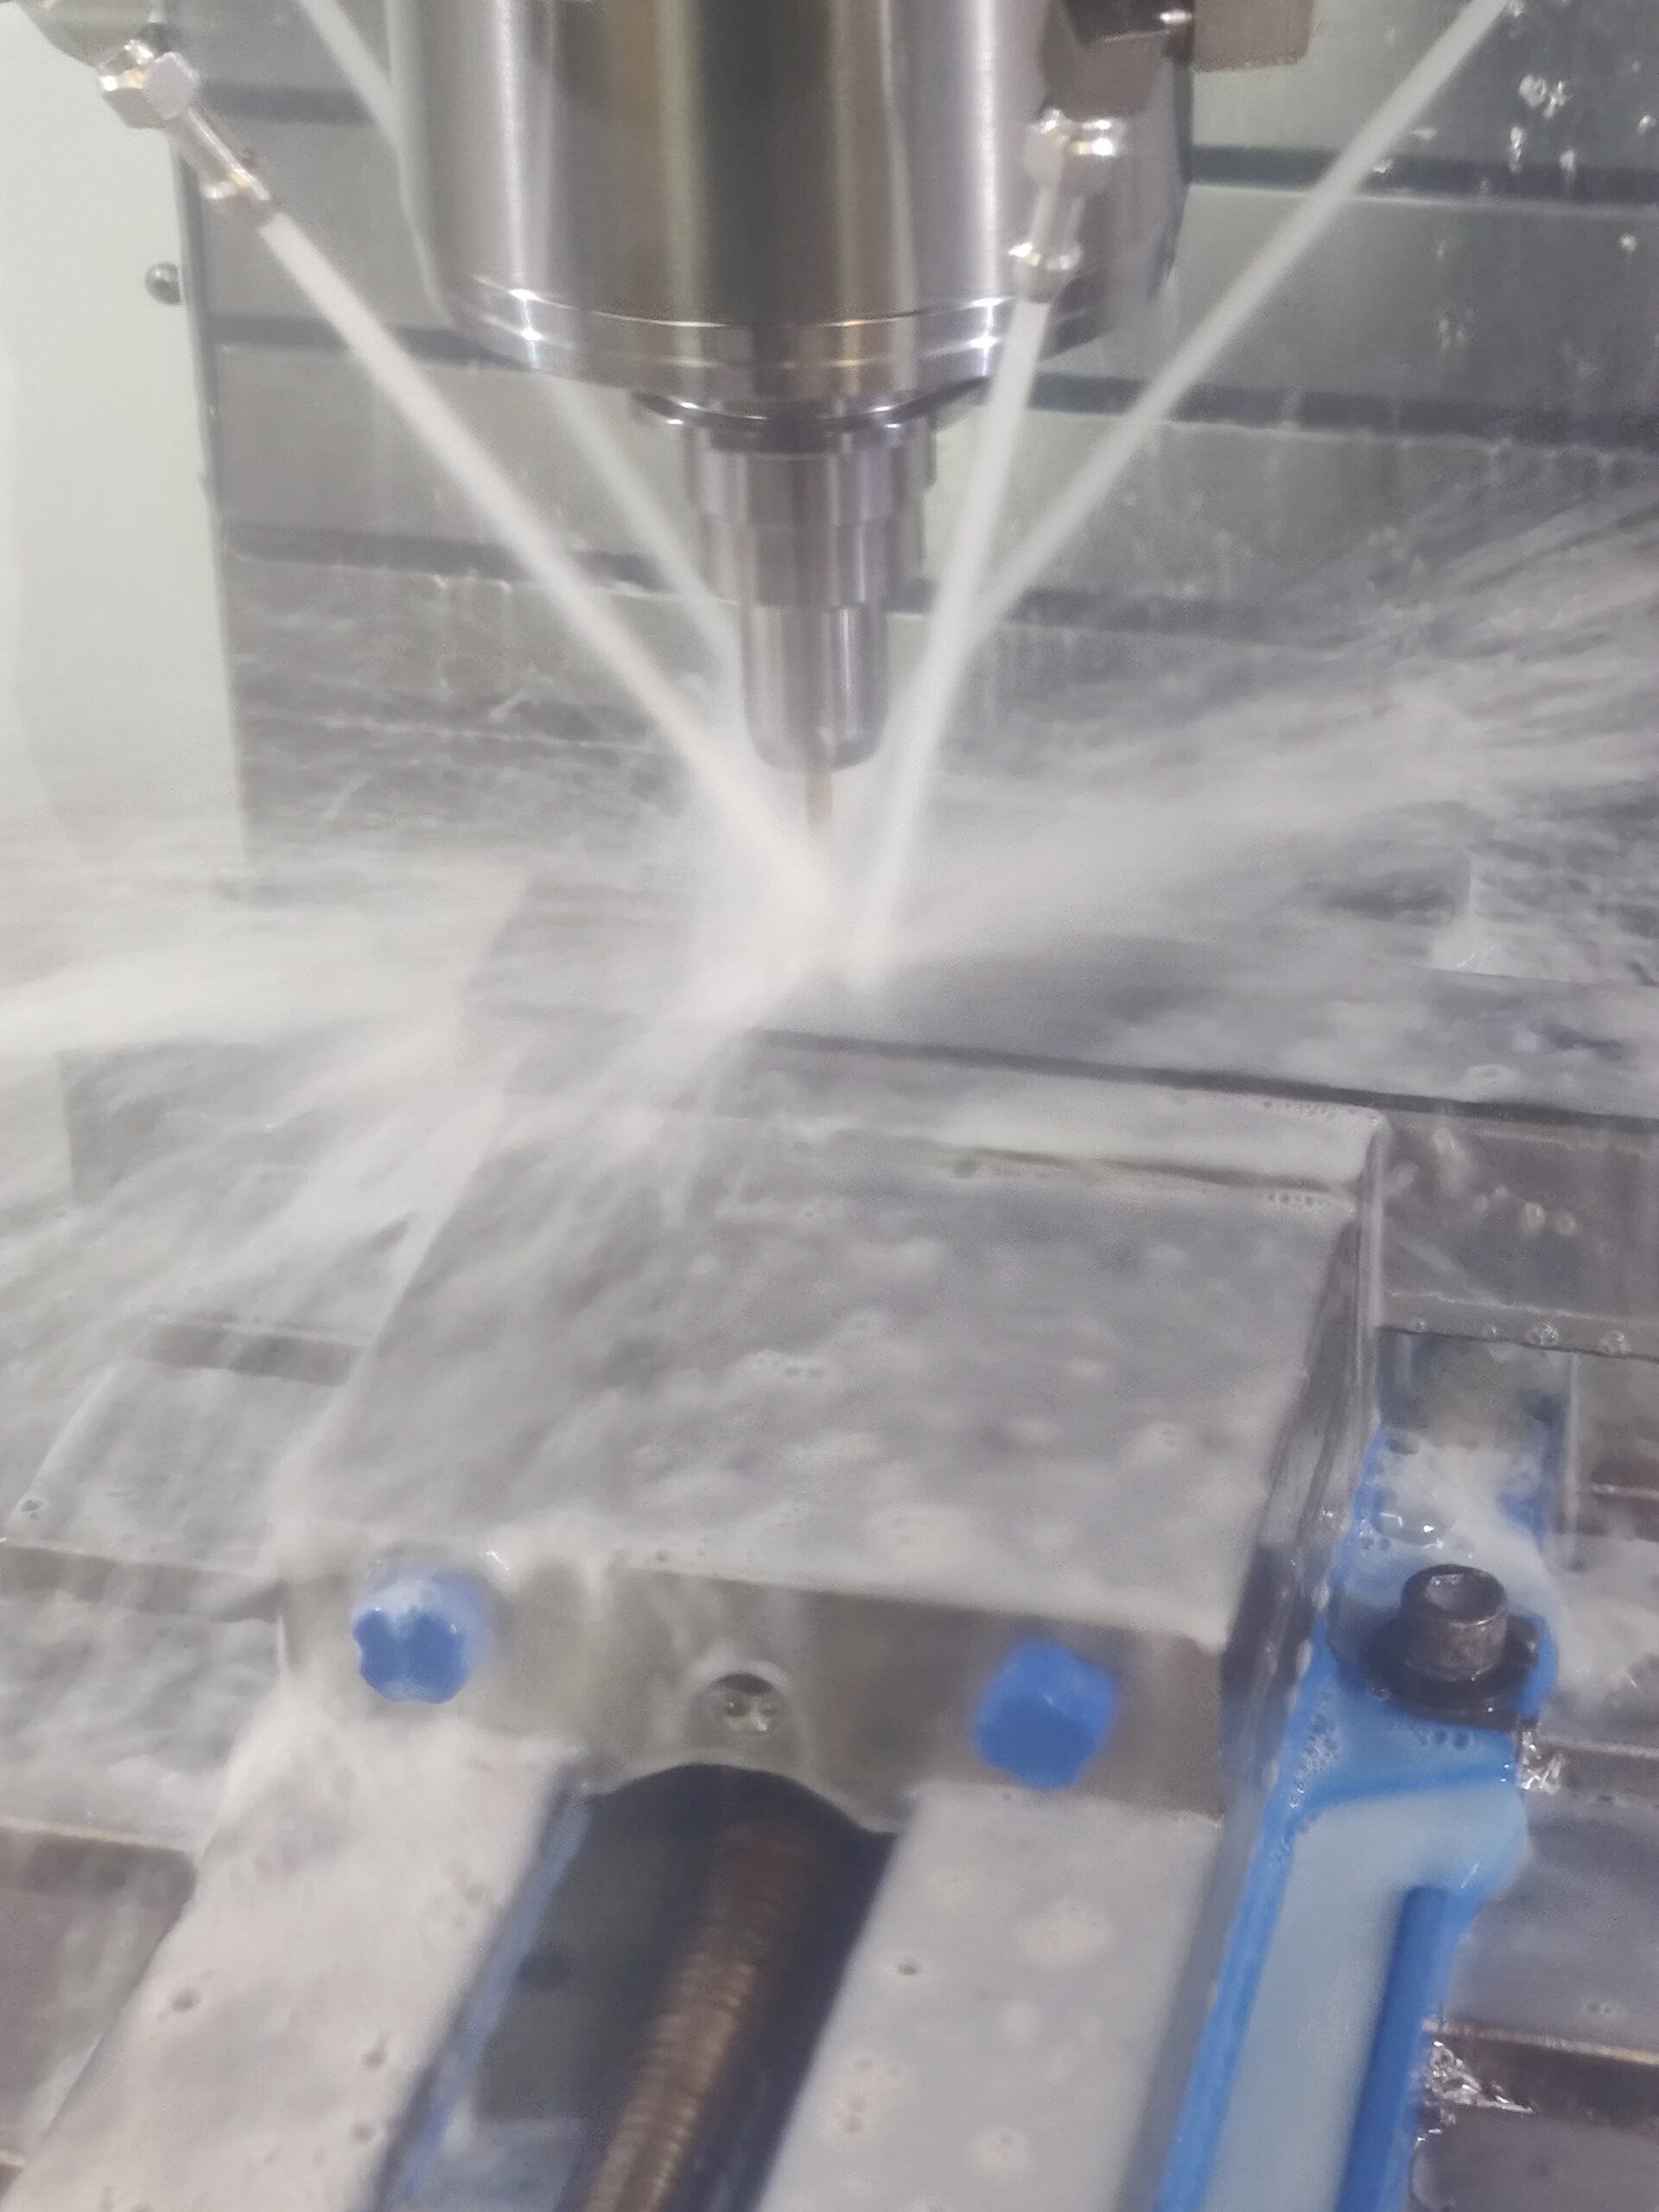
Steel is an incredibly versatile material. Thanks to the generosity of the donors to the Bechtel Center, we were able to utilize community steel stock to make the frame of our printer. Due to us wanting a precise platform, we needed to take the irregularities out of the cold rolled steel tube stock that was available. Therefore we face milled each side, as well as tapped, drilled, and bored all of the features we needed into the individual pieces. Since our goal was to use the frame we have built to support a mill head, the steel here added for incredible rigidity to mill harder materials.
We were also able to use the Fablight Metal Laser Cutter to manufacture the gusset plates needed for the design. This was cut from 1/4 in sheet stock.
Design
Frame: 50 hours CAD
Manufacturing
25 hours - CAM 5 hours, Milling 20 Hours
Assembly
5 Hours Painting / Assembling / Squaring
Custom Couplers

The parts shown above were all manufactured on the ST-20 Lathe utilizing Active tooling. These parts are the couplings that lead from the stepper motors to the ball screws. Making these on the lathe allowed us to work with an unfamiliar CAM and manufacturing style. These parts are stainless steel.
Design
5 Hours
Manufacturing
10 Hours - 2 Hours CAM, 7 Hours Manufacturing
Assembly
2 Hours
Custom Dovetail Tool Changer
Our custom aluminum tool changer design uses magnetism and gravity to keep the tools aligned properly. The dovetail slots are cut to allow the female piece to grasp onto the male bracket and lock in place using magnets. Due to the steppers having more than enough torque to break out of the magnetic force and pick up the next tool. These parts were milled on the 4 axis mill.
Design
10 hours
Manufacturing
7 hours
Assembly
6 Hours
Sponsors